Follow us on X. We're posting regular updates about everything GTA VI!
@iGrandTheftAutoSnapshot Locations Map & Guide
In previous GTA games, players collected Hidden Packages to unlock money and weapons. GTA San Andreas is significantly larger than its predecessors and introduces a plethora of new collectible types.
There are 250 collectible items altogether and 50 of them are completed by taking photos of floating 'snapshot' icons around San Fierro.
You'll need to equip the camera (a weapon found in CJ's bedroom and various places around the map) to take photos.
The snapshot icons can only be seen when you're looking down the lens of the camera.
I strongly recommend you work through the snapshots in numerical order and don't skip ahead so that you can check them off as you go. It's very time consuming go through every location again to find one you've missed.
Snapshot Locations Map
Click on a number to display a pop-up showing a screenshot of the location.
If you'd prefer to view the map on a separate page, click the thumbnail below.
Snapshot Locations Guide
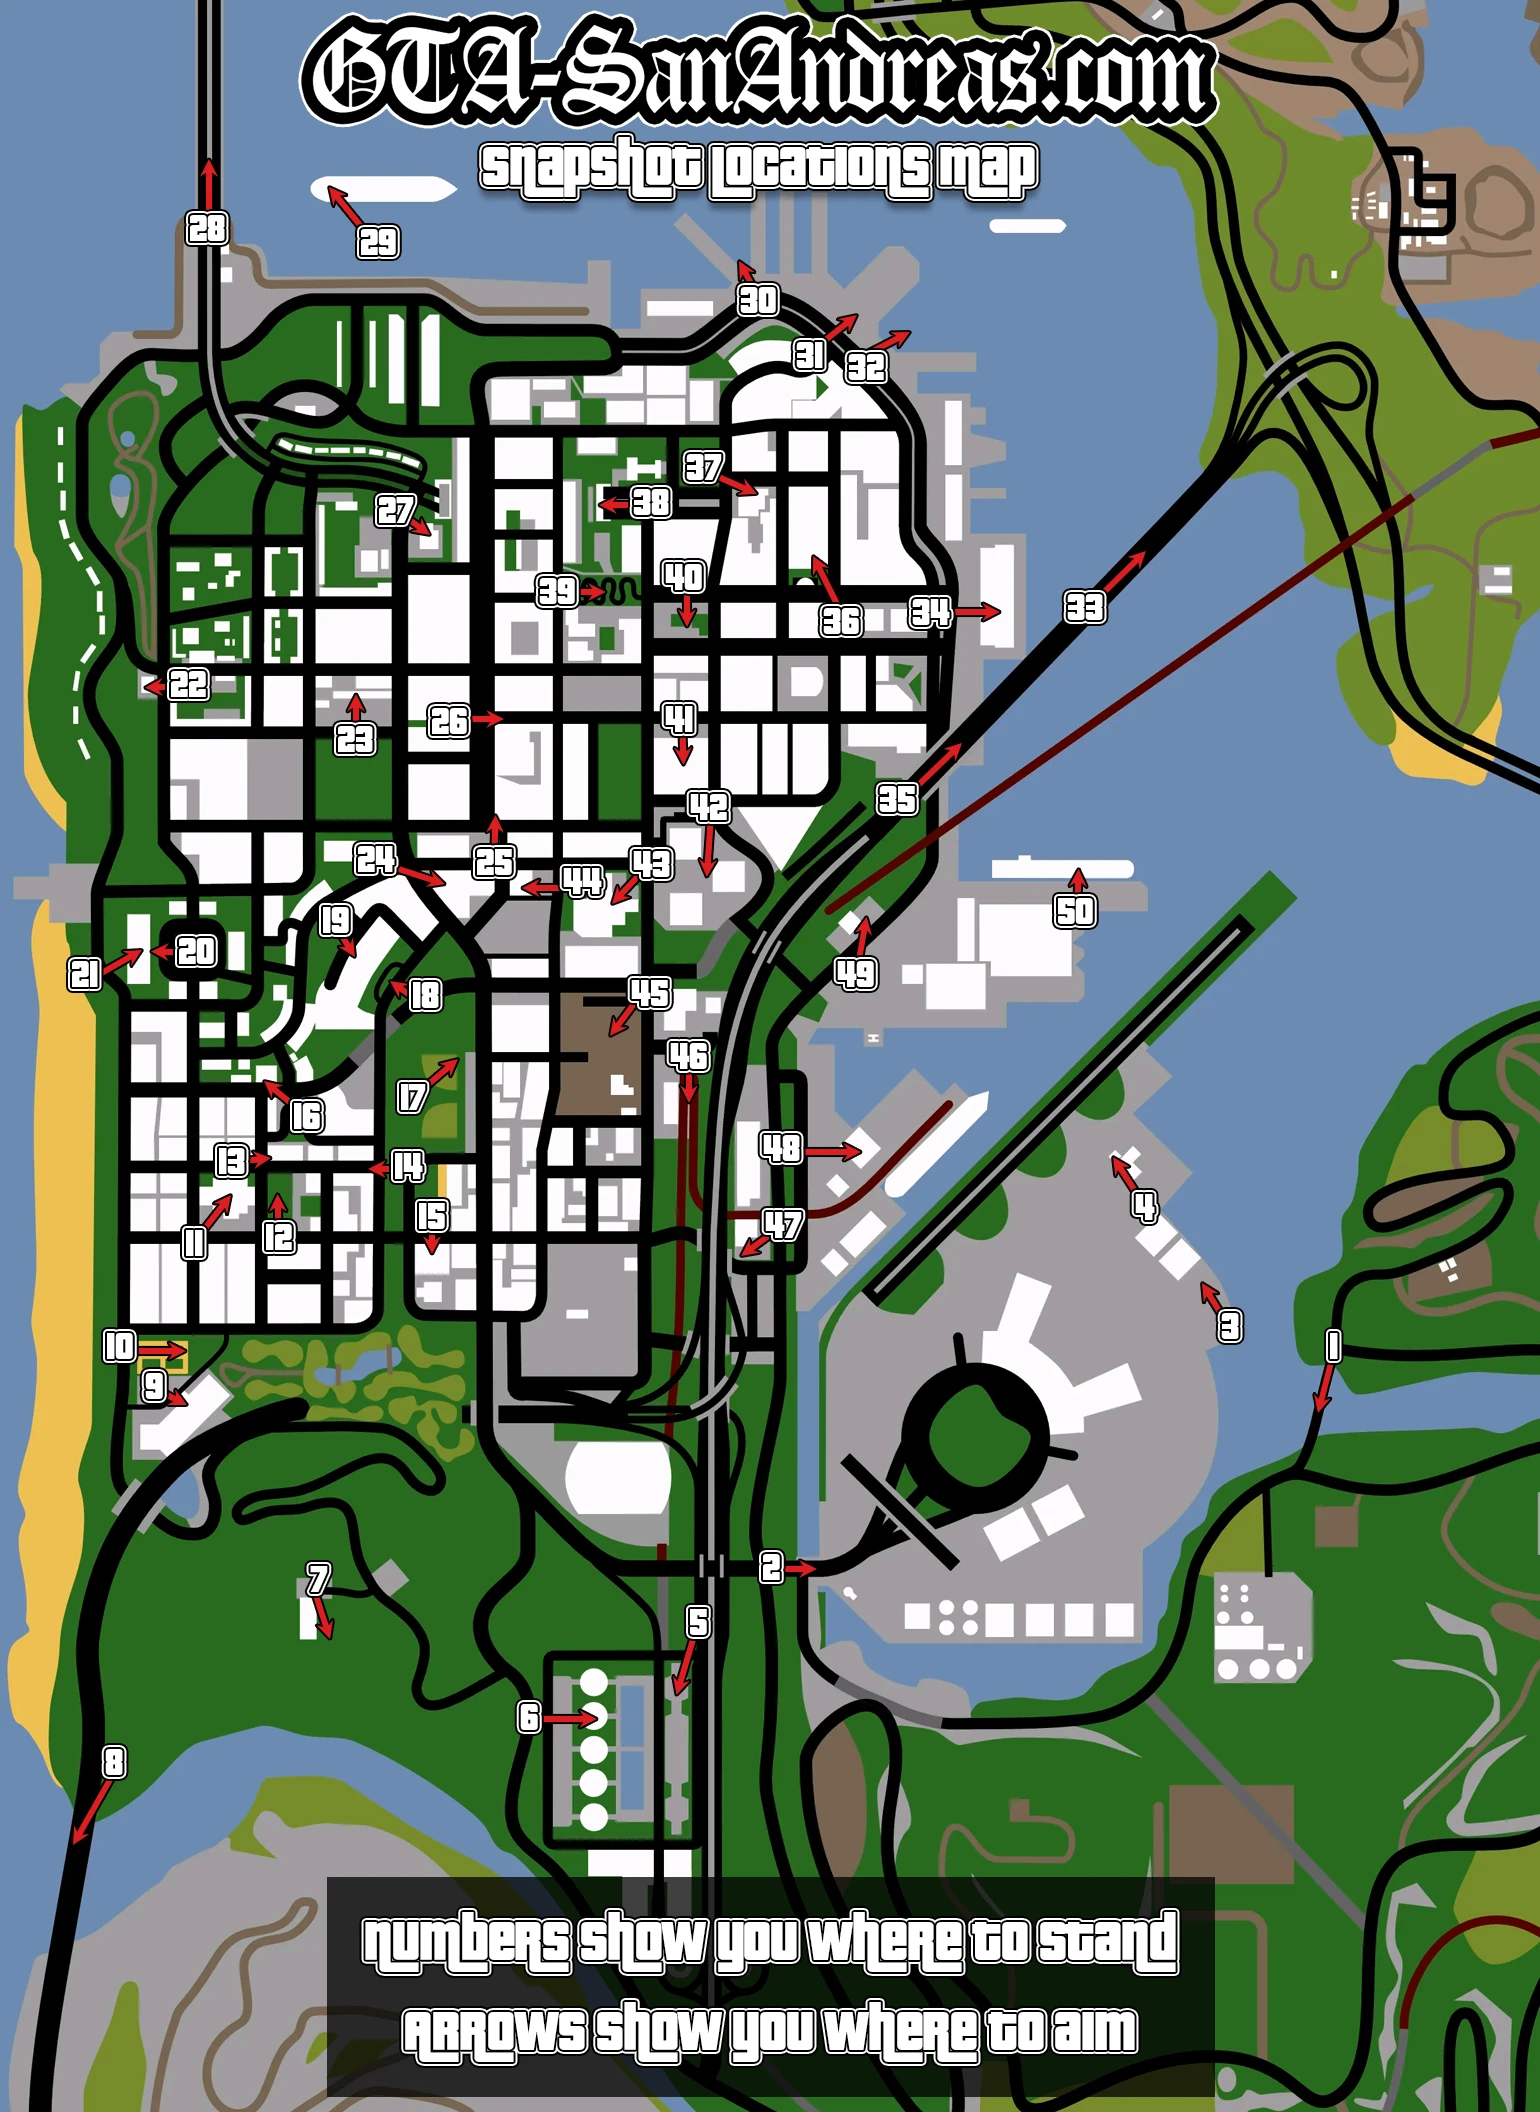
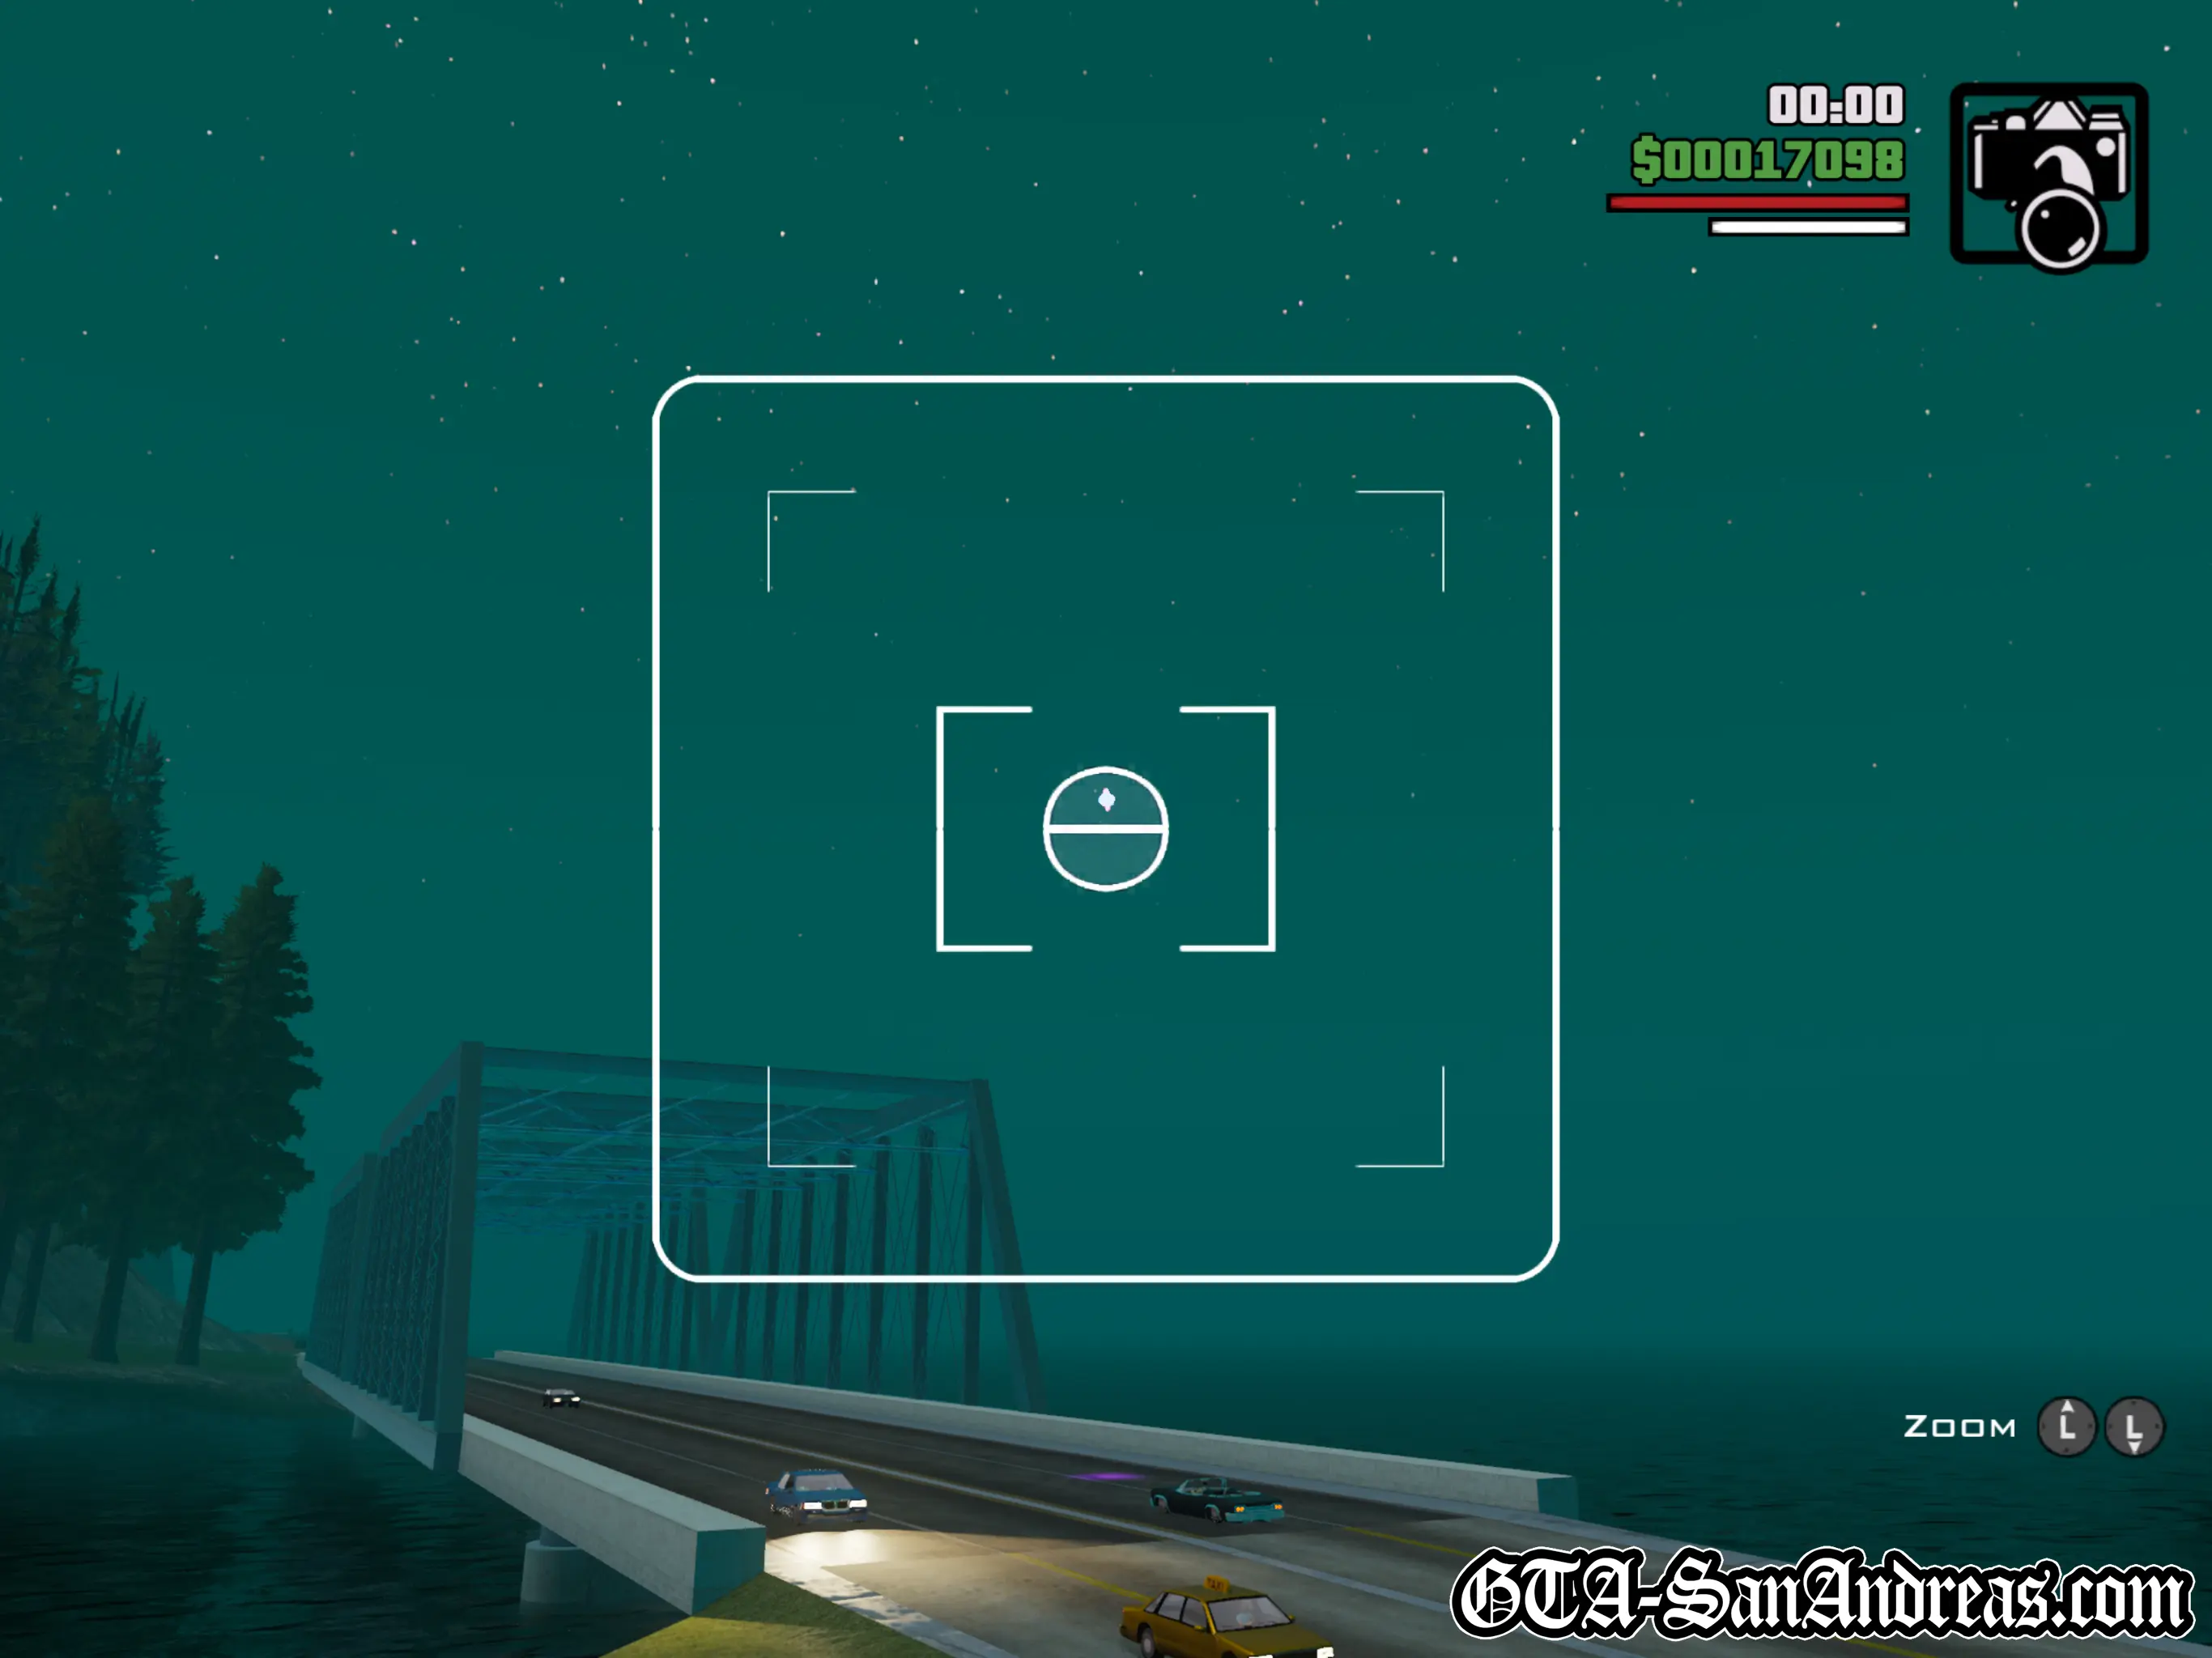
Snapshot #1
Location
Red County - Hovering above the bridge near the airport which leads between a large industrial complex with red and white chimneys and the country roads of Red County.
Where To Stand
Stand anywhere on the bridge and you should be able to snap this one.
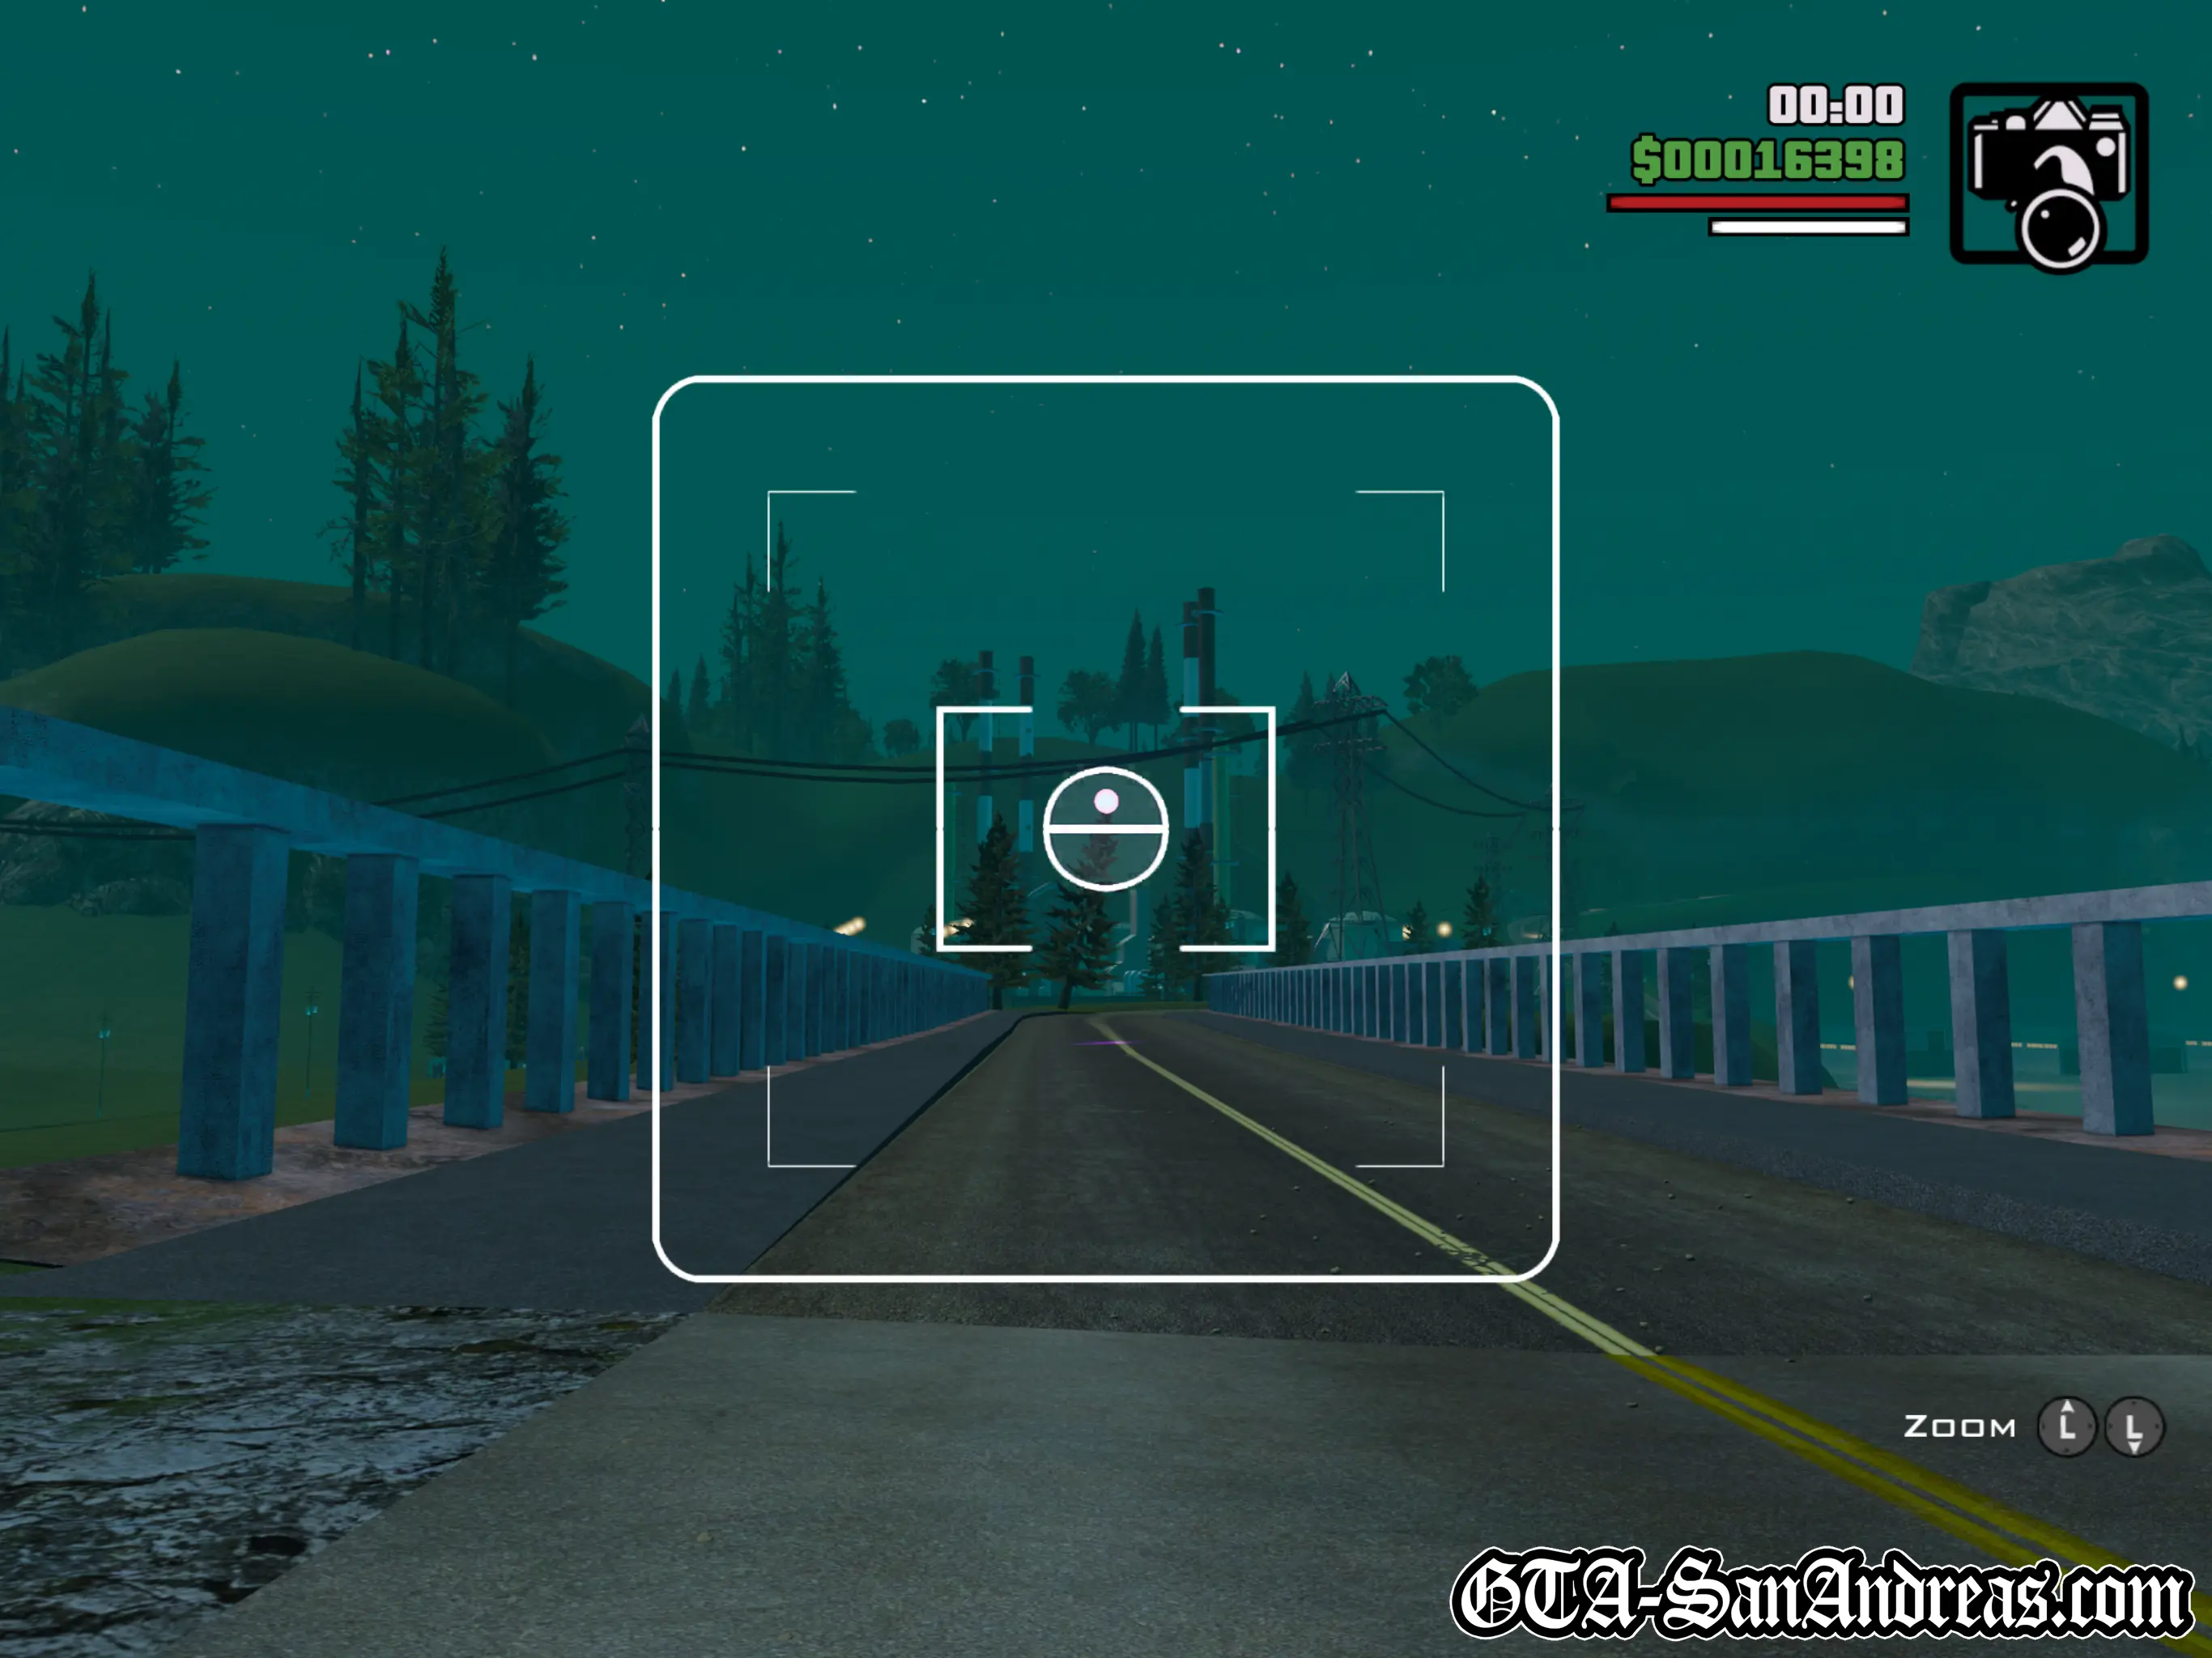
Snapshot #2
Location
Easter Bay Airport - In front of the airport entrance is a large sign with a 3D plane flying through it. The snapshot icon is hovering under the bridge, in the centre of the sign.
Where To Stand
Stand on the road or sidewalk anywhere in front of the sign.
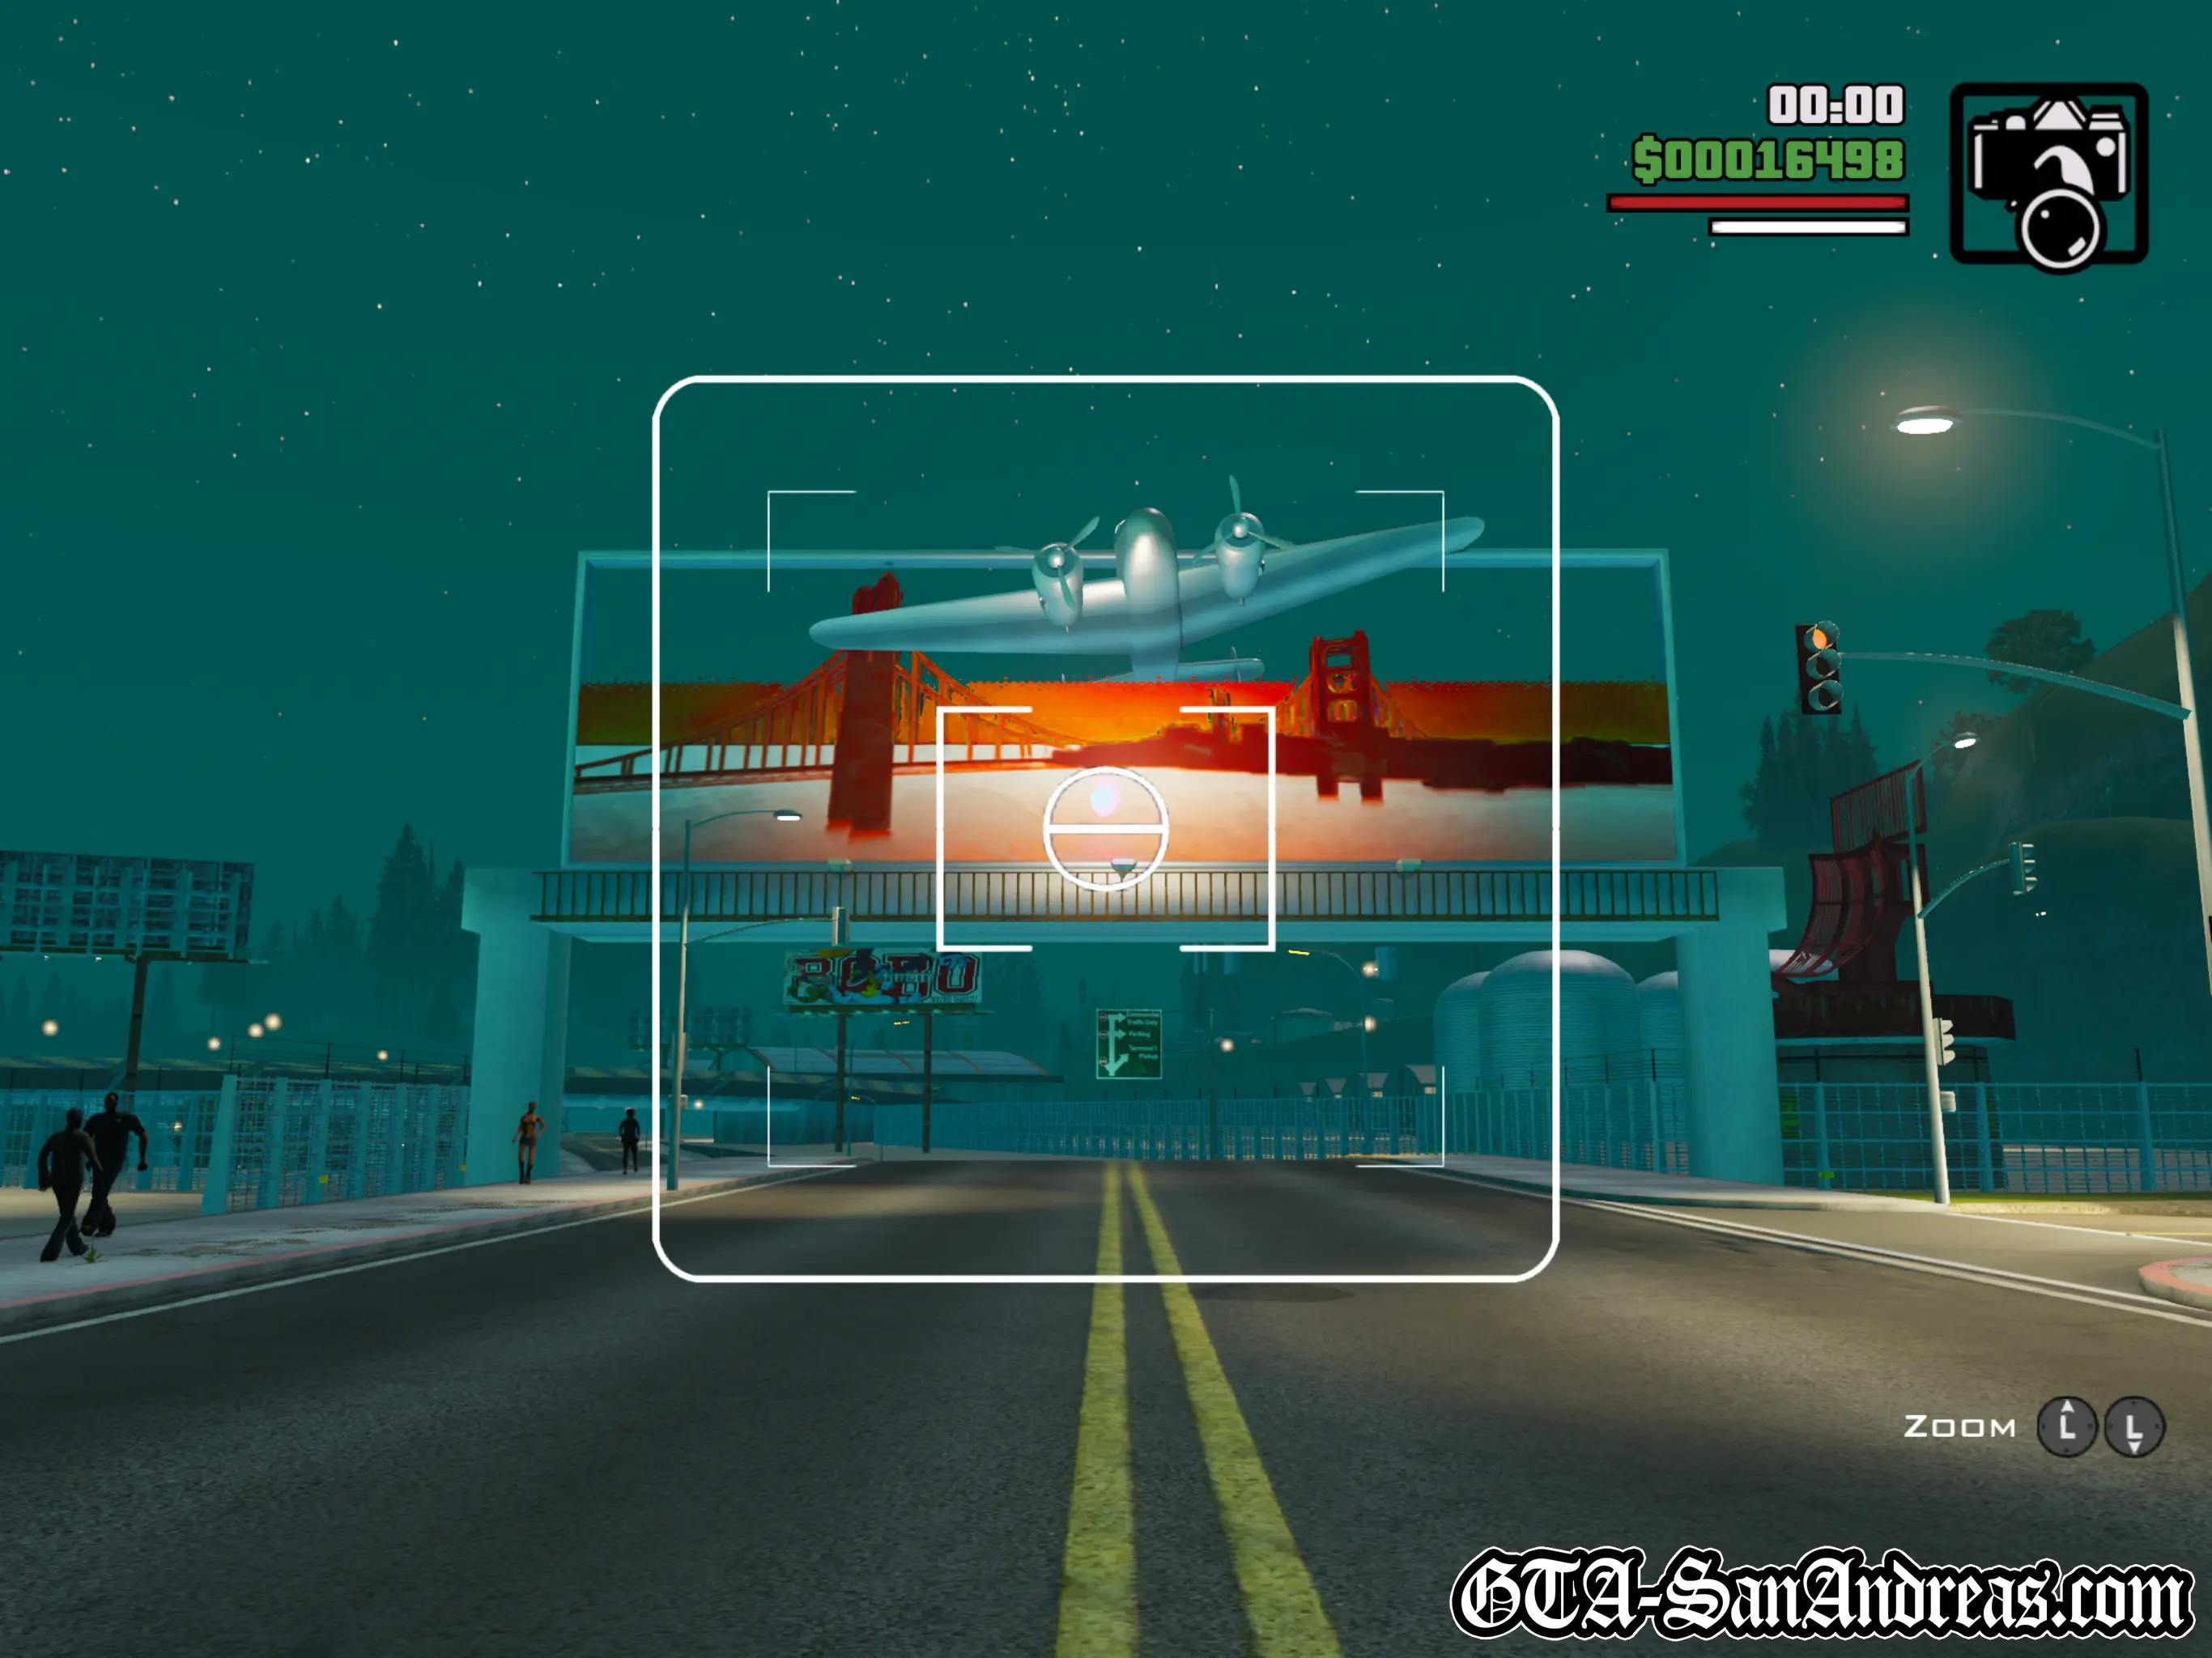
Snapshot #3
Location
Easter Bay Airport - Inside the airport, there are three large metal pill-shaped containers near the water. The snapshot icon is found between the 2nd and 3rd ones, hovering above a heat-seeking missile launcher.
Where To Stand
As long as you can see between the pill-shaped tankers, you can get this anywhere on foot.
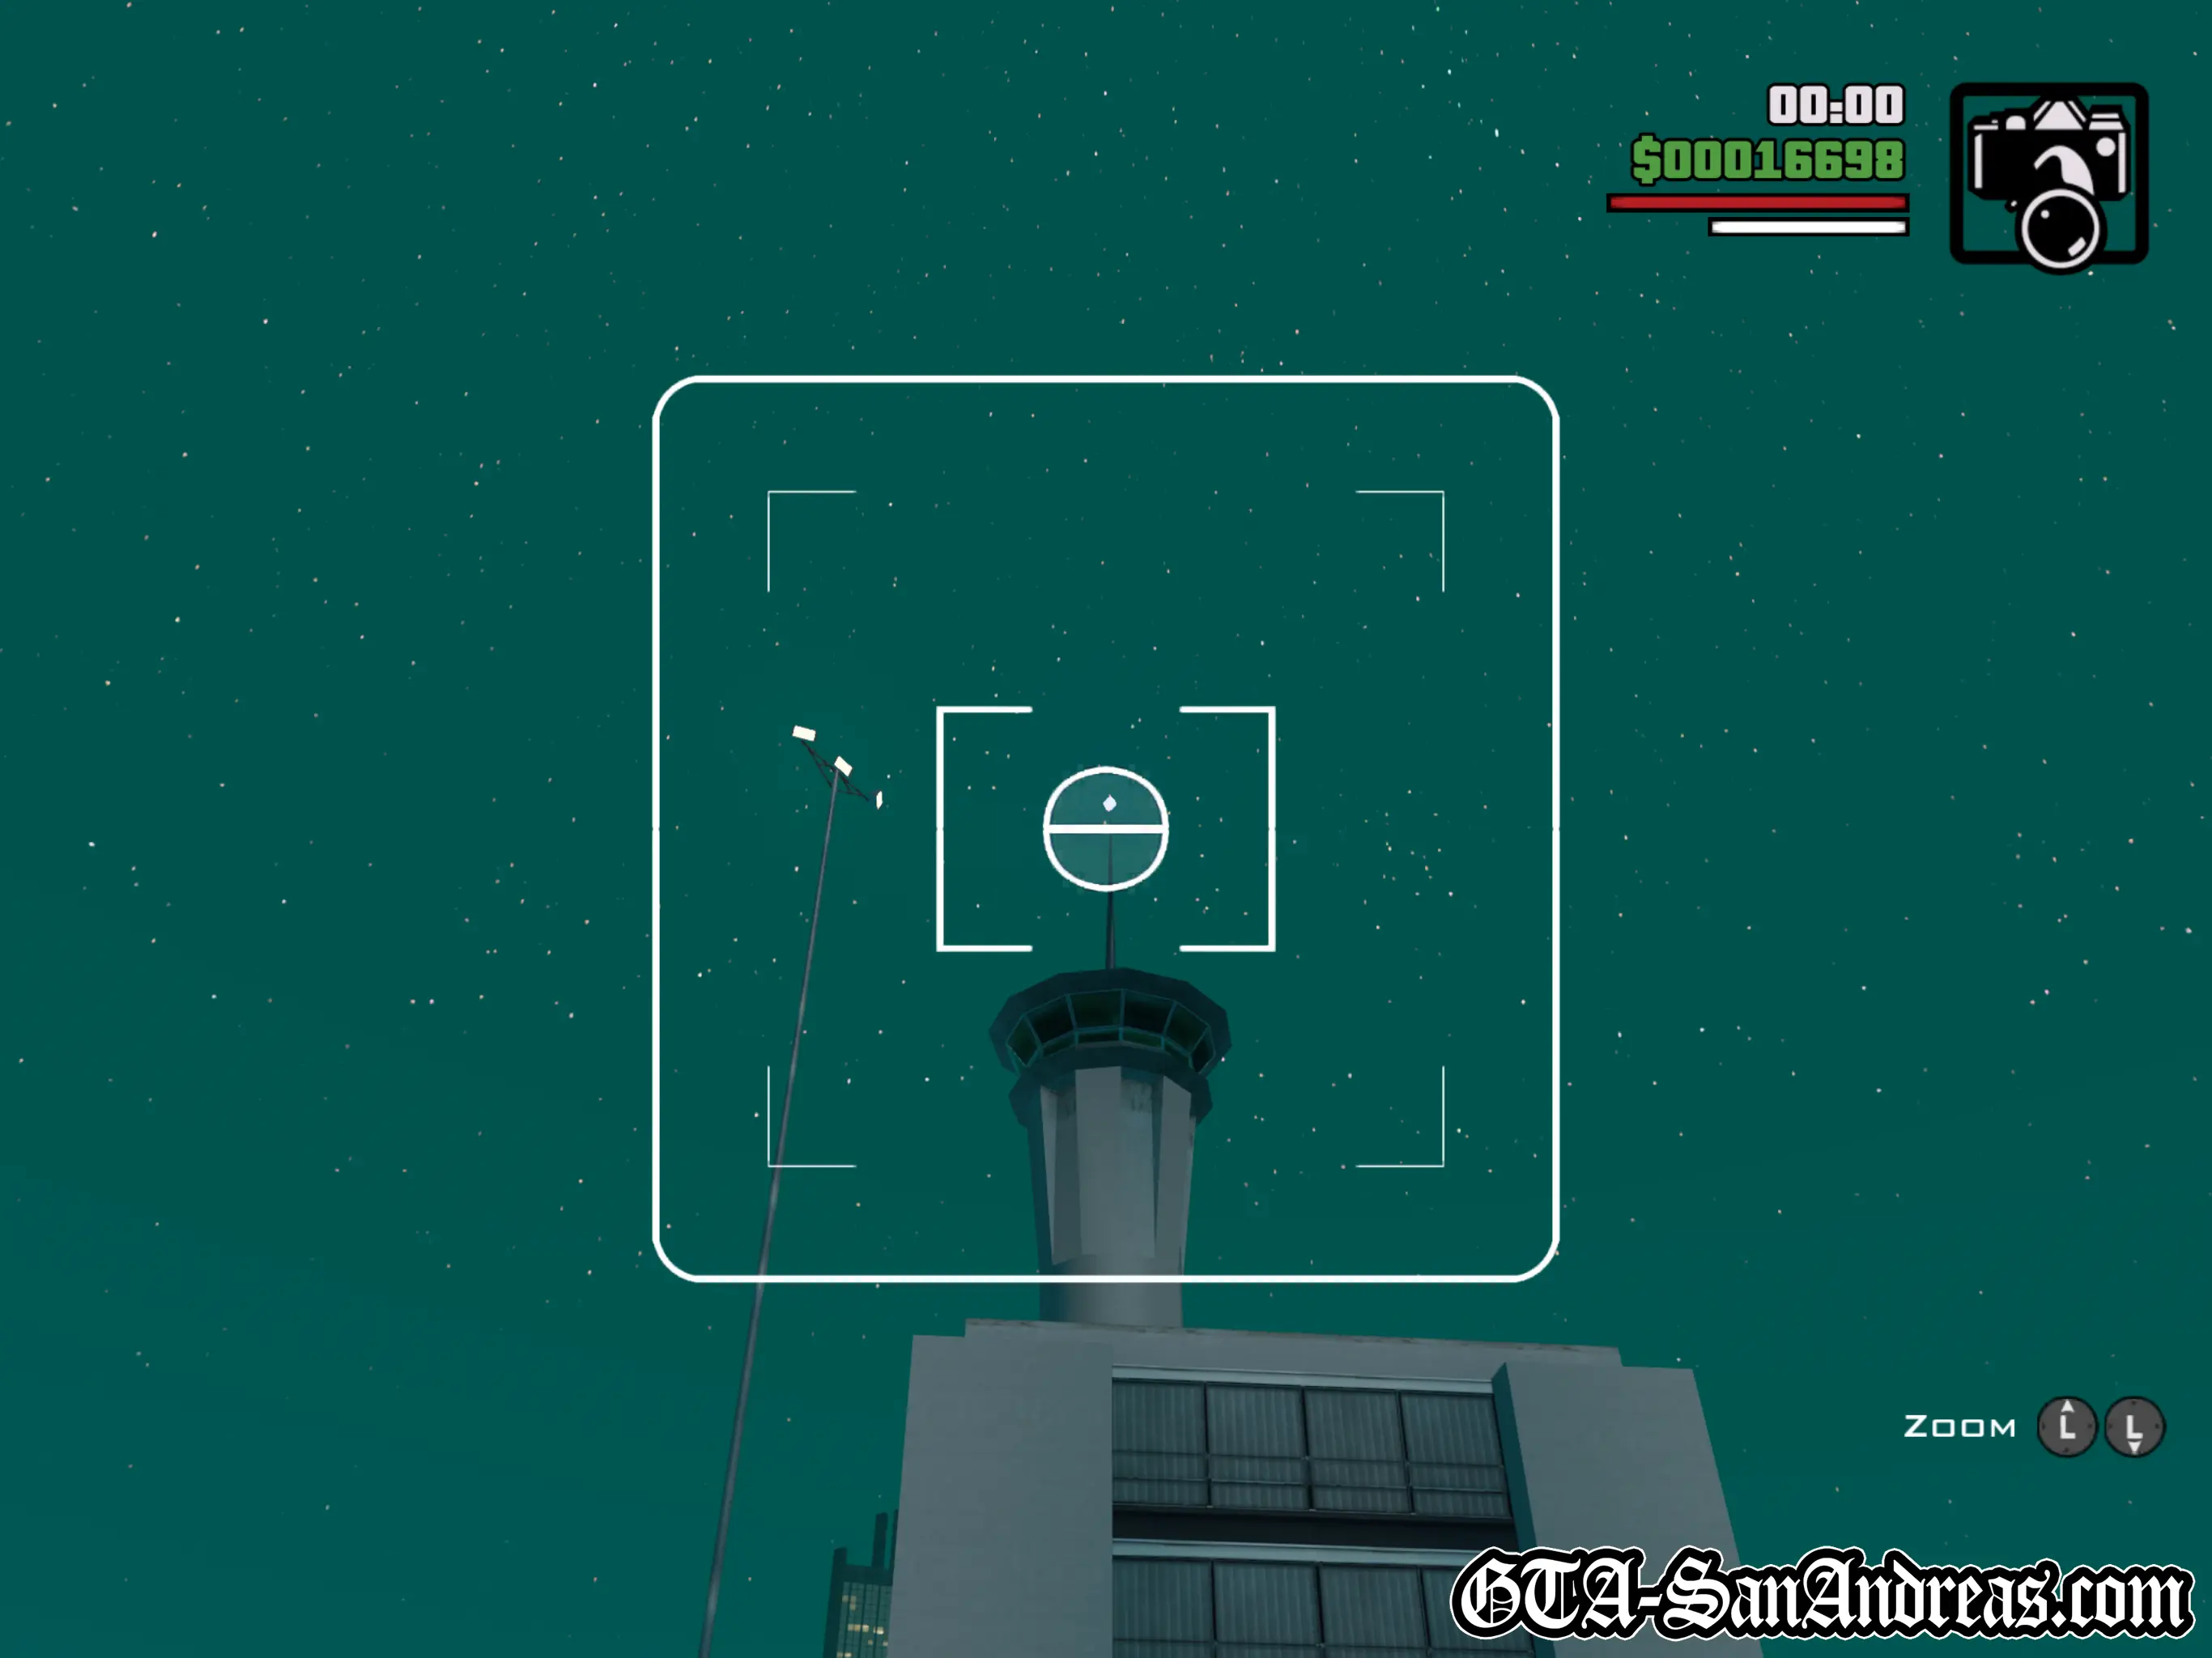
Snapshot #4
Location
Easter Bay Airport - Right at the top of the airport tower. It's quite high up and you need to be reasonably close to the tower for it to appear.
Where To Stand
There's a helipad section nearby with a few parked helicopters and a big 'H' icon painted on the ground. If you stand here you should be able to snap it from ground level.
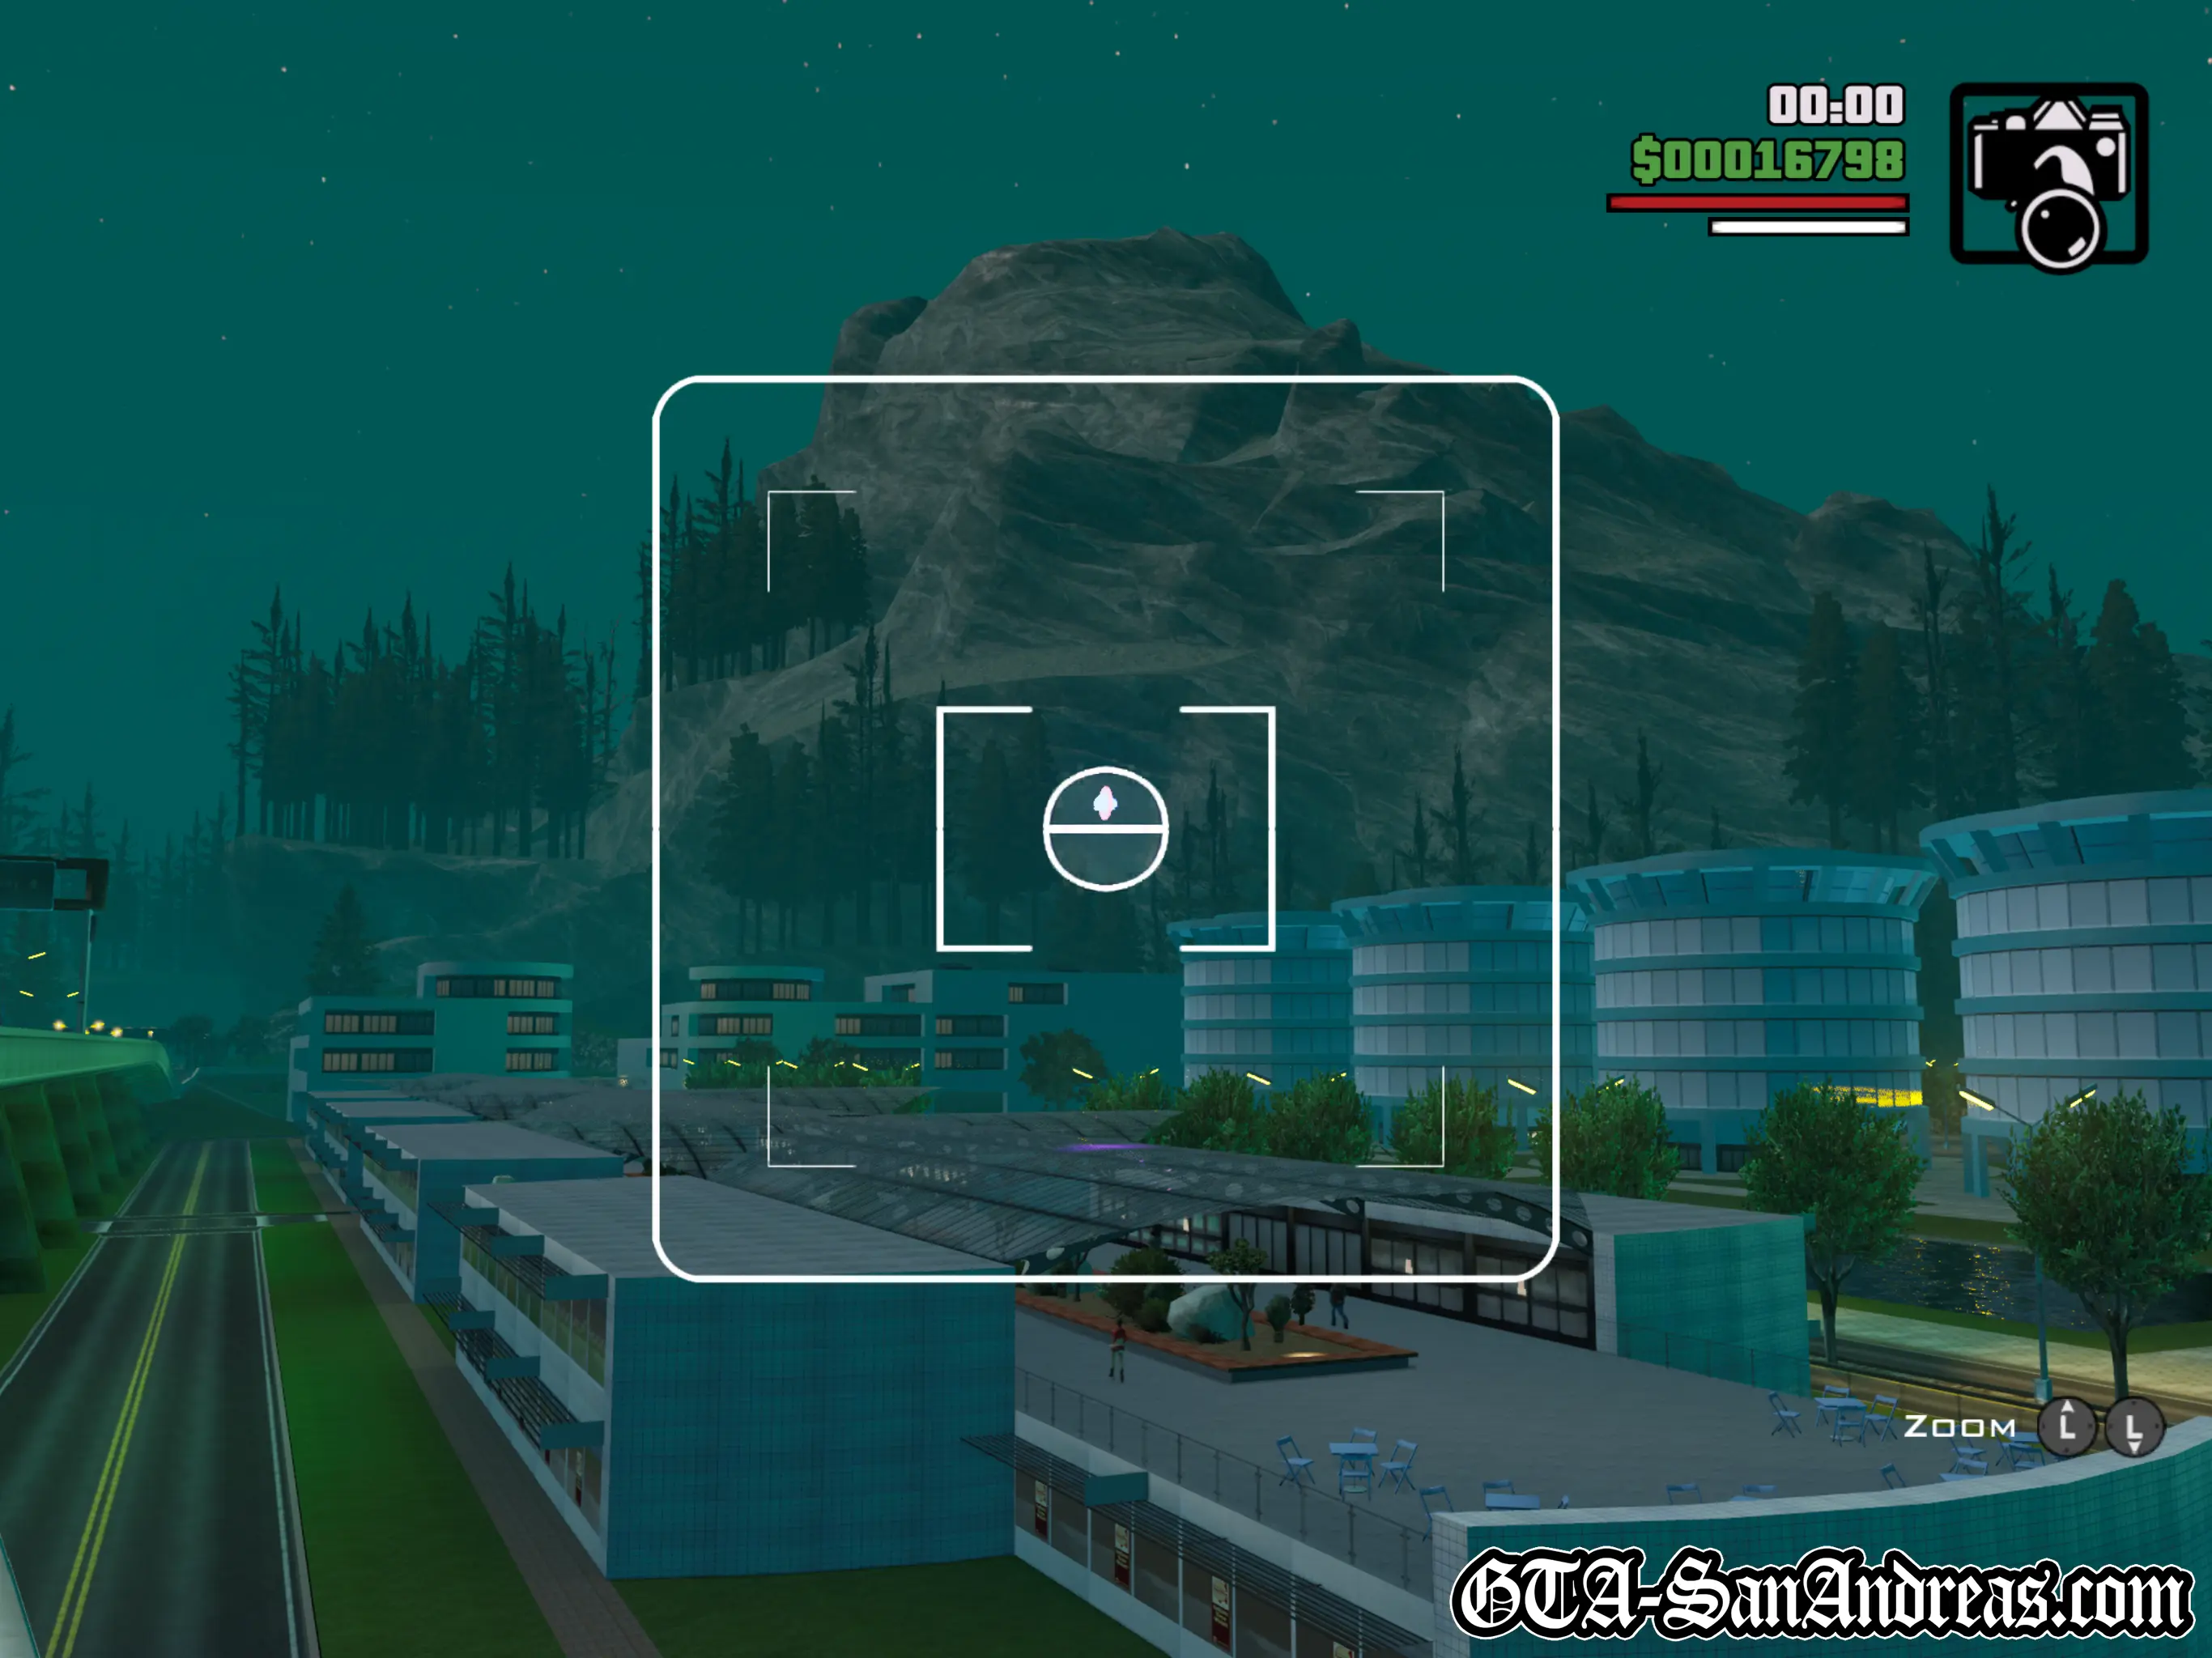
Snapshot #5
Location
Foster Valley - Hovering over the glass roof of a tidy looking shopping area, near some large round towers.
Where To Stand
You can get this from anywhere nearby. I stood on the freeway to take the screenshot, but it's quite easy to see when you're close enough.
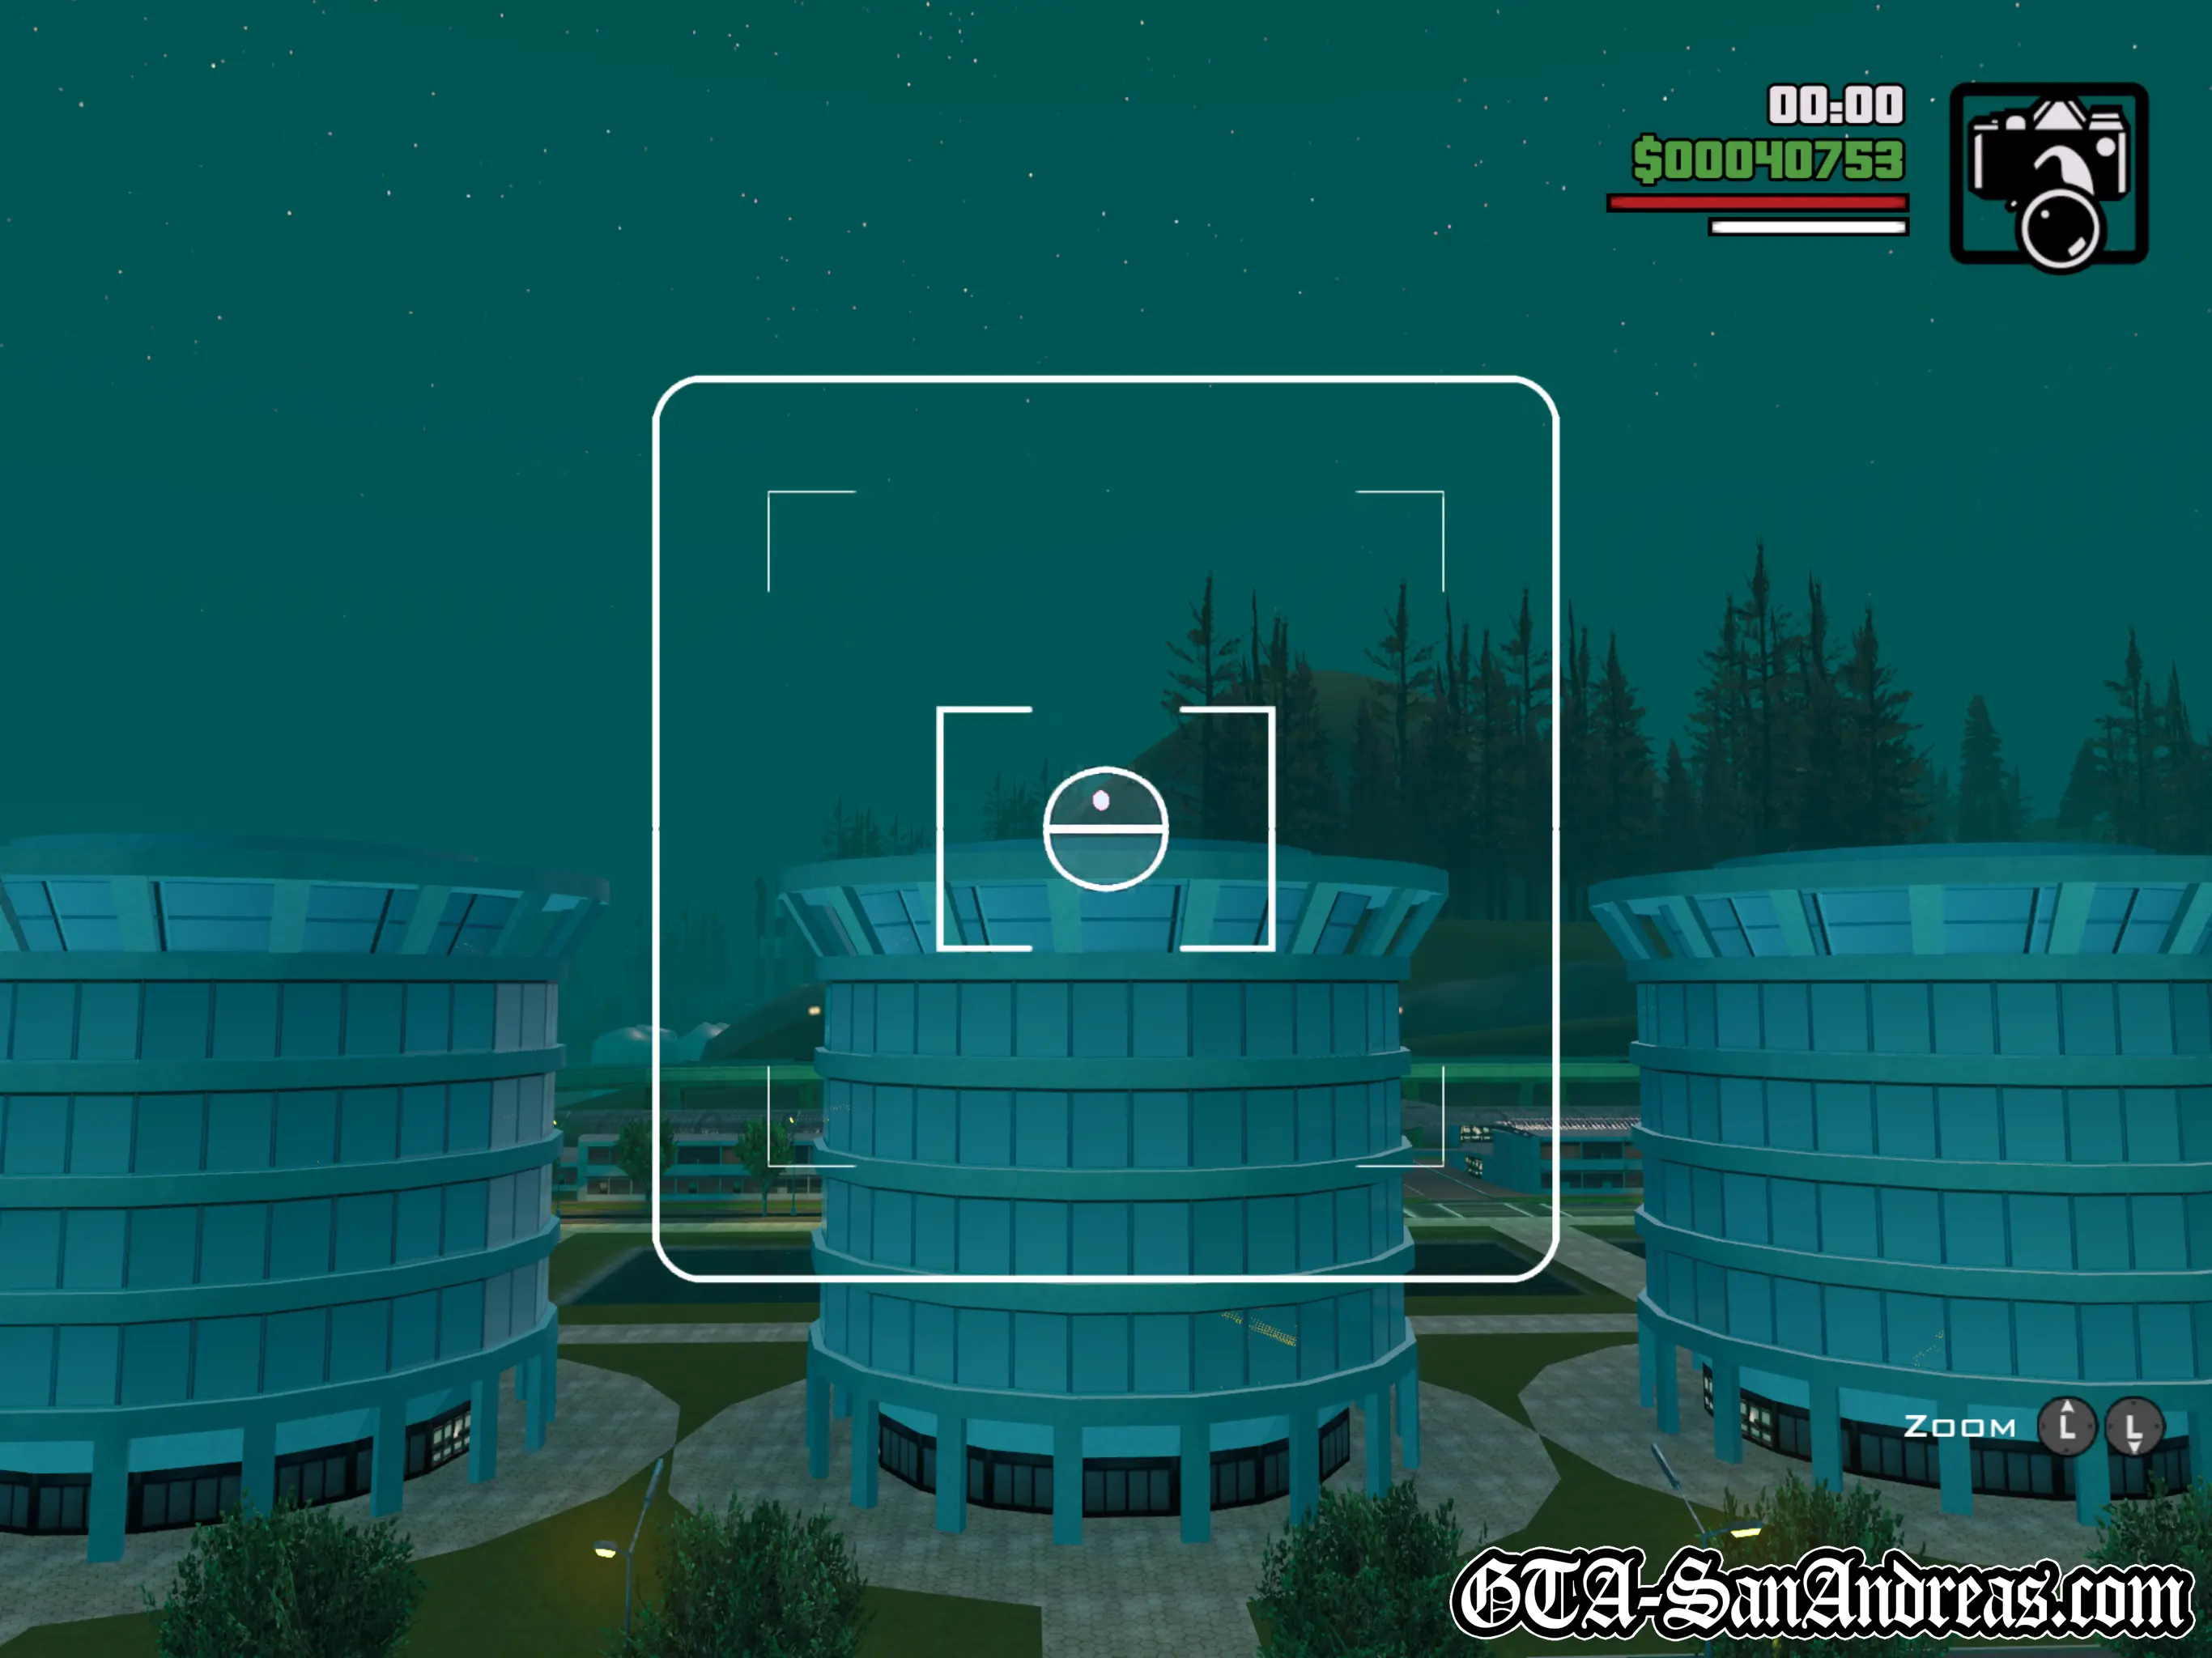
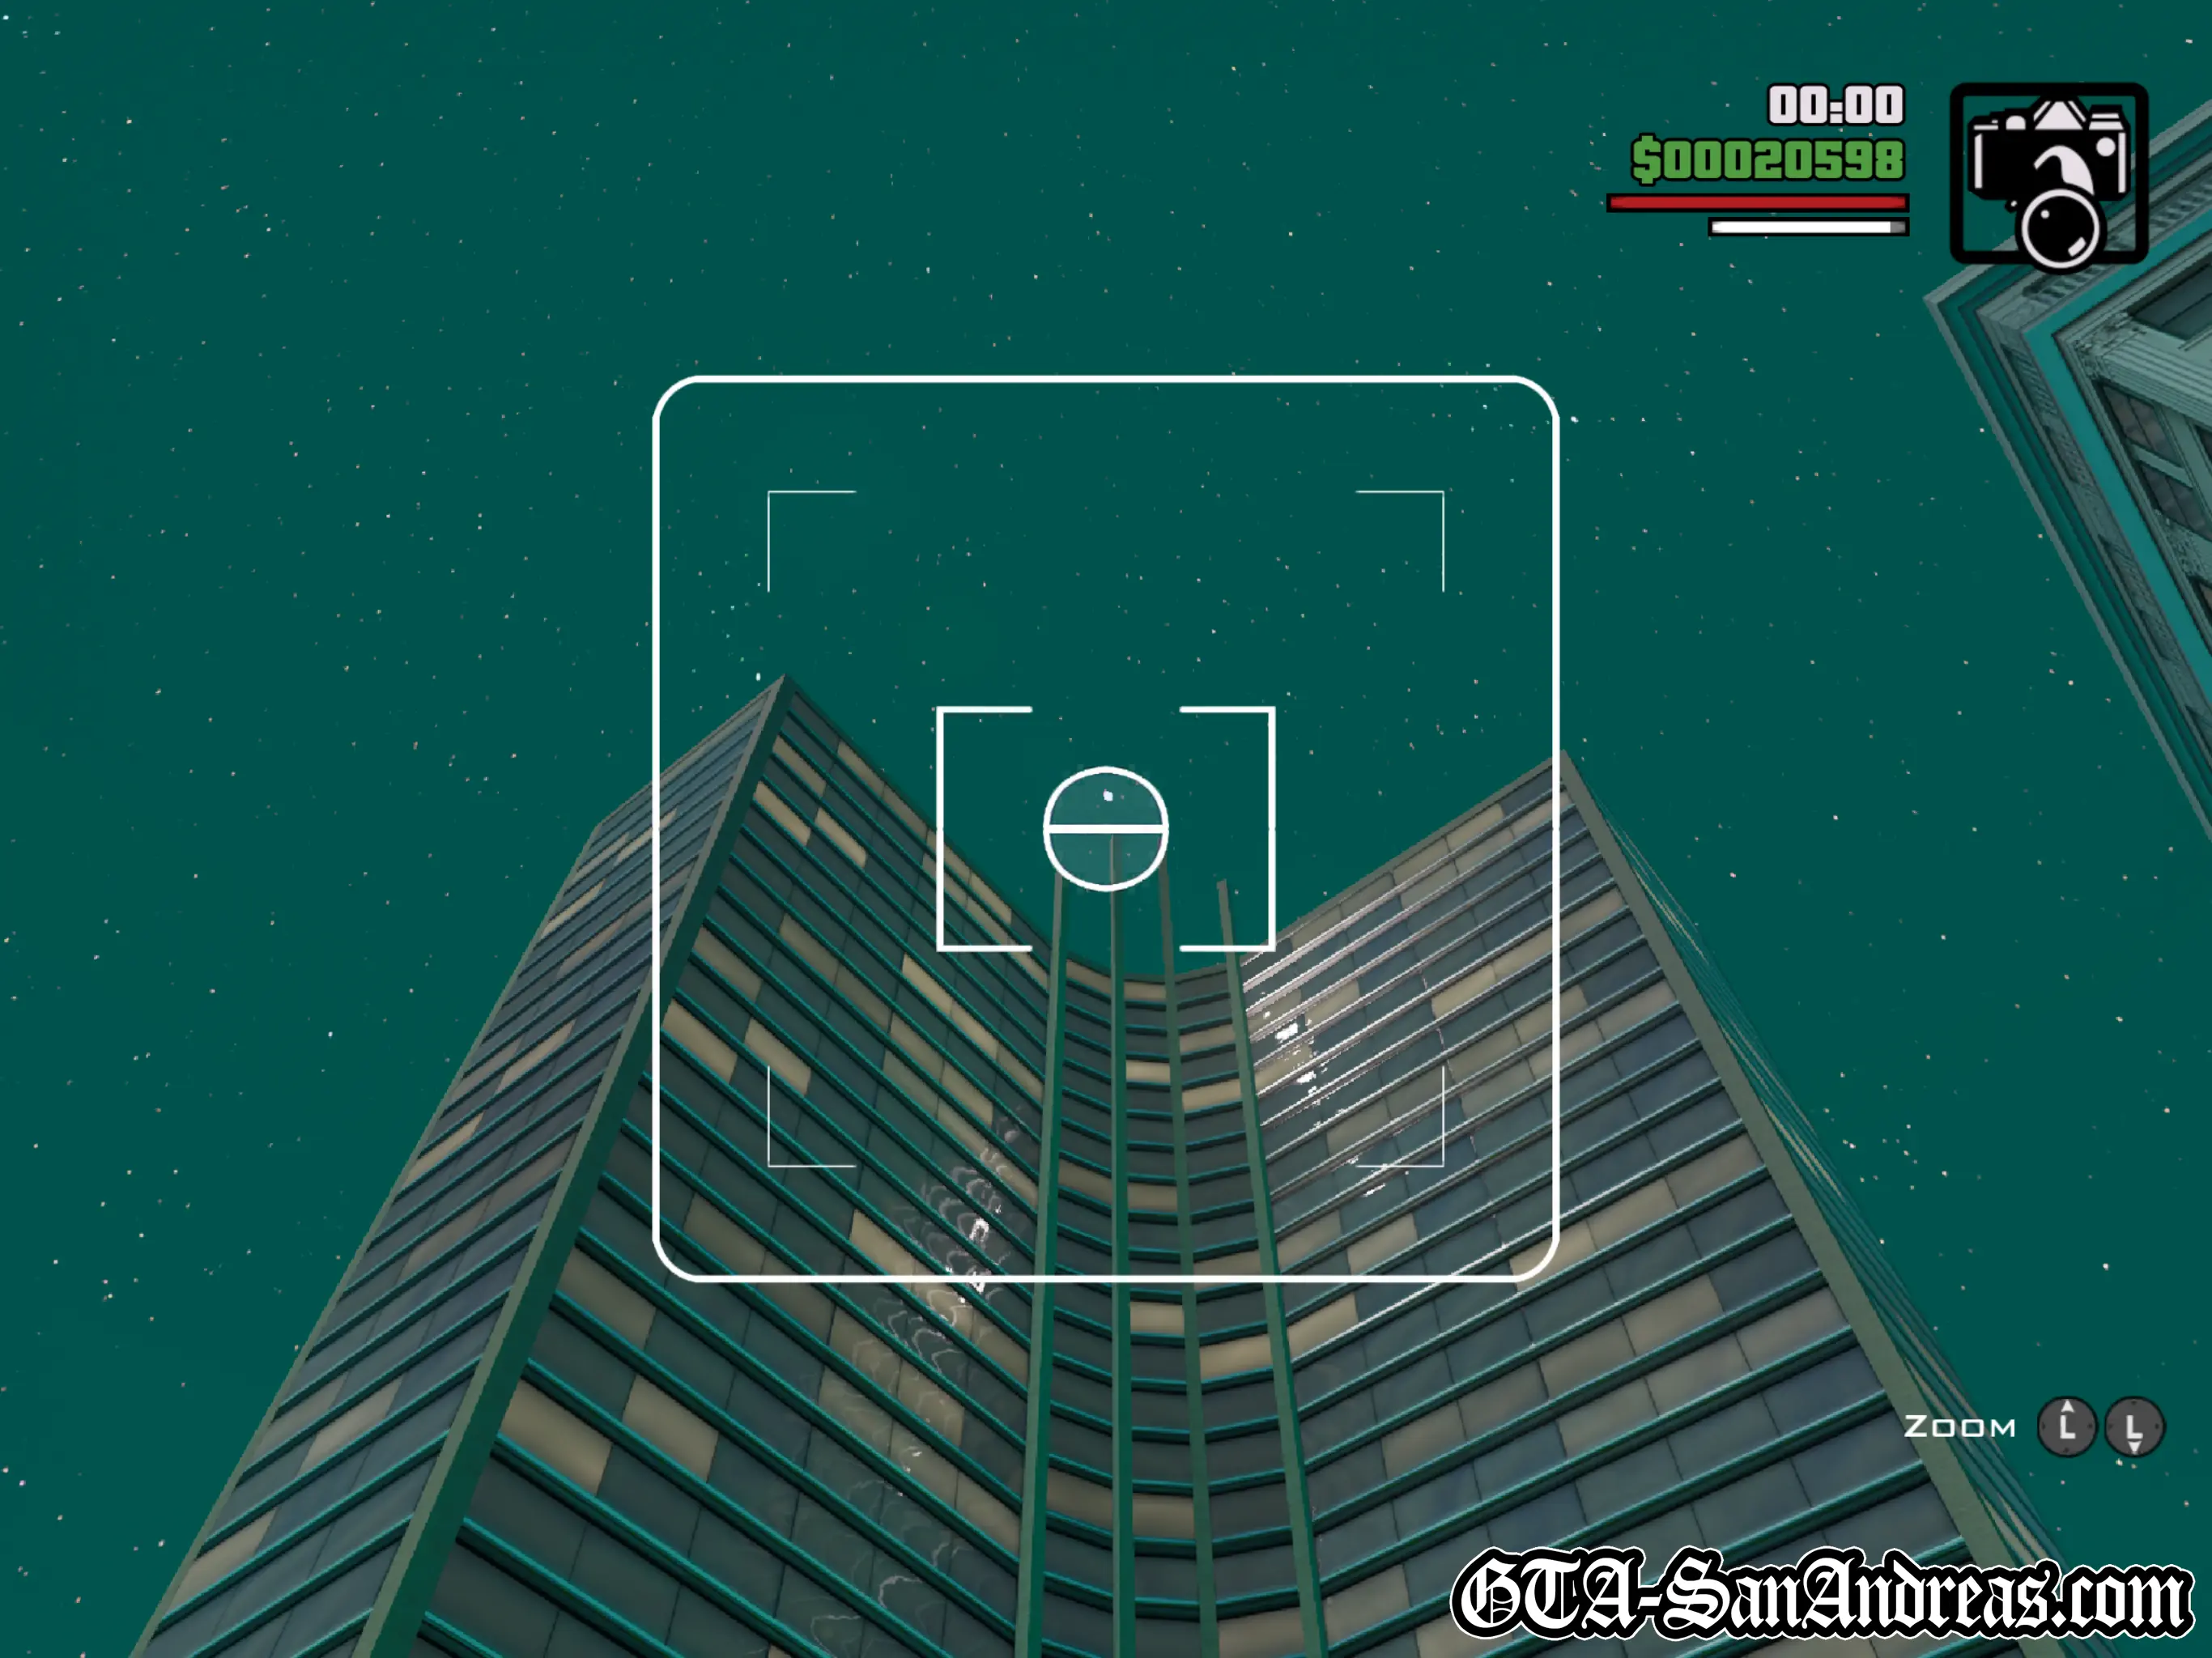
Snapshot #6
Location
Foster Valley - On top of the 2nd most Northern round tower, near the previous snapshot. It's pretty difficult to see this one from ground level, usually I'd suggest using a helicopter, however if you climb the grassy hill to the West, there is a position near a road sign where you'll be close enough to capture it on foot.
Where To Stand
Either land a helicopter on top of one of the towers, or stand on the grass next to the high road to the West. Keep edging closer to the side of the large hill and eventually you'll be close enough to make the snapshot icon appear.
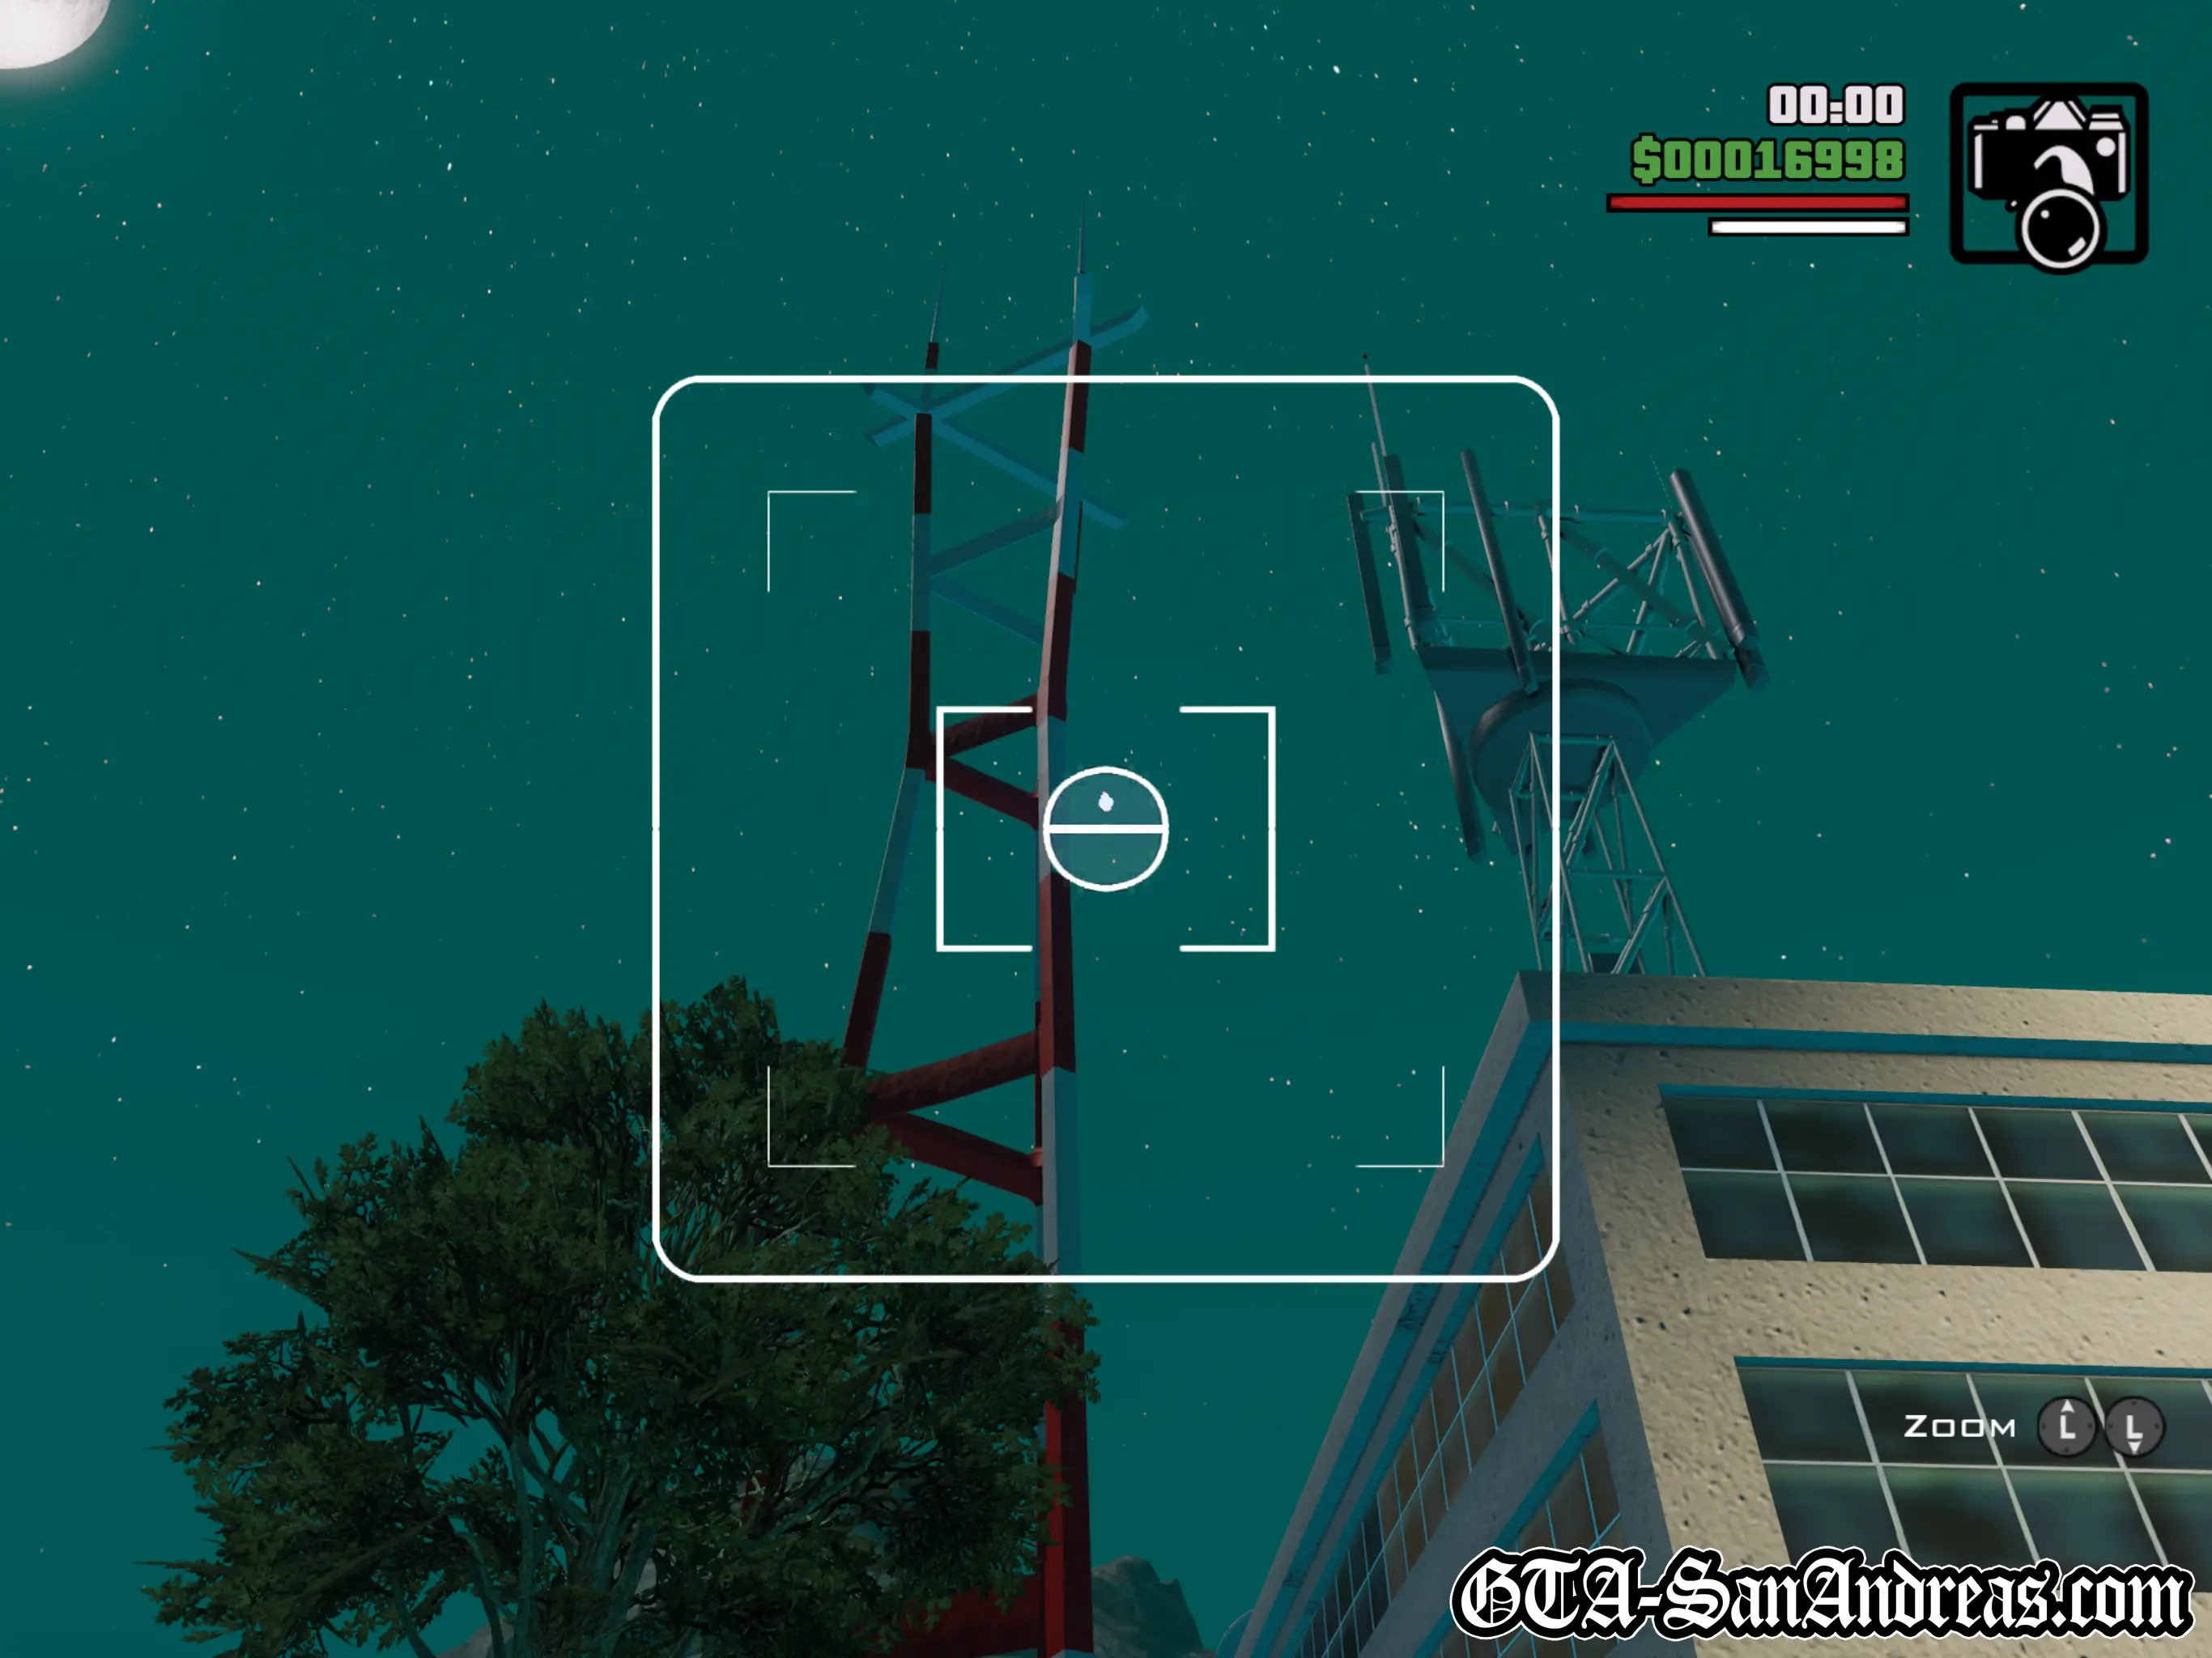
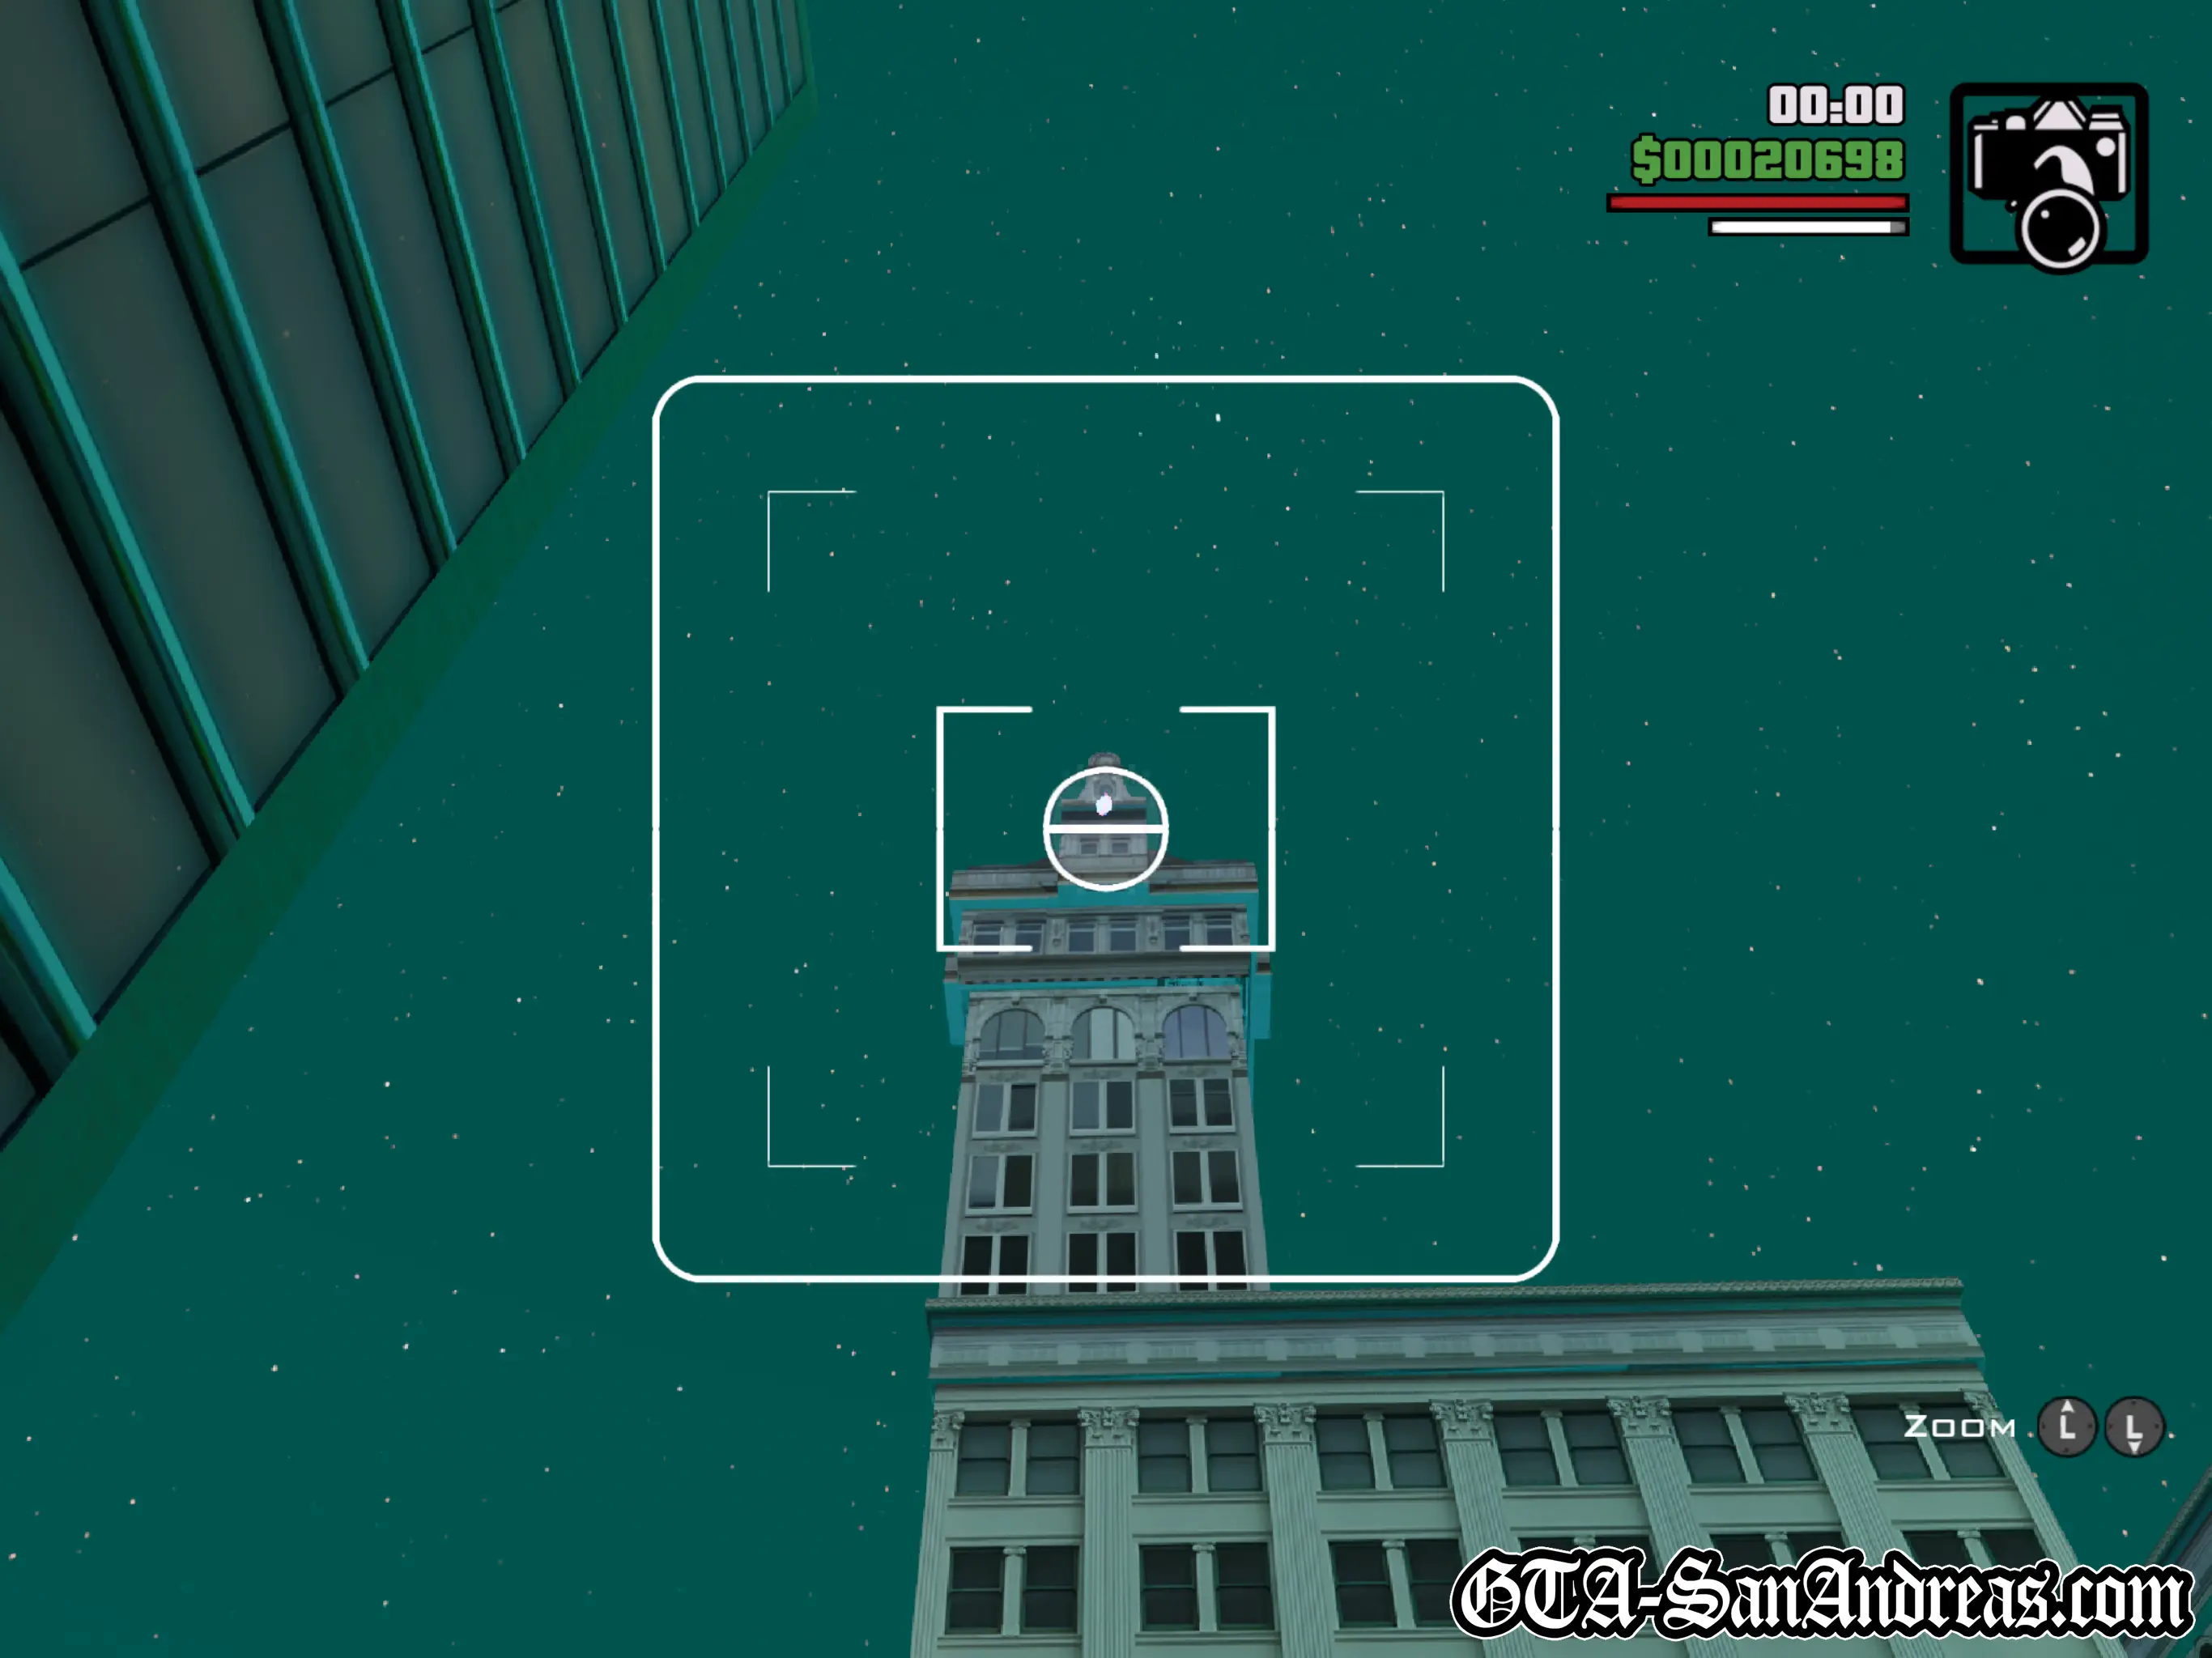
Snapshot #7
Location
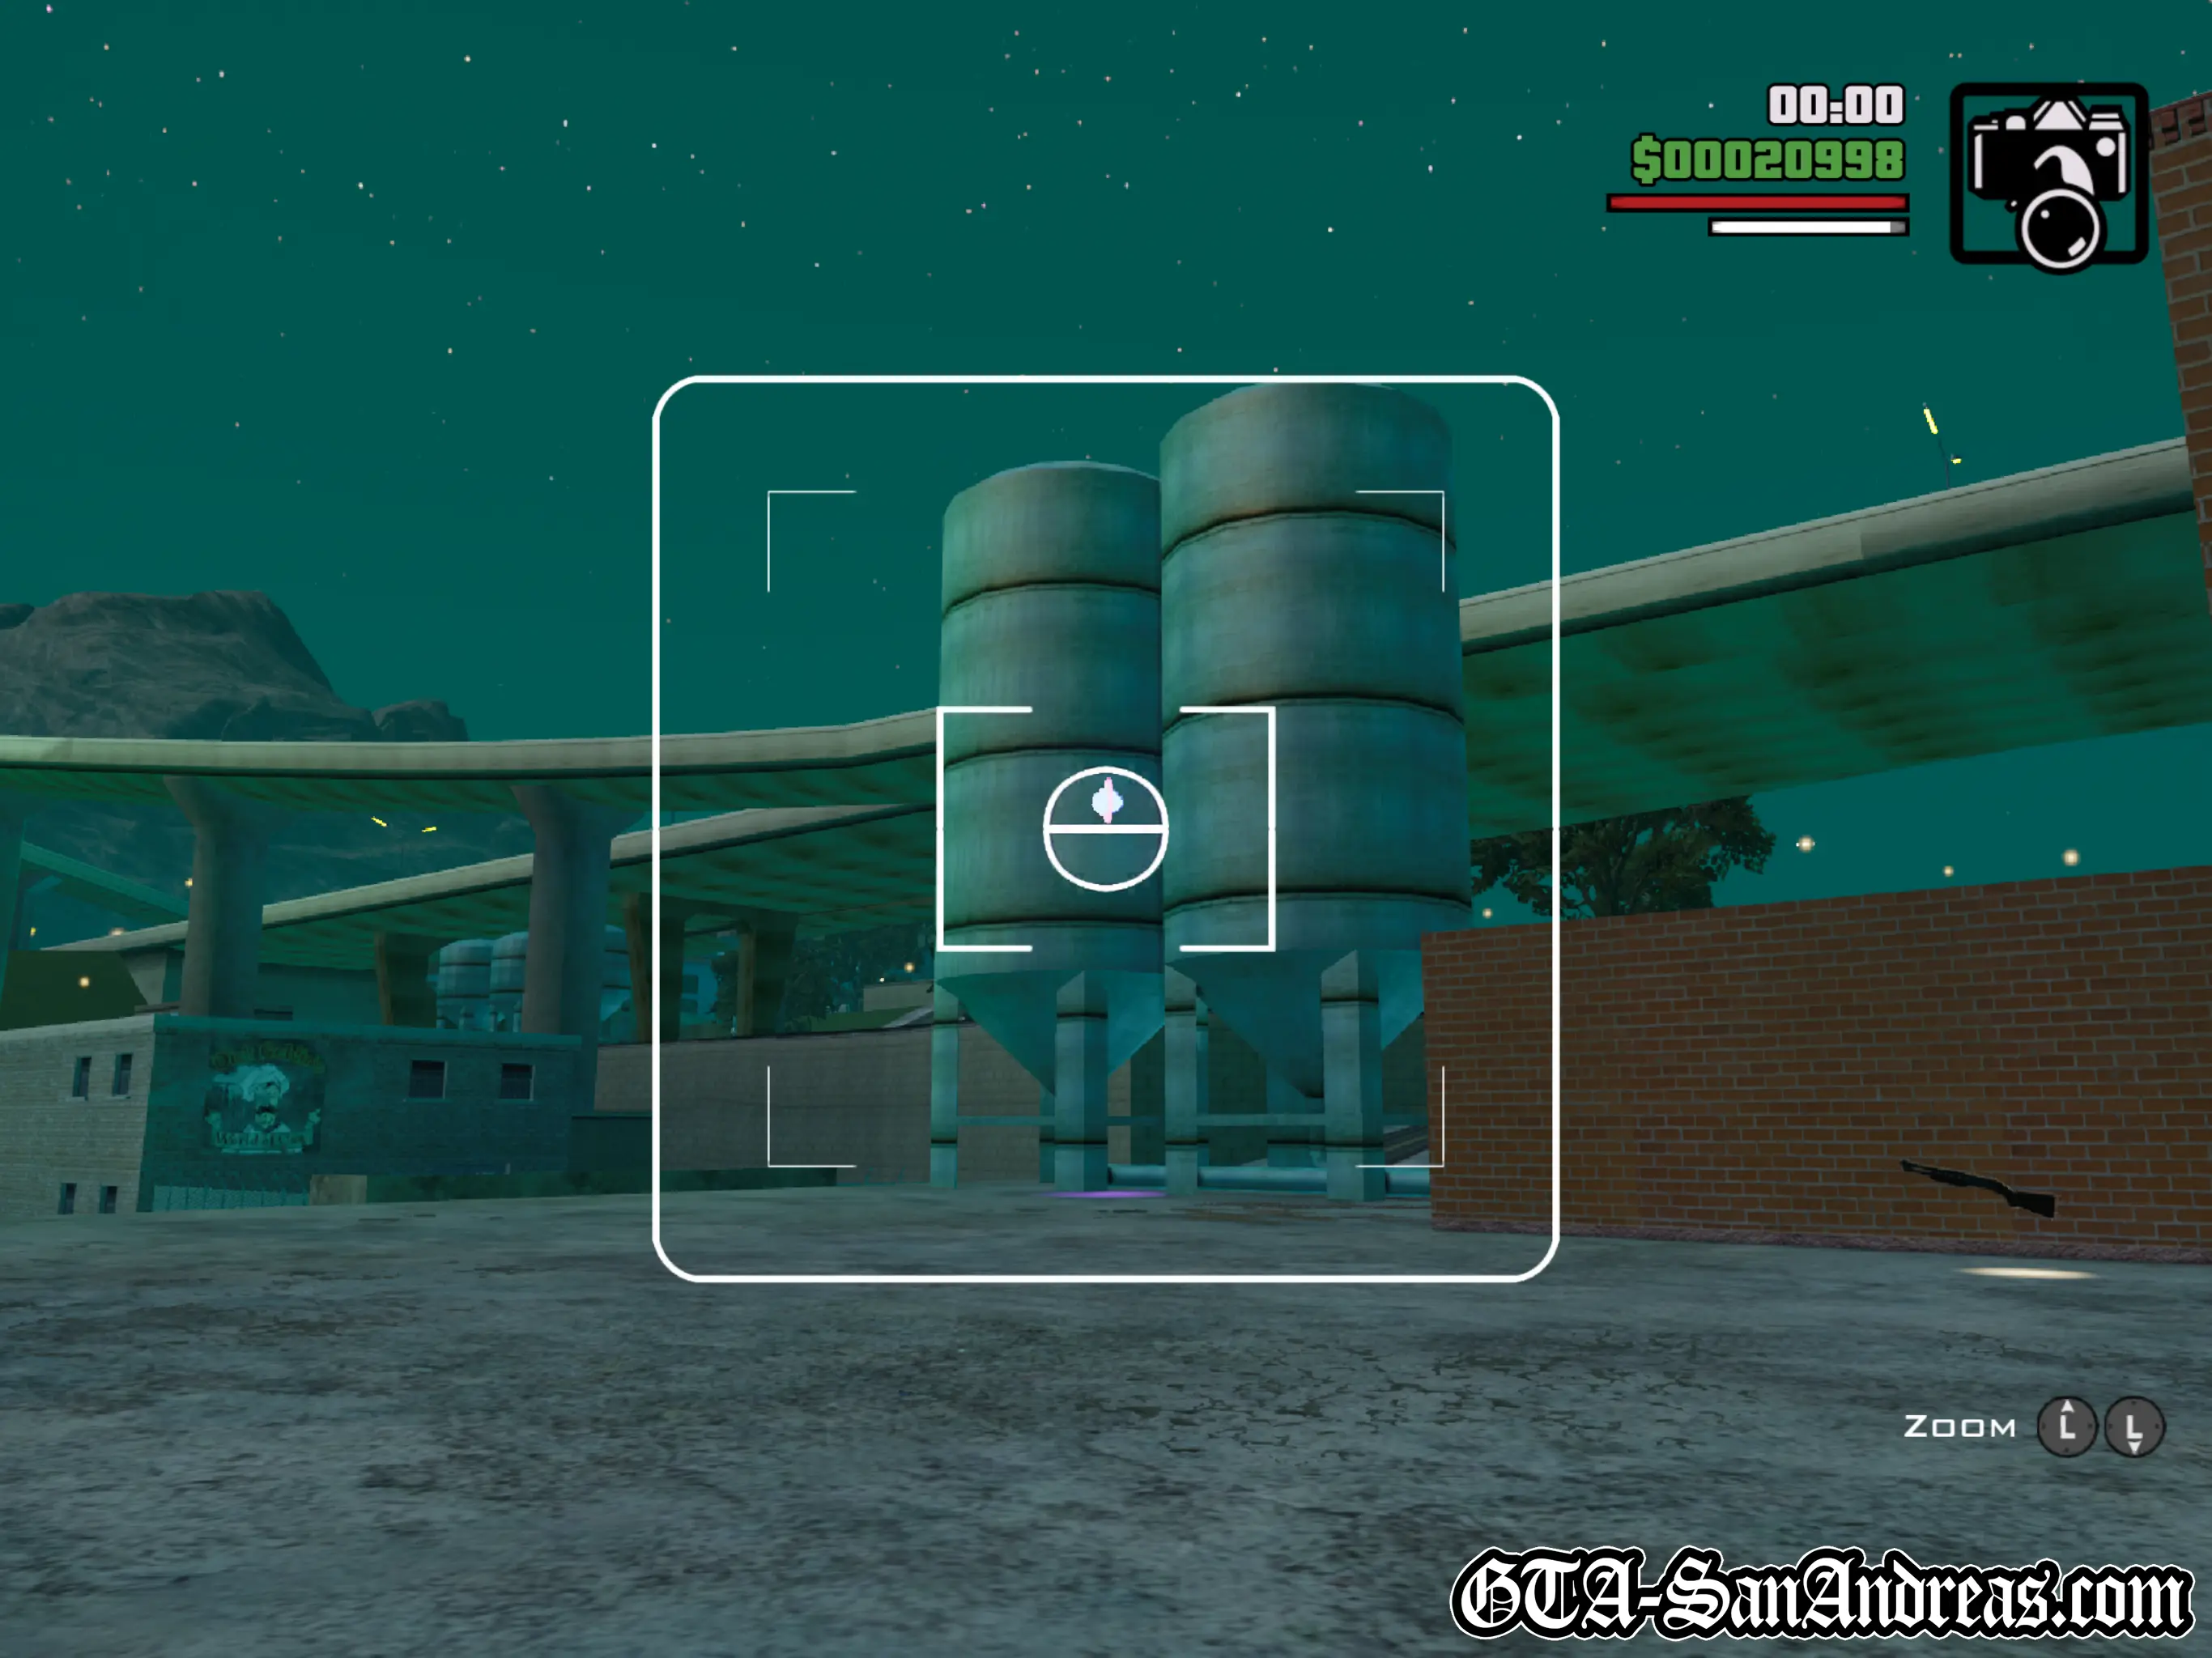
Missionary Hill - High up on a red and white striped radio tower at the top of a hill, next to the news station.
Where To Stand
You can stand on the grass near the tower, or in the car park of the news station and you should be close enough to make this one appear.
Snapshot #8
Location
San Fierro - High above a bridge leading traffic from Mount Chiliad towards San Fierro.
Where To Stand
Standing on the road or grass anywhere on the San Fierro side of the bridge should do the job.
Snapshot #9
Location
Avispa Country Club - Floating high up in front of a balcony at the top of the large country club hotel.
Where To Stand
Anywhere in front of the building will do. I stood in the middle of the tennis courts.
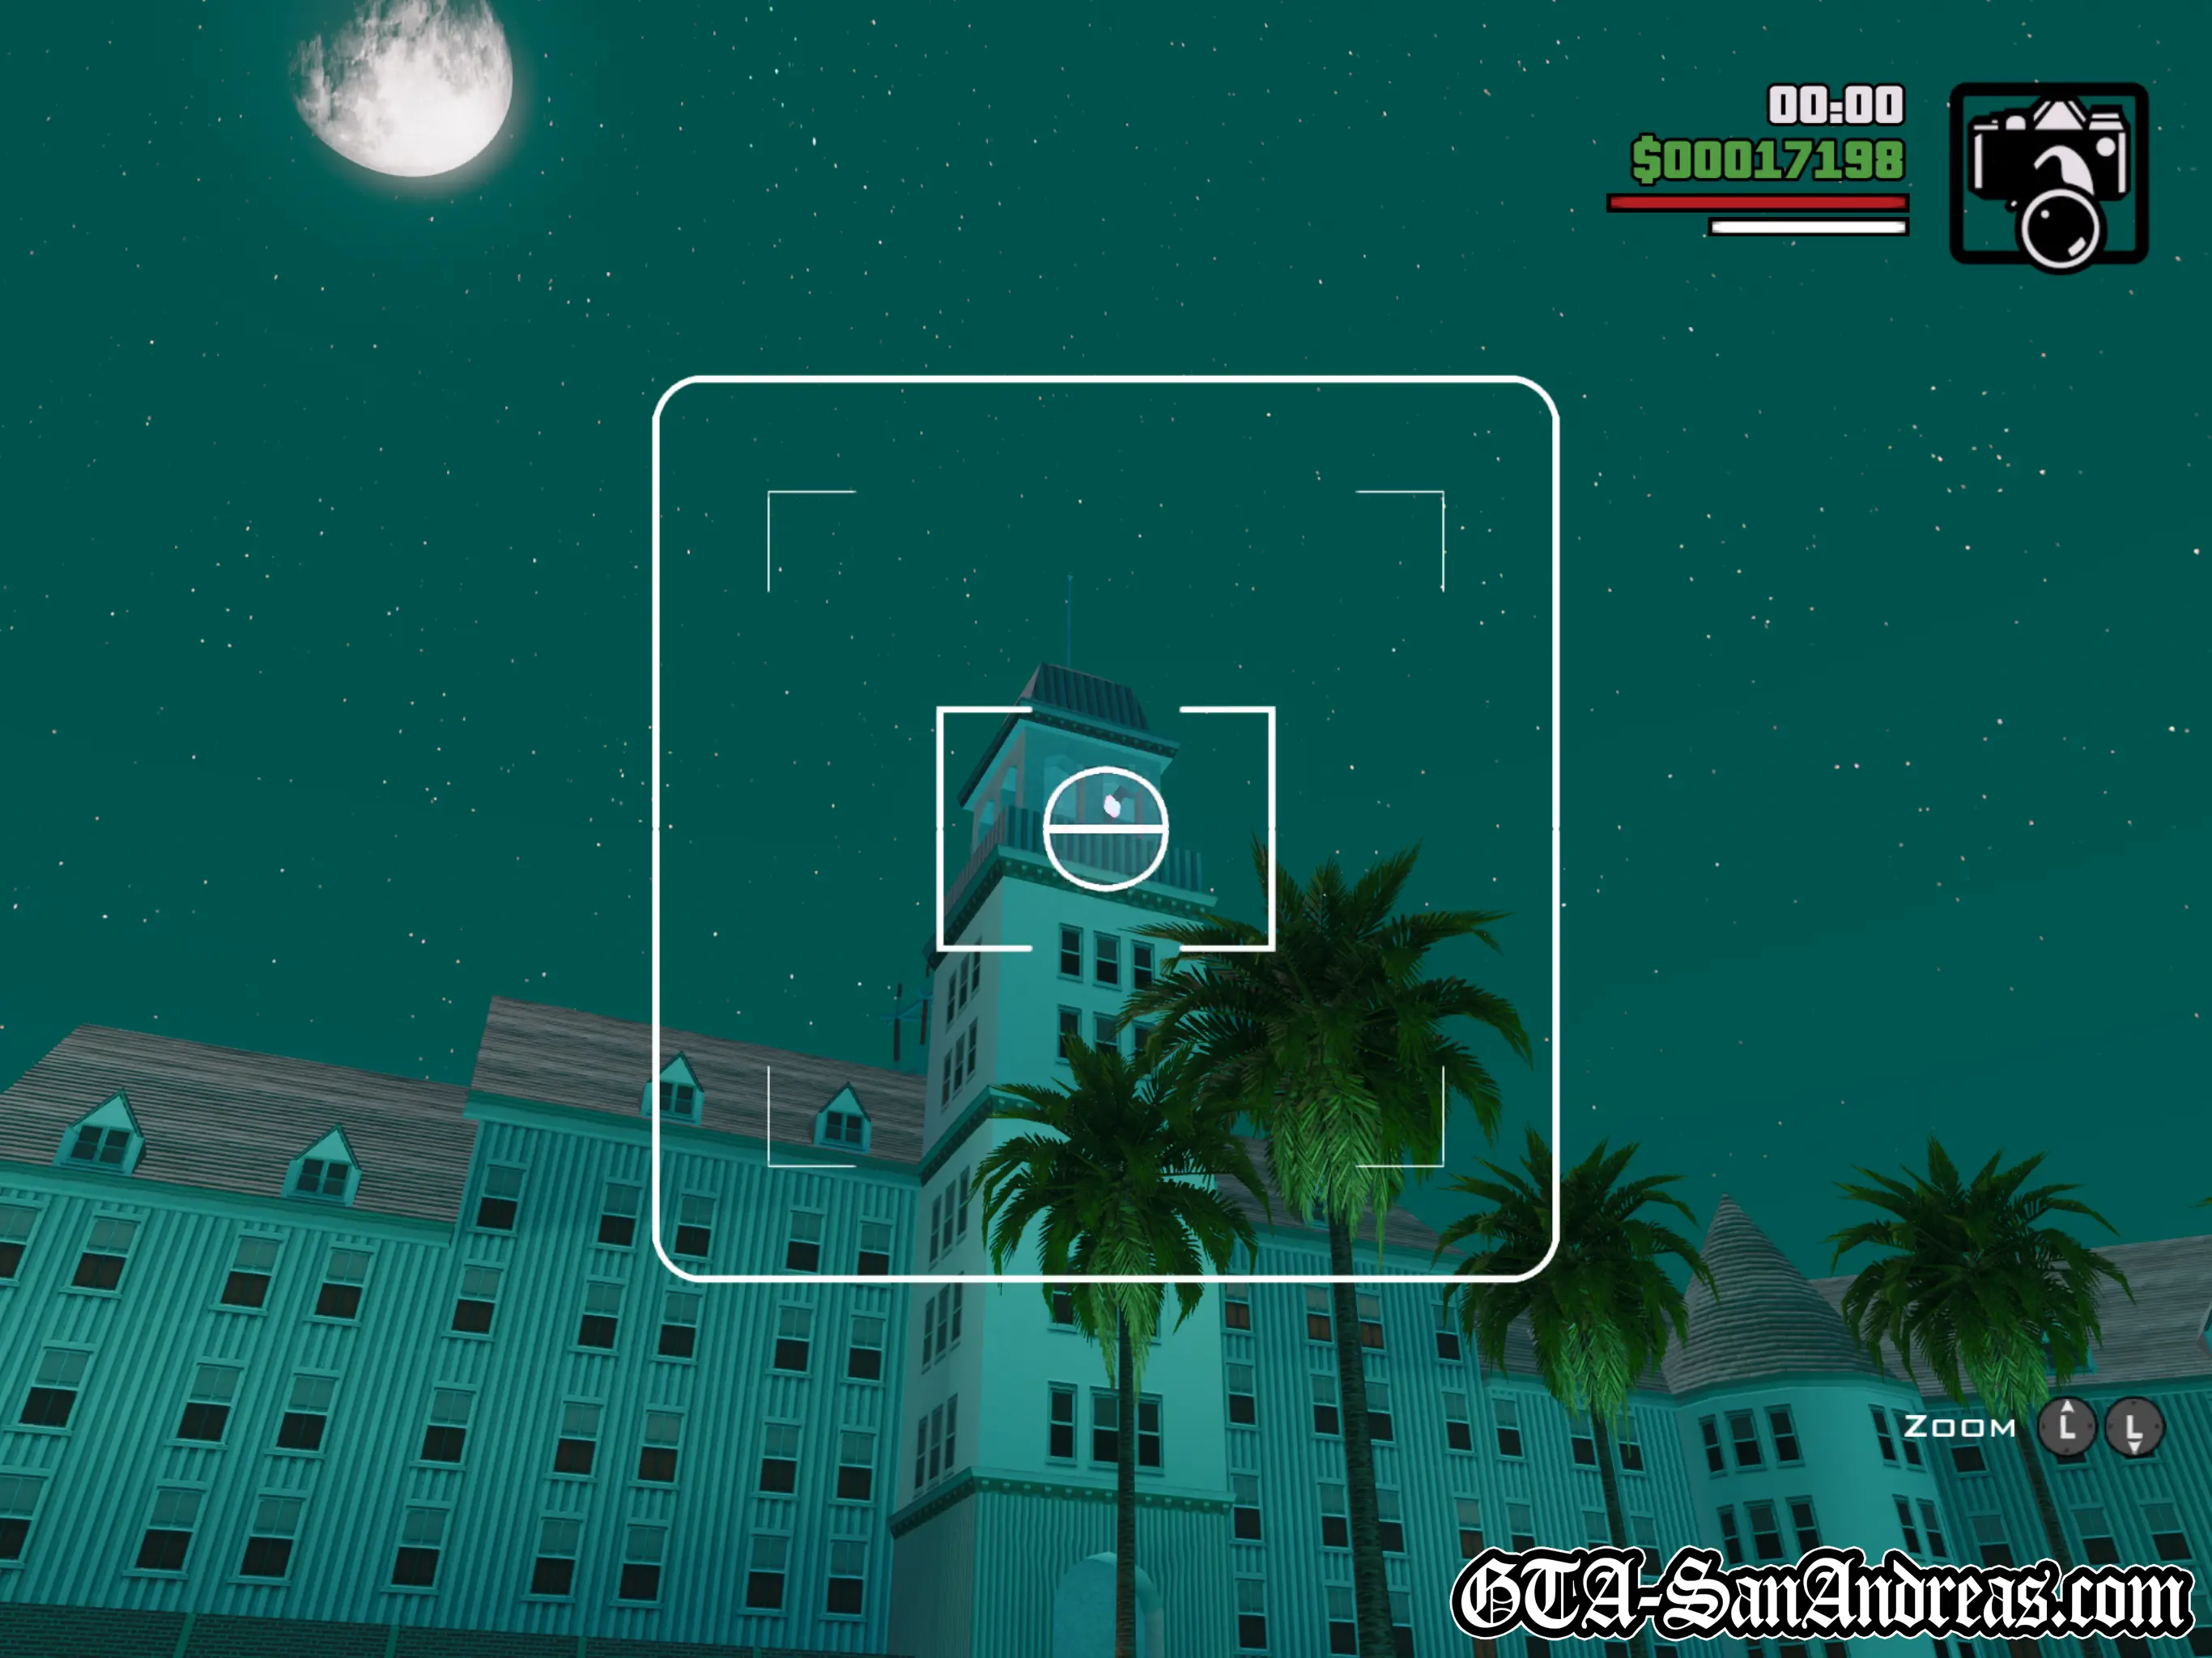
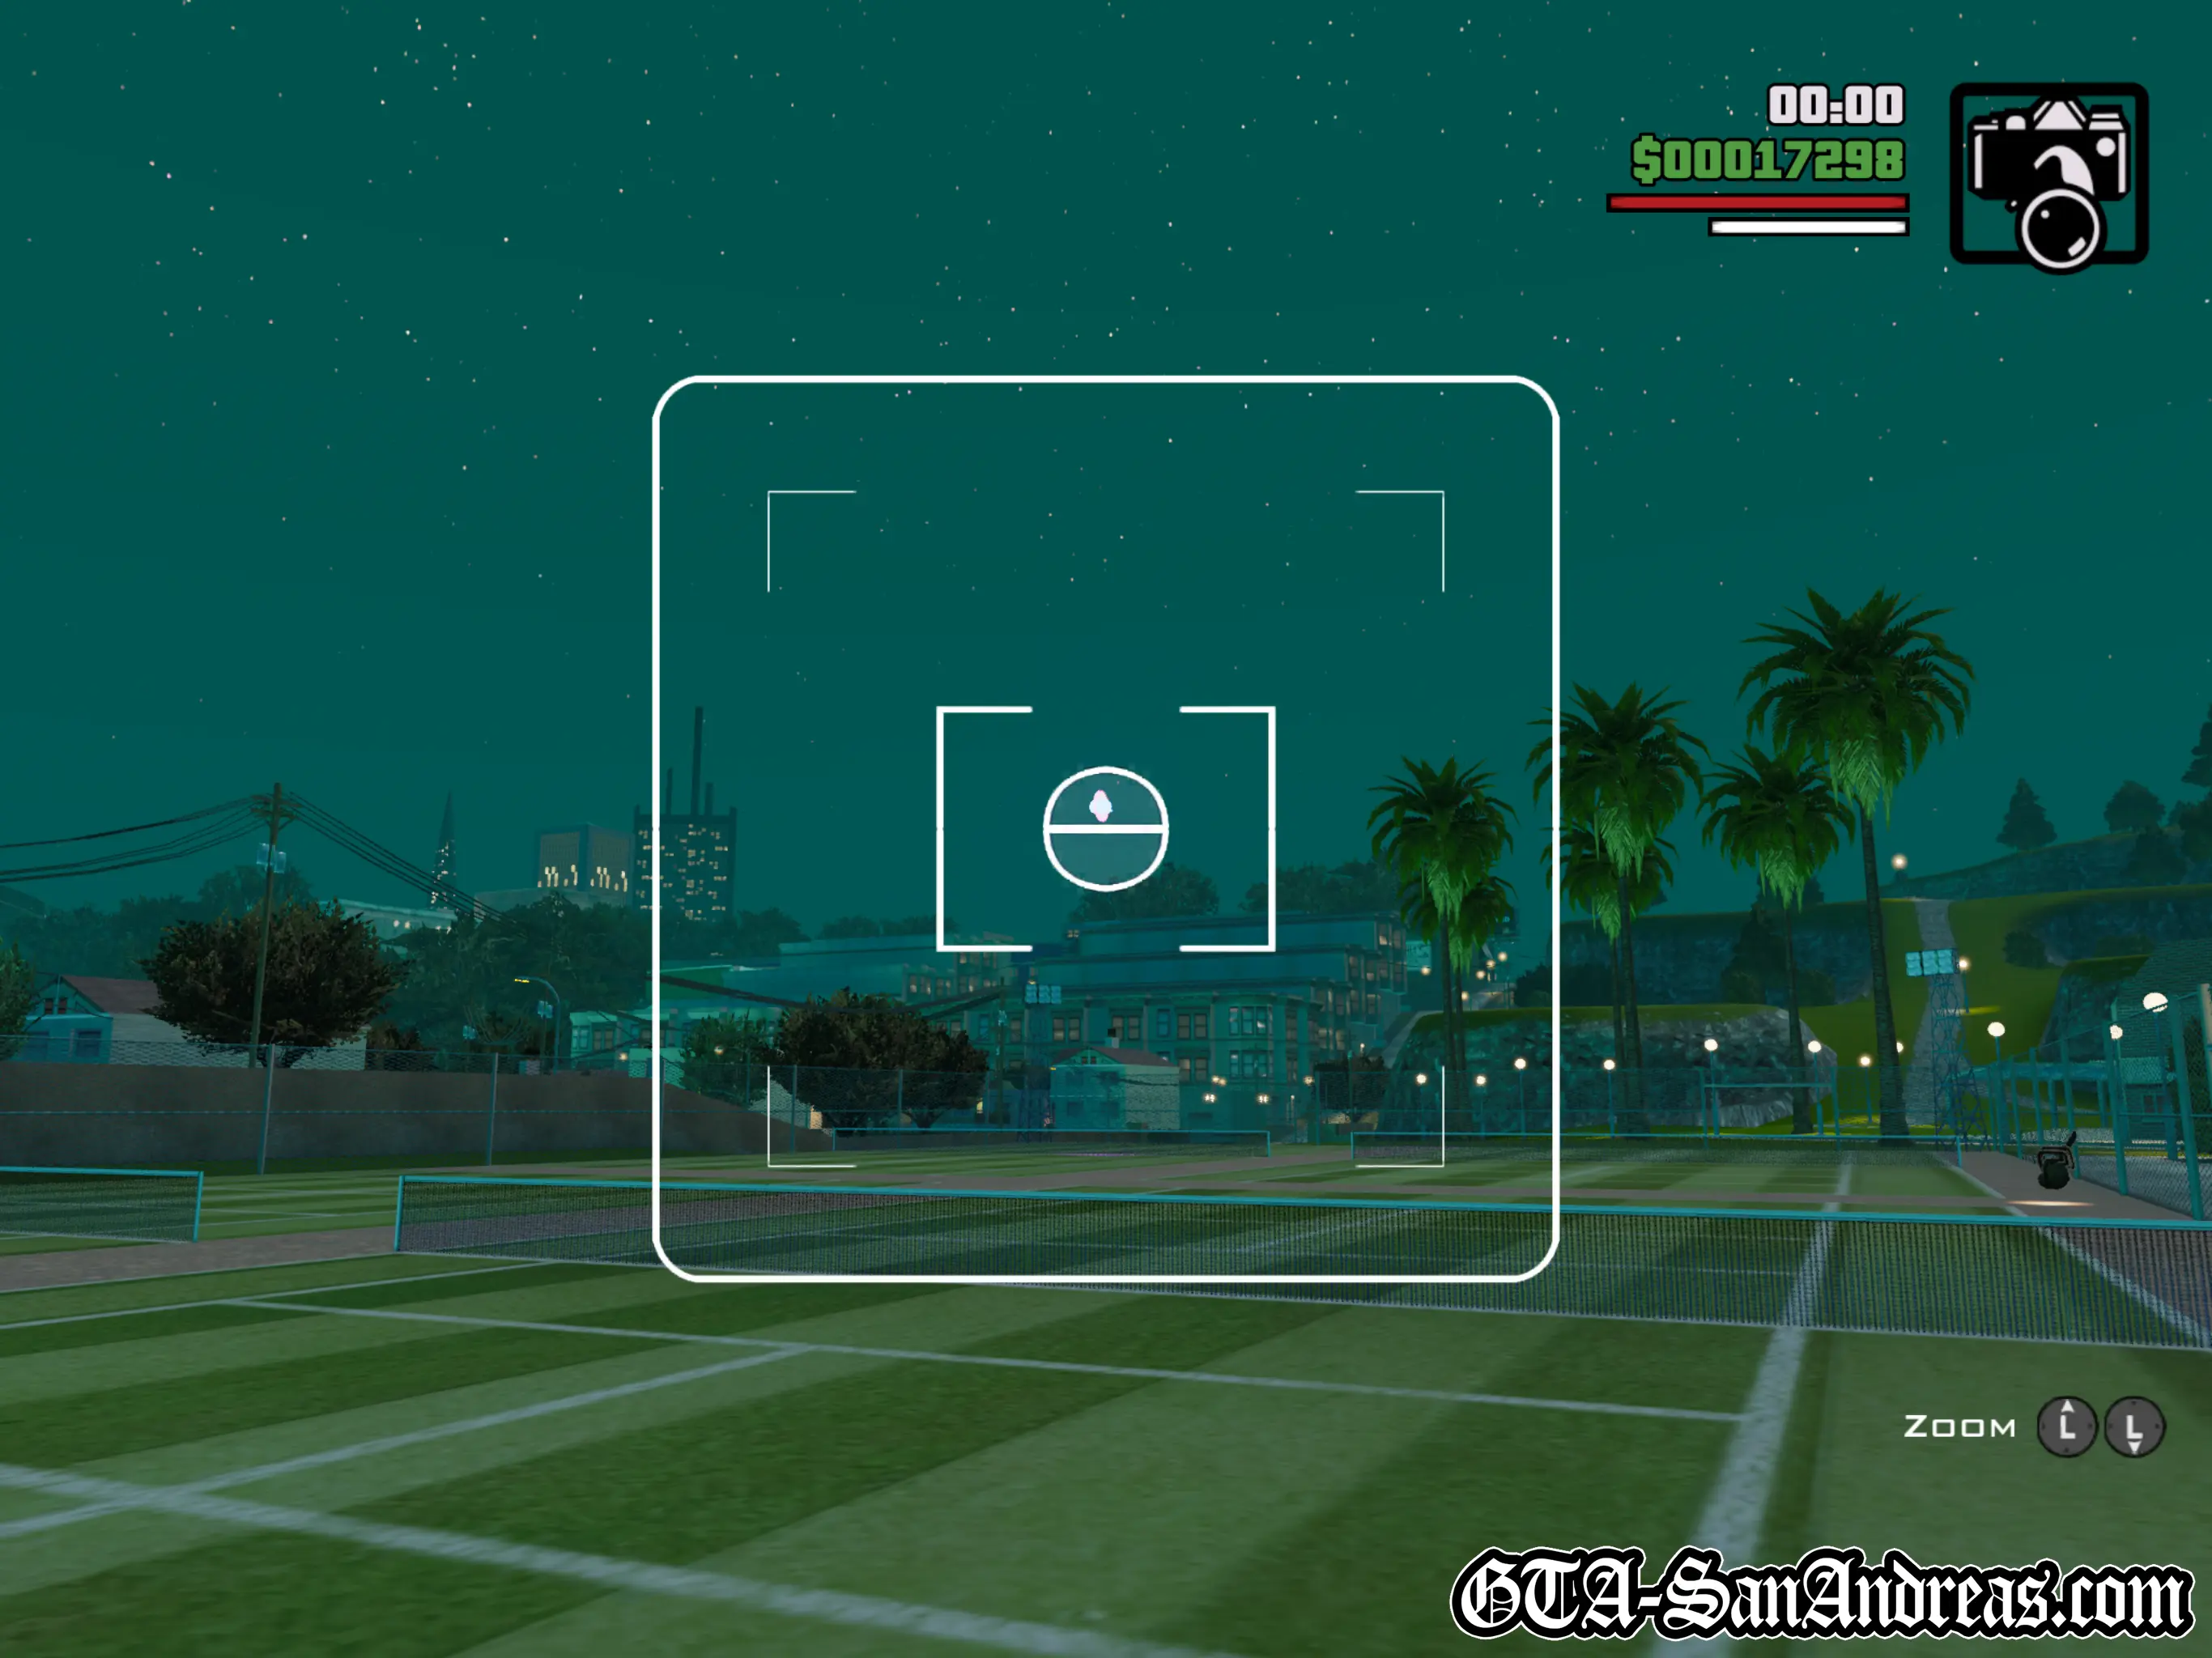
Snapshot #10
Location
Avispa Country Club - Floating at the North-East end of the tennis courts.
Where To Stand
Stand on the tennis court or the road nearby. This one is quite easy.
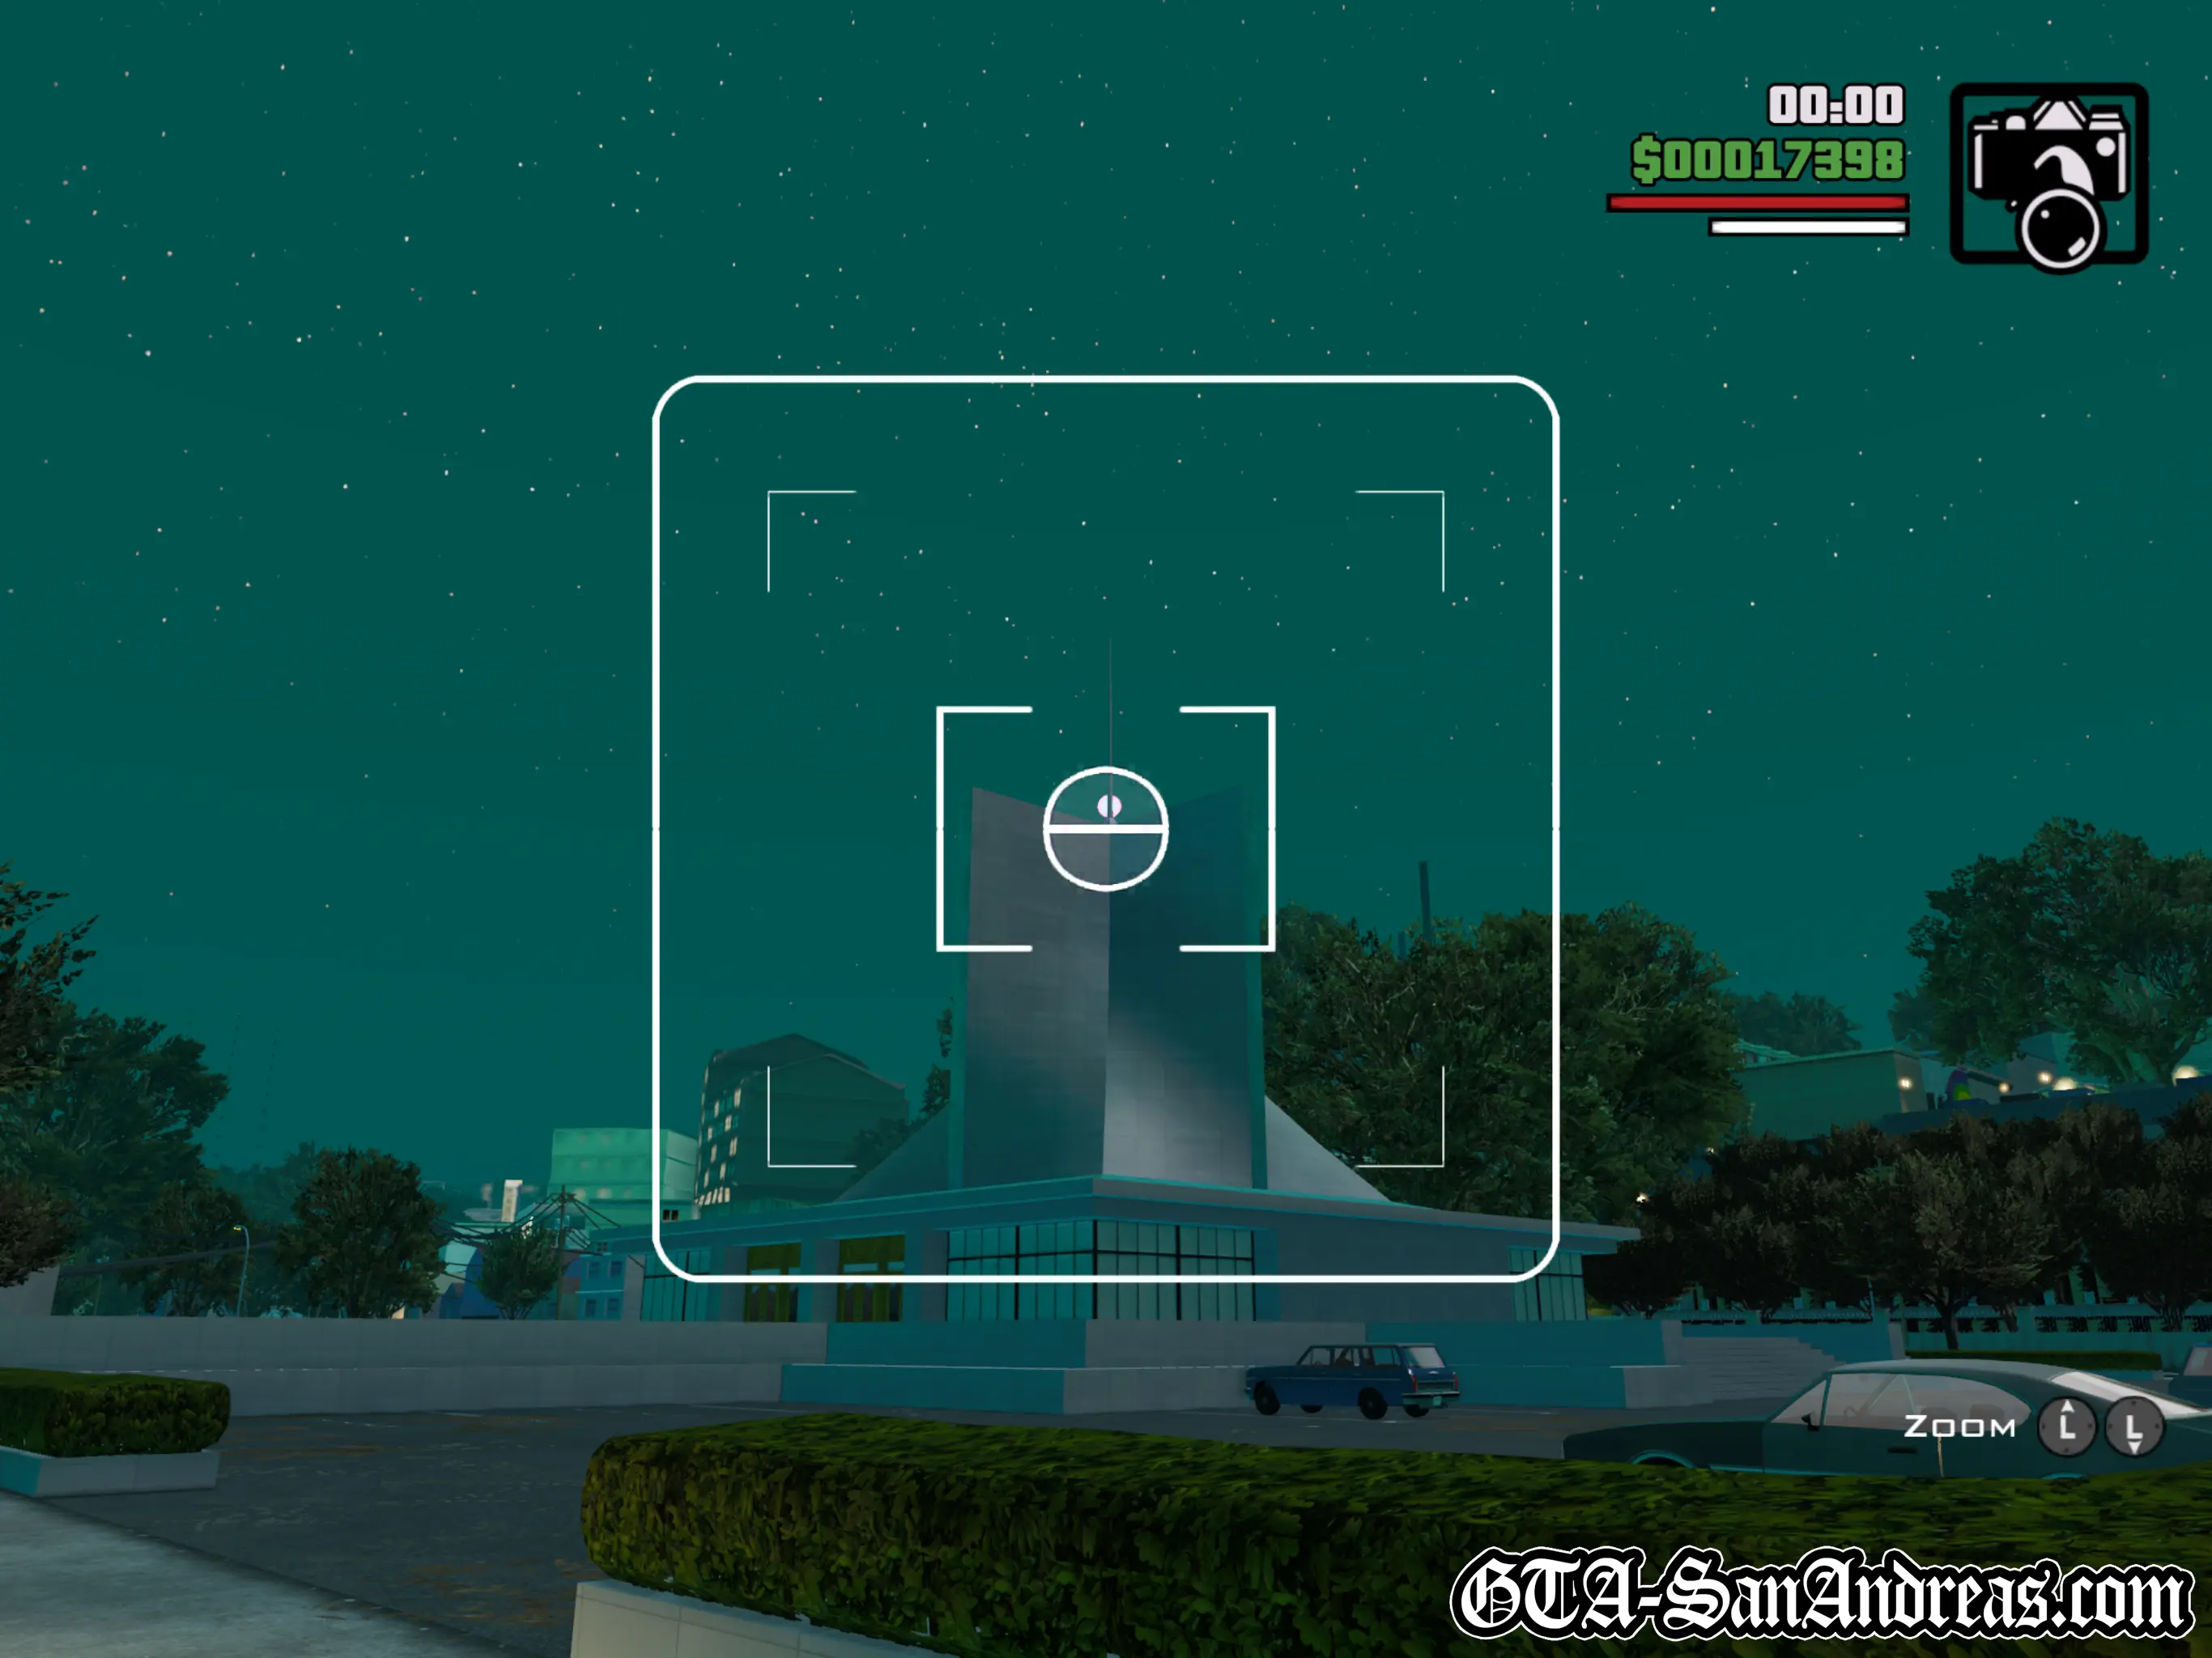
Snapshot #11
Location
Ocean Flats - The snapshot icon is at the top of a large cross-shaped building surrounded by parking lots.
Where To Stand
Pretty much anywhere inside the car park should be close enough to make it appear.
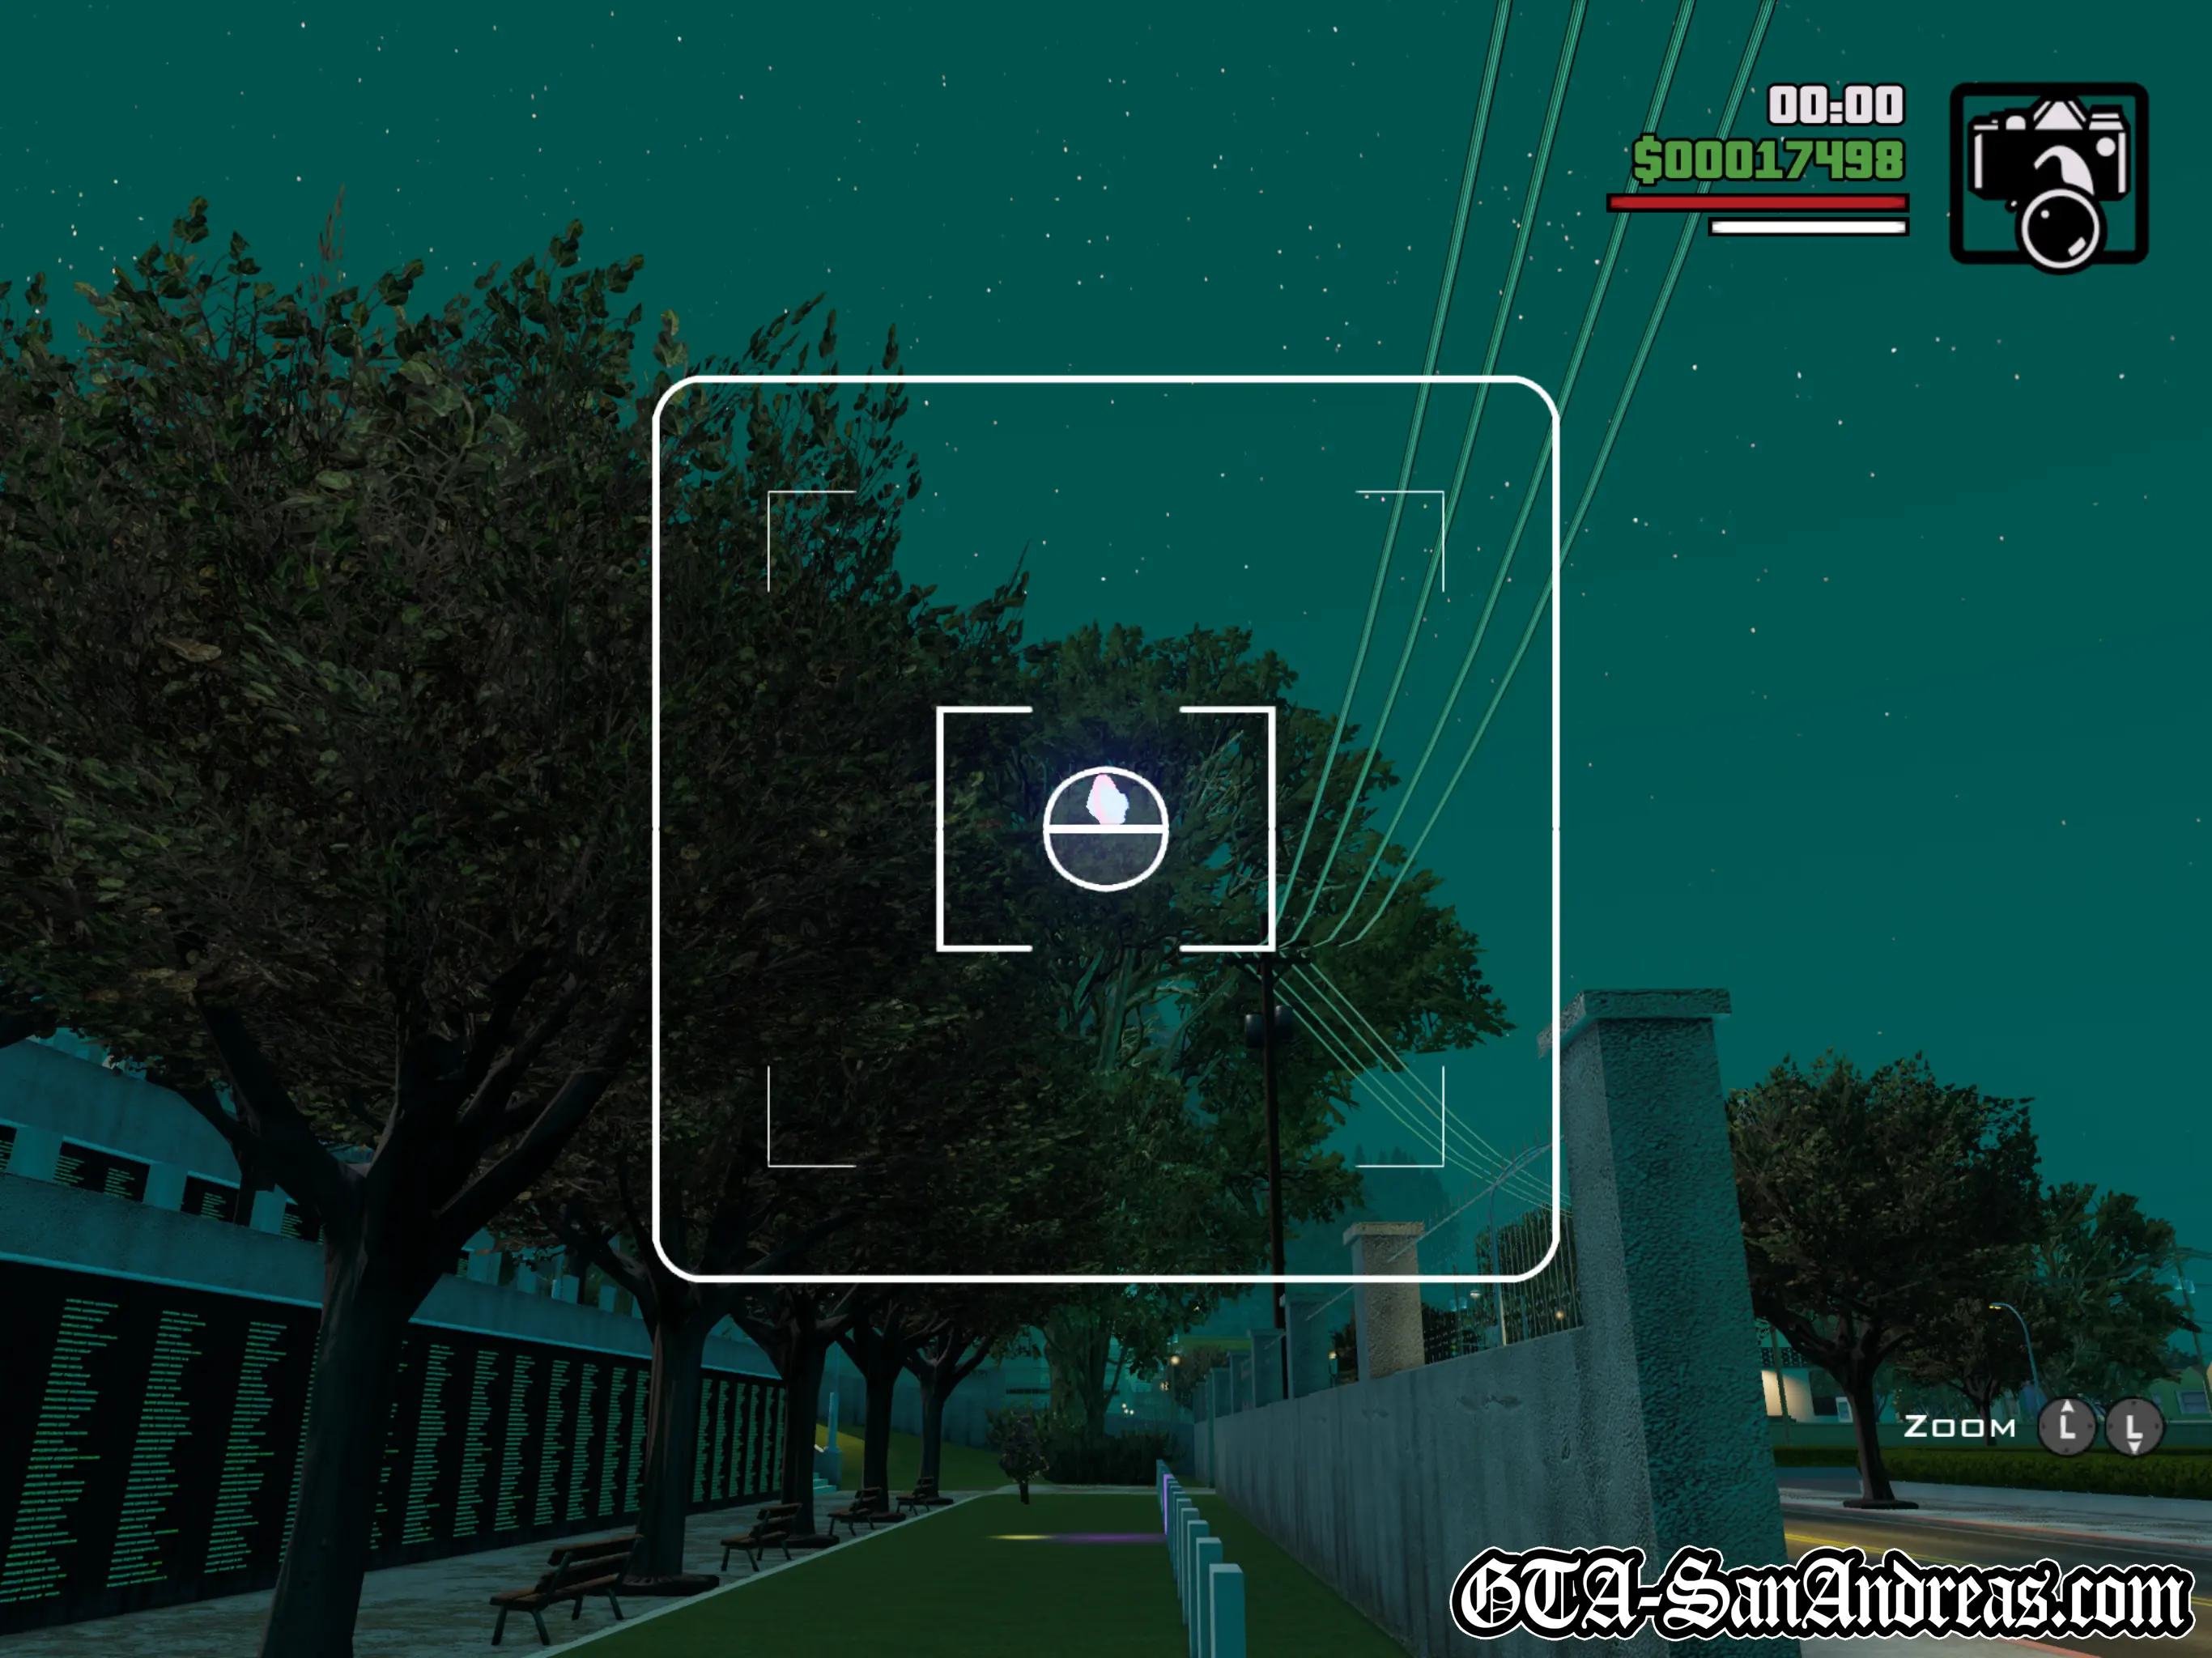
Snapshot #12
Location
Hashbury - To the East of the large building from before is a cemetery. The snapshot icon is floating up near the trees from the ground level. There are some flowers you can pick up here and the snapshot is right above them.
Where To Stand
Inside the cemetery or on the road outside. Anywhere nearby should make it appear.
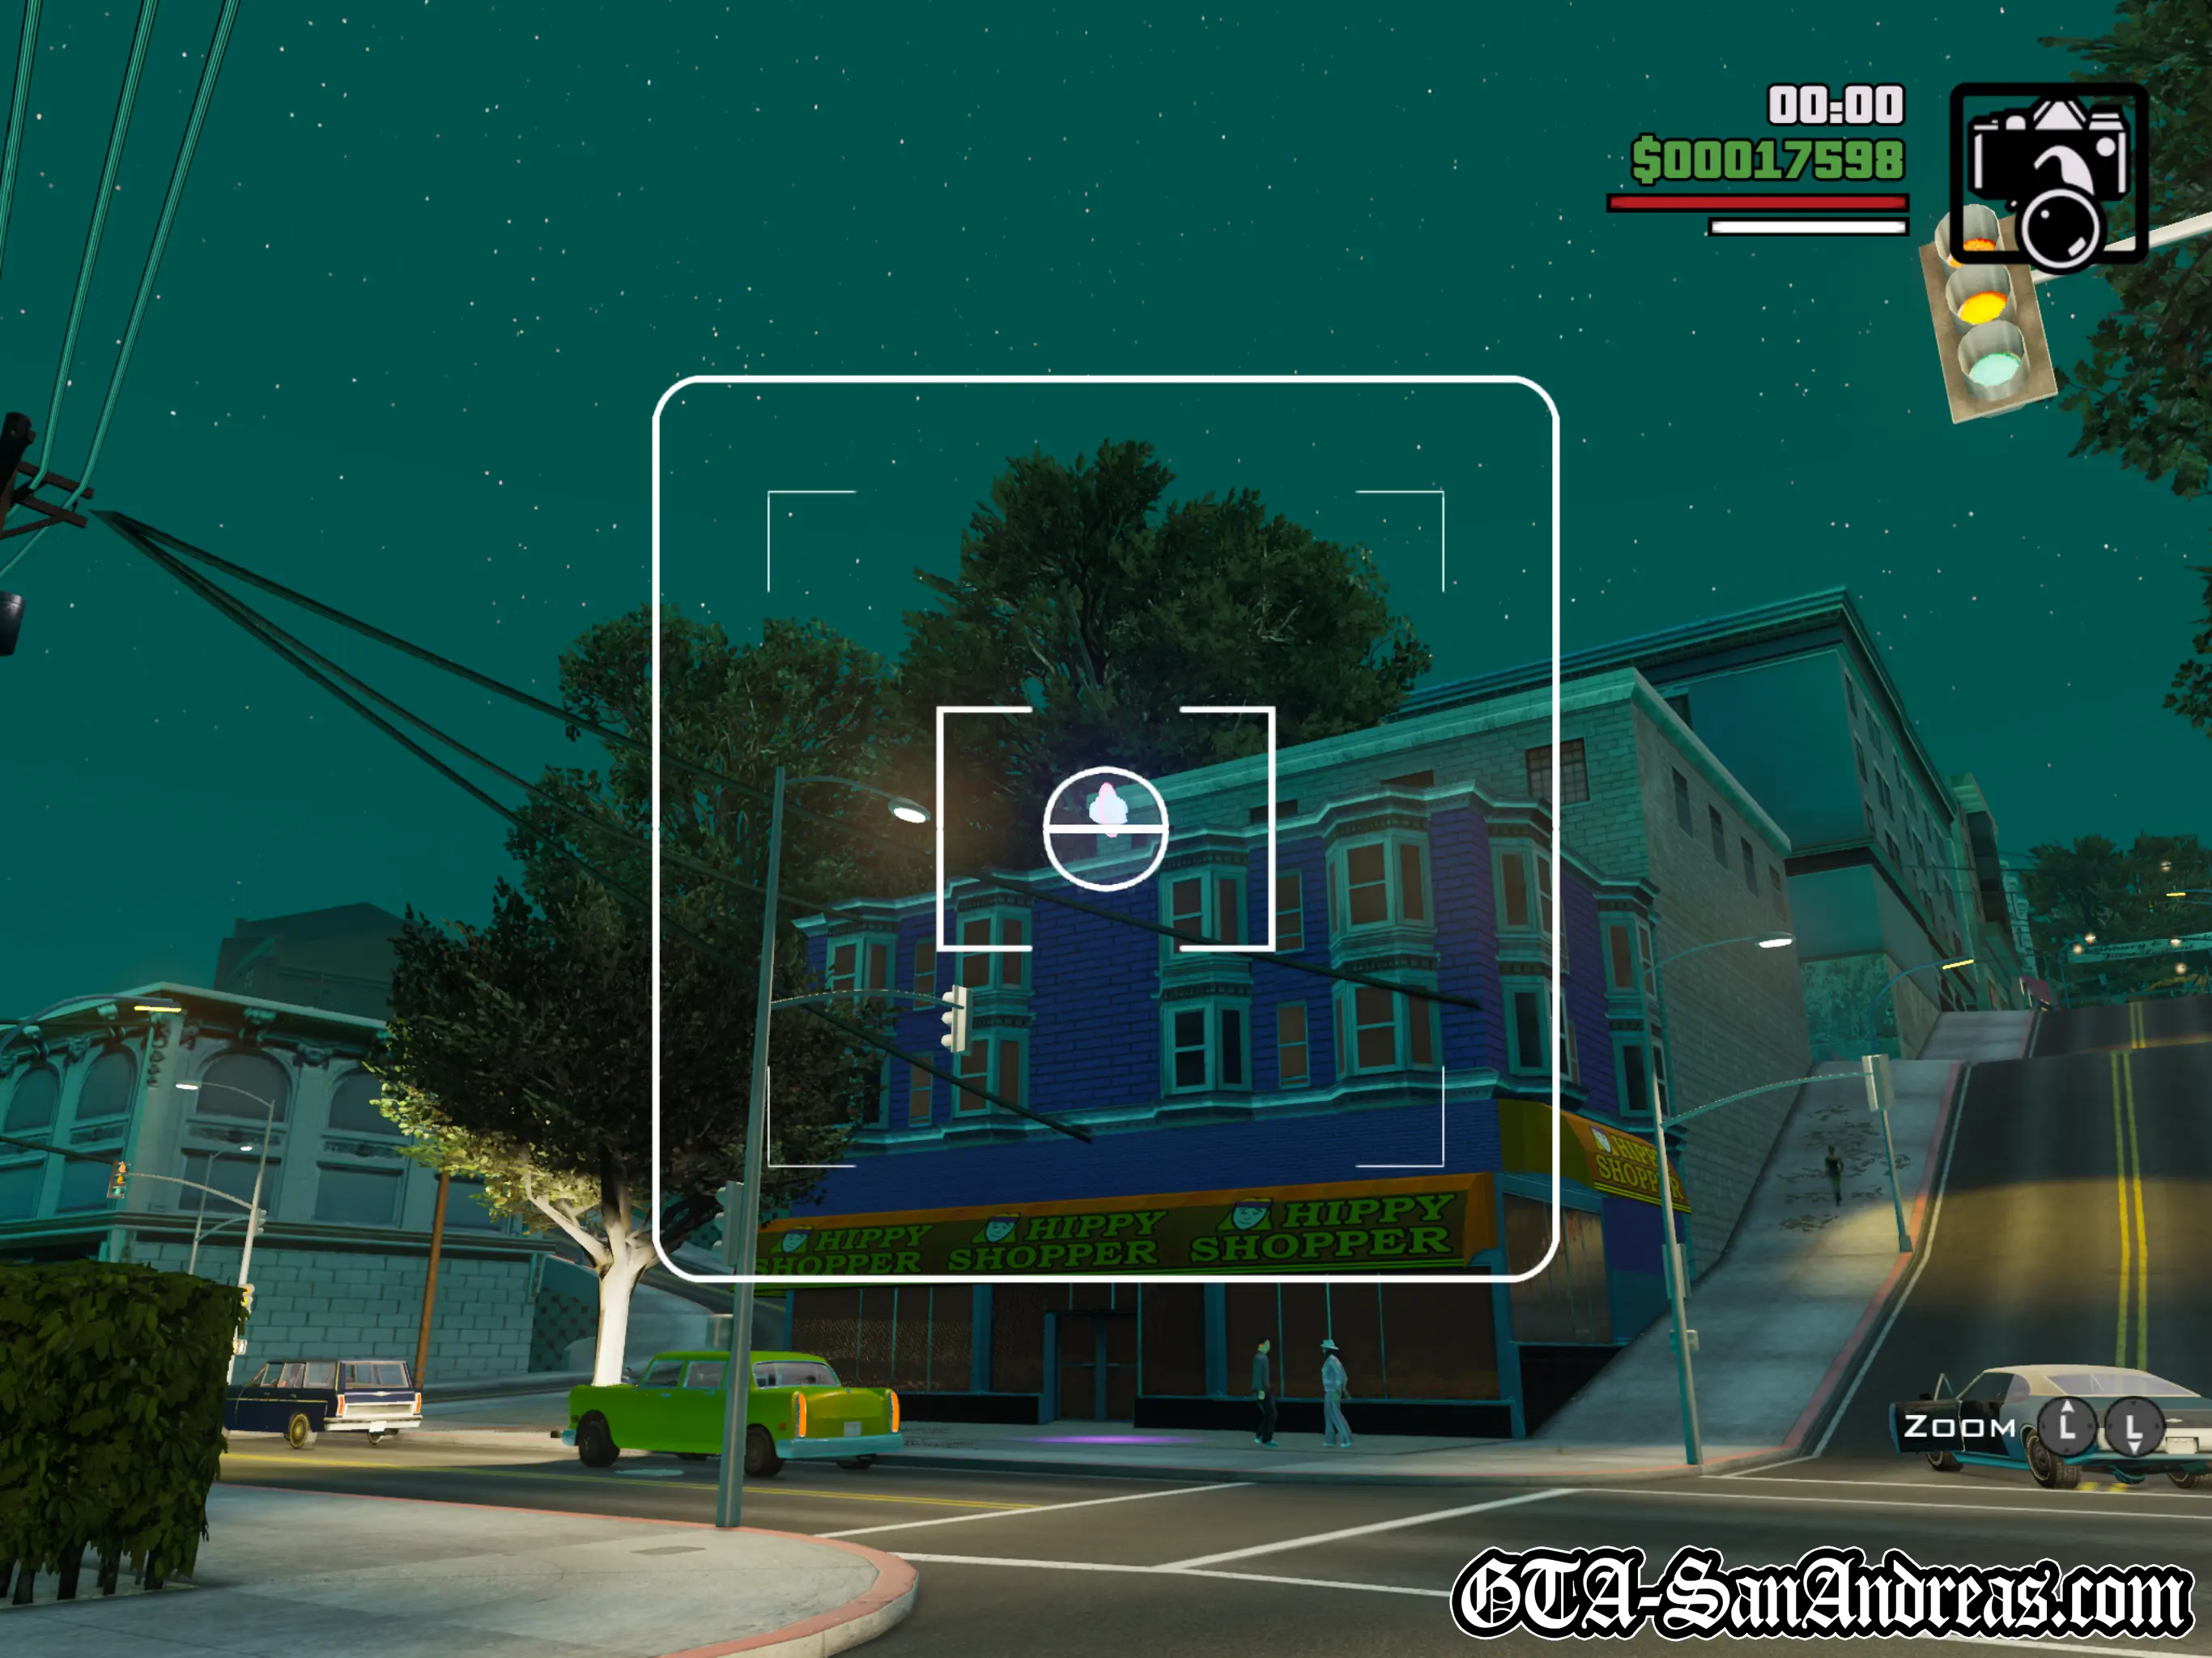
Snapshot #13
Location
Queens - Hovering in front of Hippy Shopper.
Where To Stand
Just stand on the road in front of the shop and you'll see this one easily.
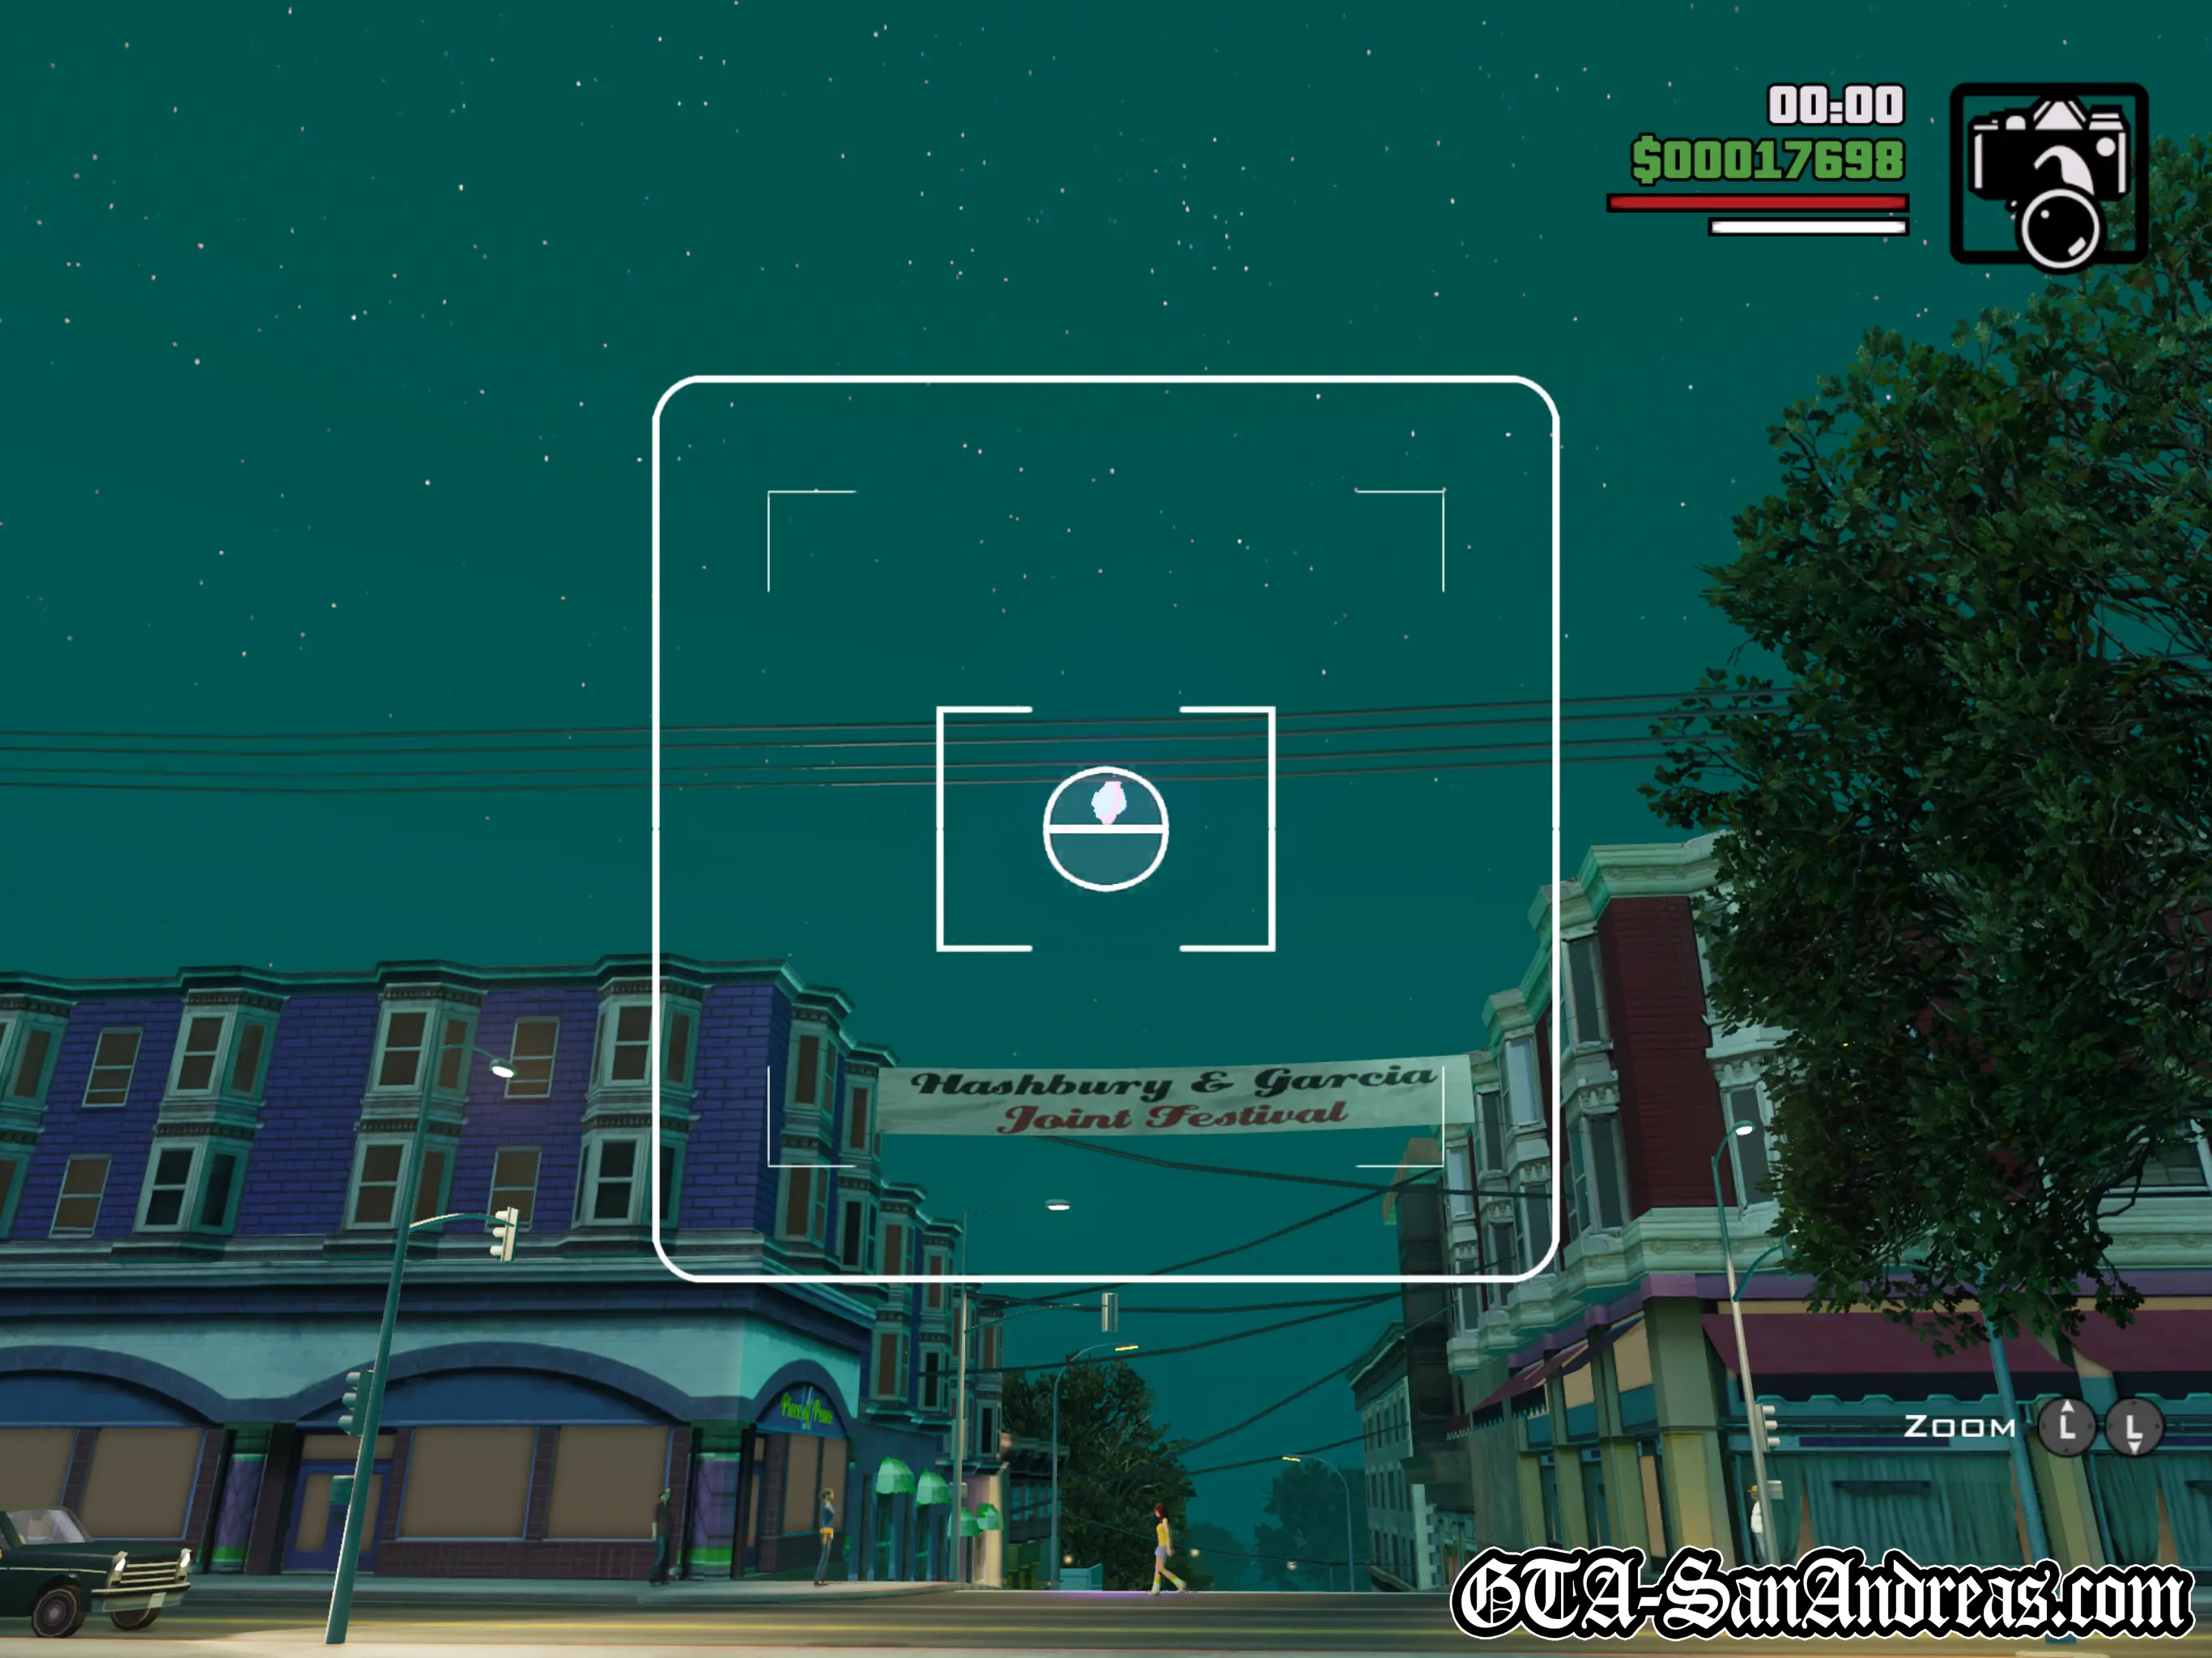
Snapshot #14
Location
Garcia - Hovering above the Hashbury & Garcia Joint Festival banner which crosses the road between two buildings.
Where To Stand
Stand on the grass or pavement to the East of the banner and you'll be able to see it.
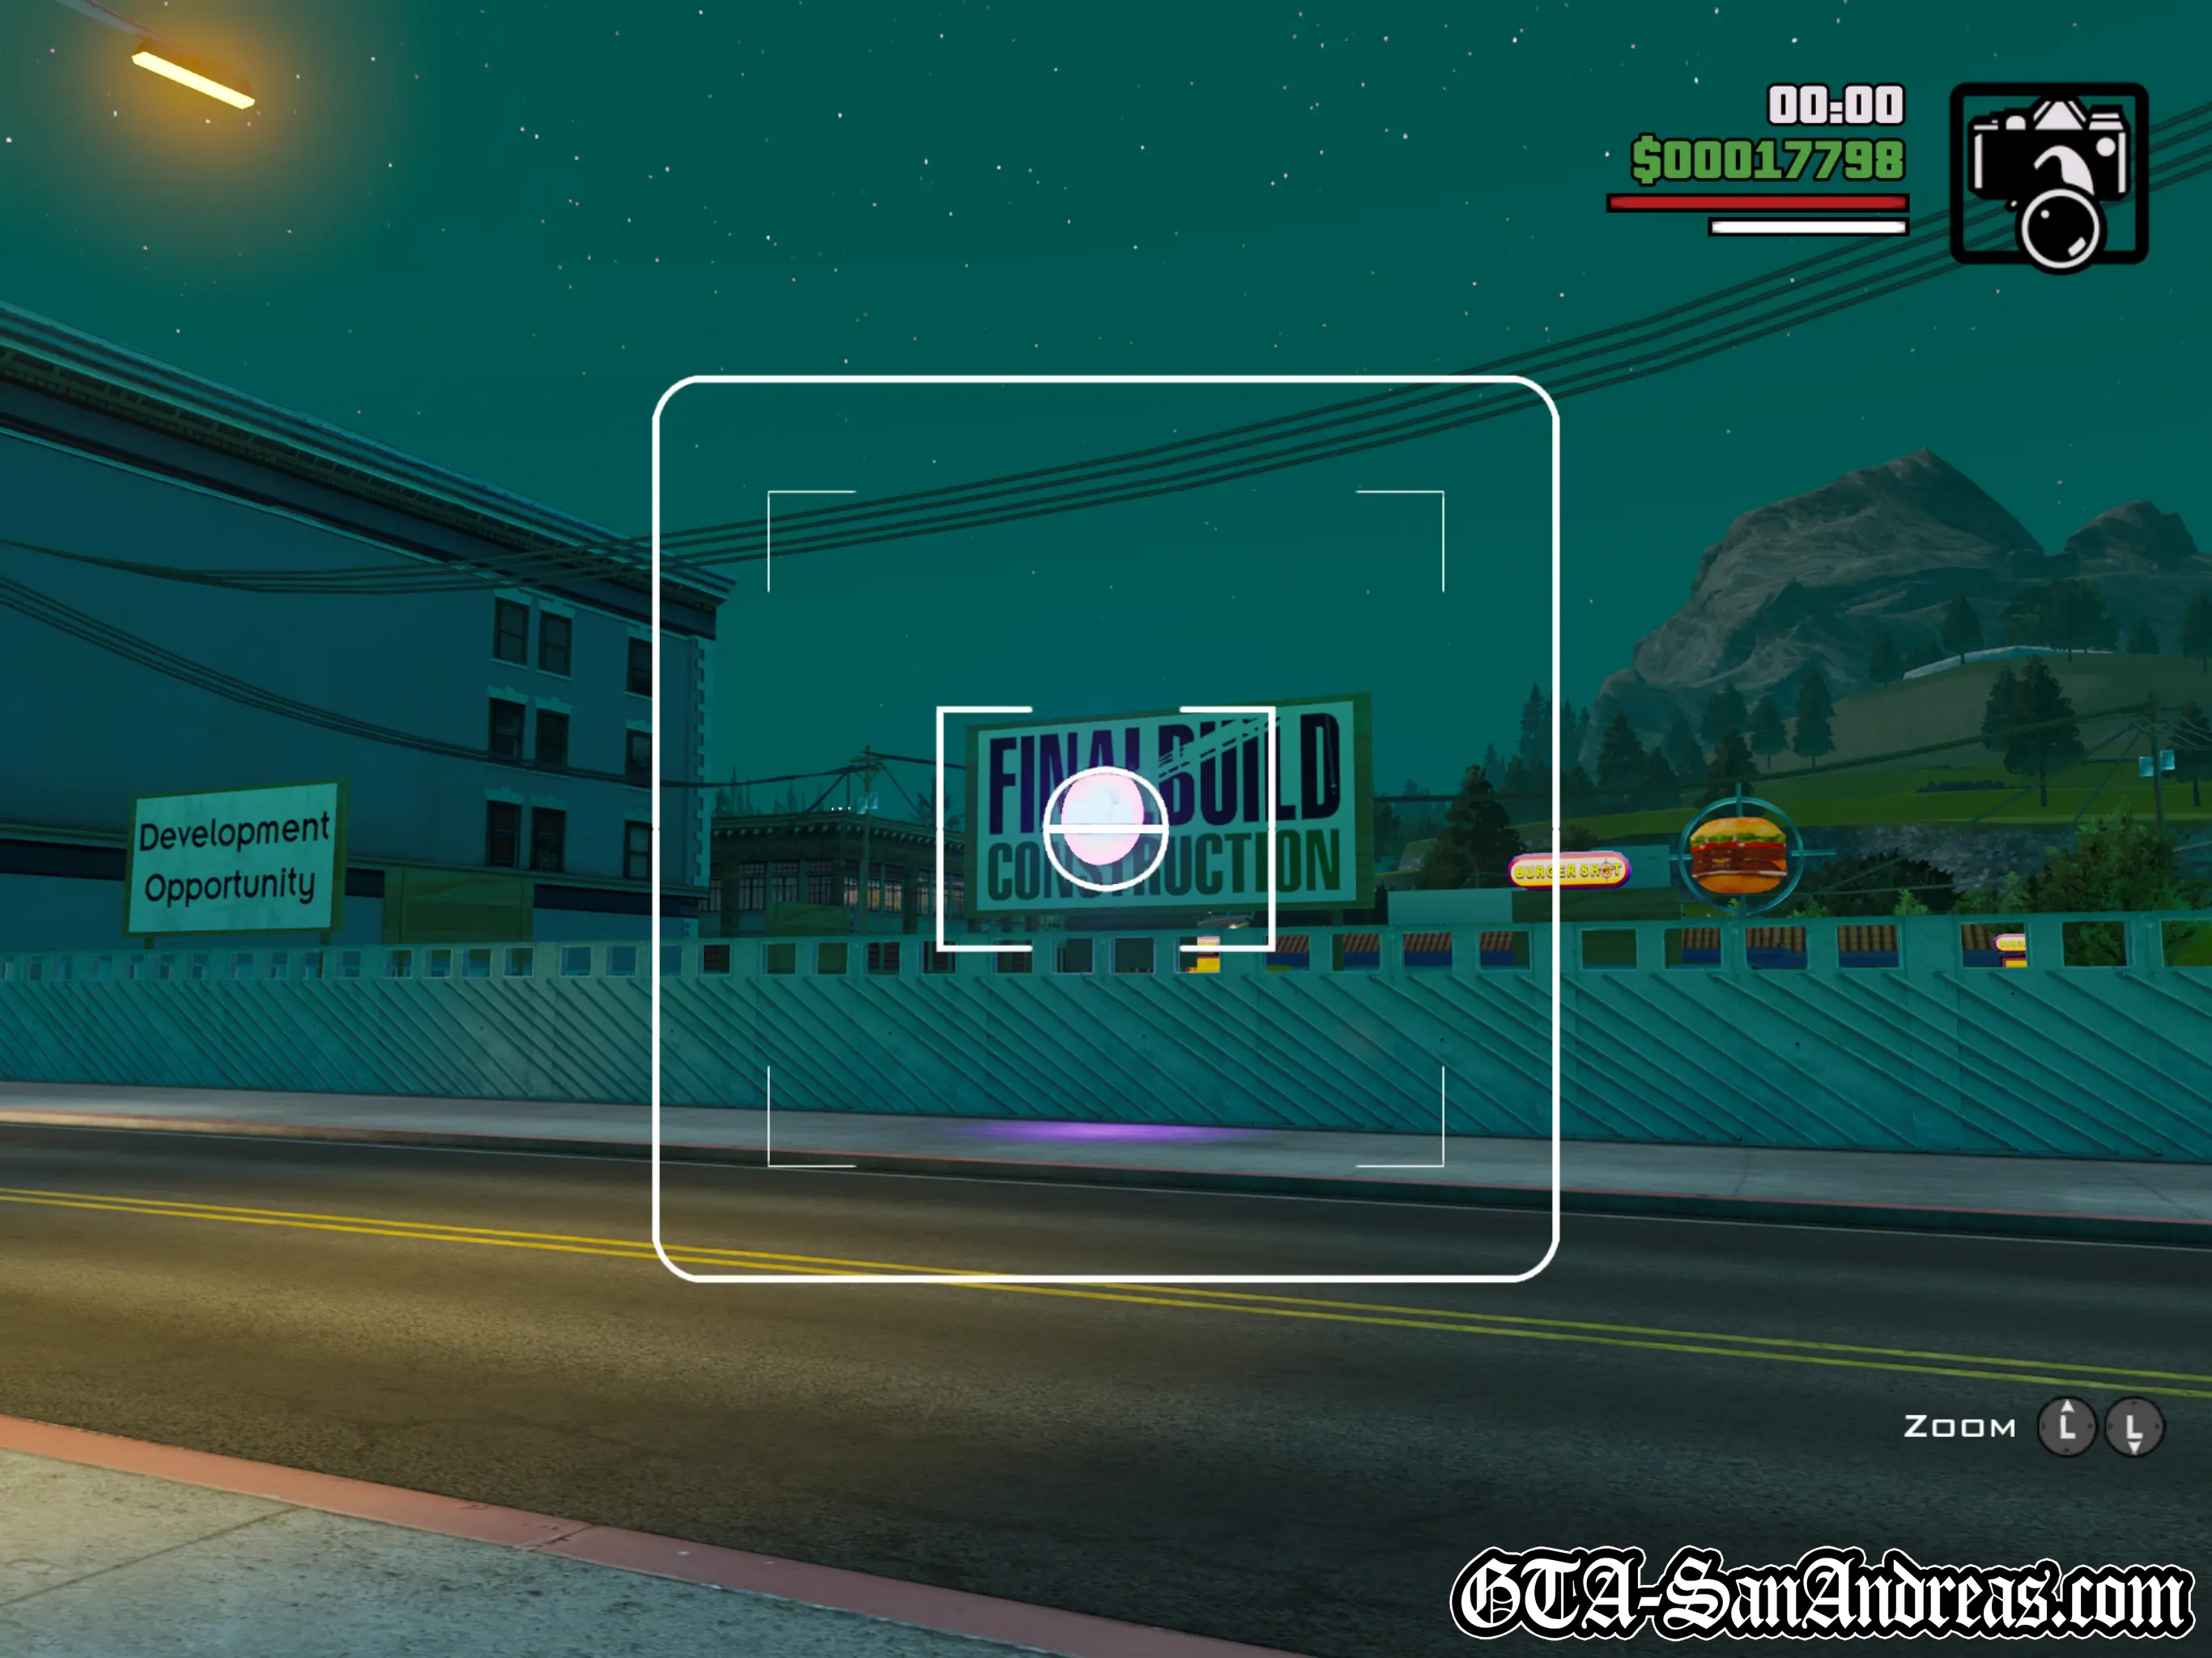
Snapshot #15
Location
Garcia - Right in front of the Final Build Construction sign next to a building site behind Burger Shot. It's practically at ground level so you can't miss it.
Where To Stand
Stand on the road right in front of the Final Build Construction sign.
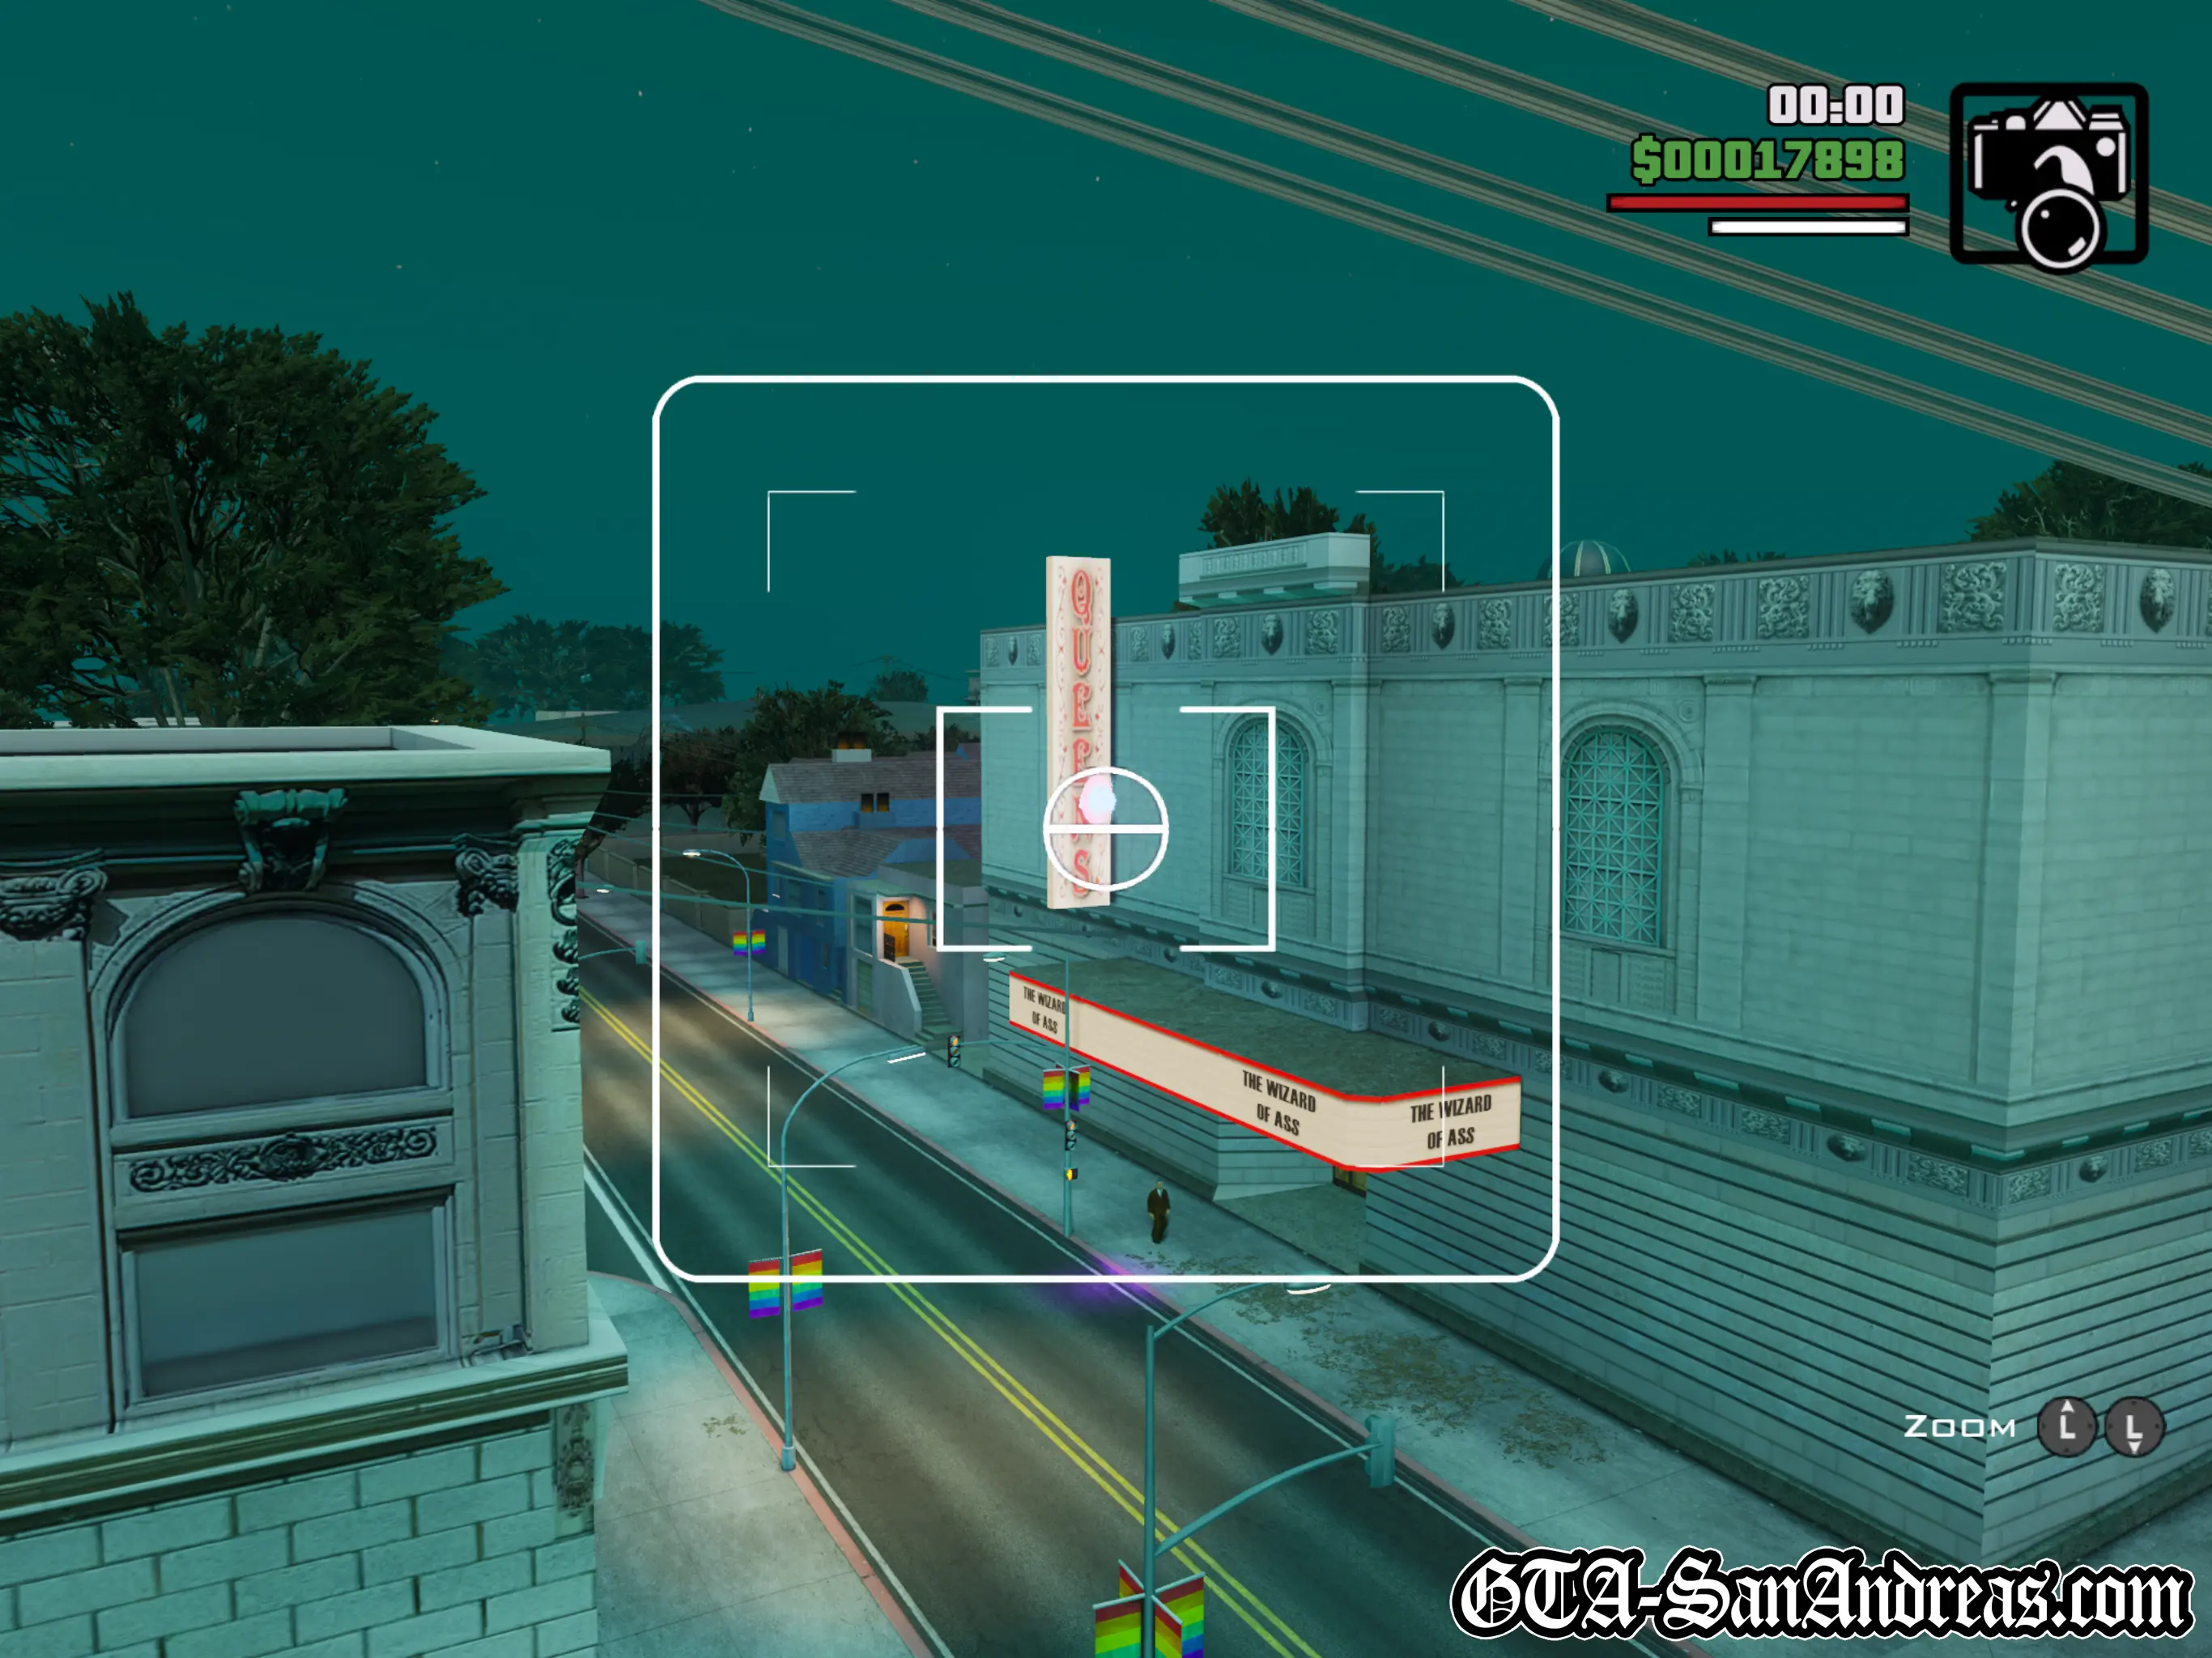
Snapshot #16
Location
Queens - Floating mid-way up at the front of Queen's cinema, above the sign for The Wizard of Ass.
Where To Stand
Anywhere on the road in front of the cinema. I took the screenshot from the curvy road nearby.
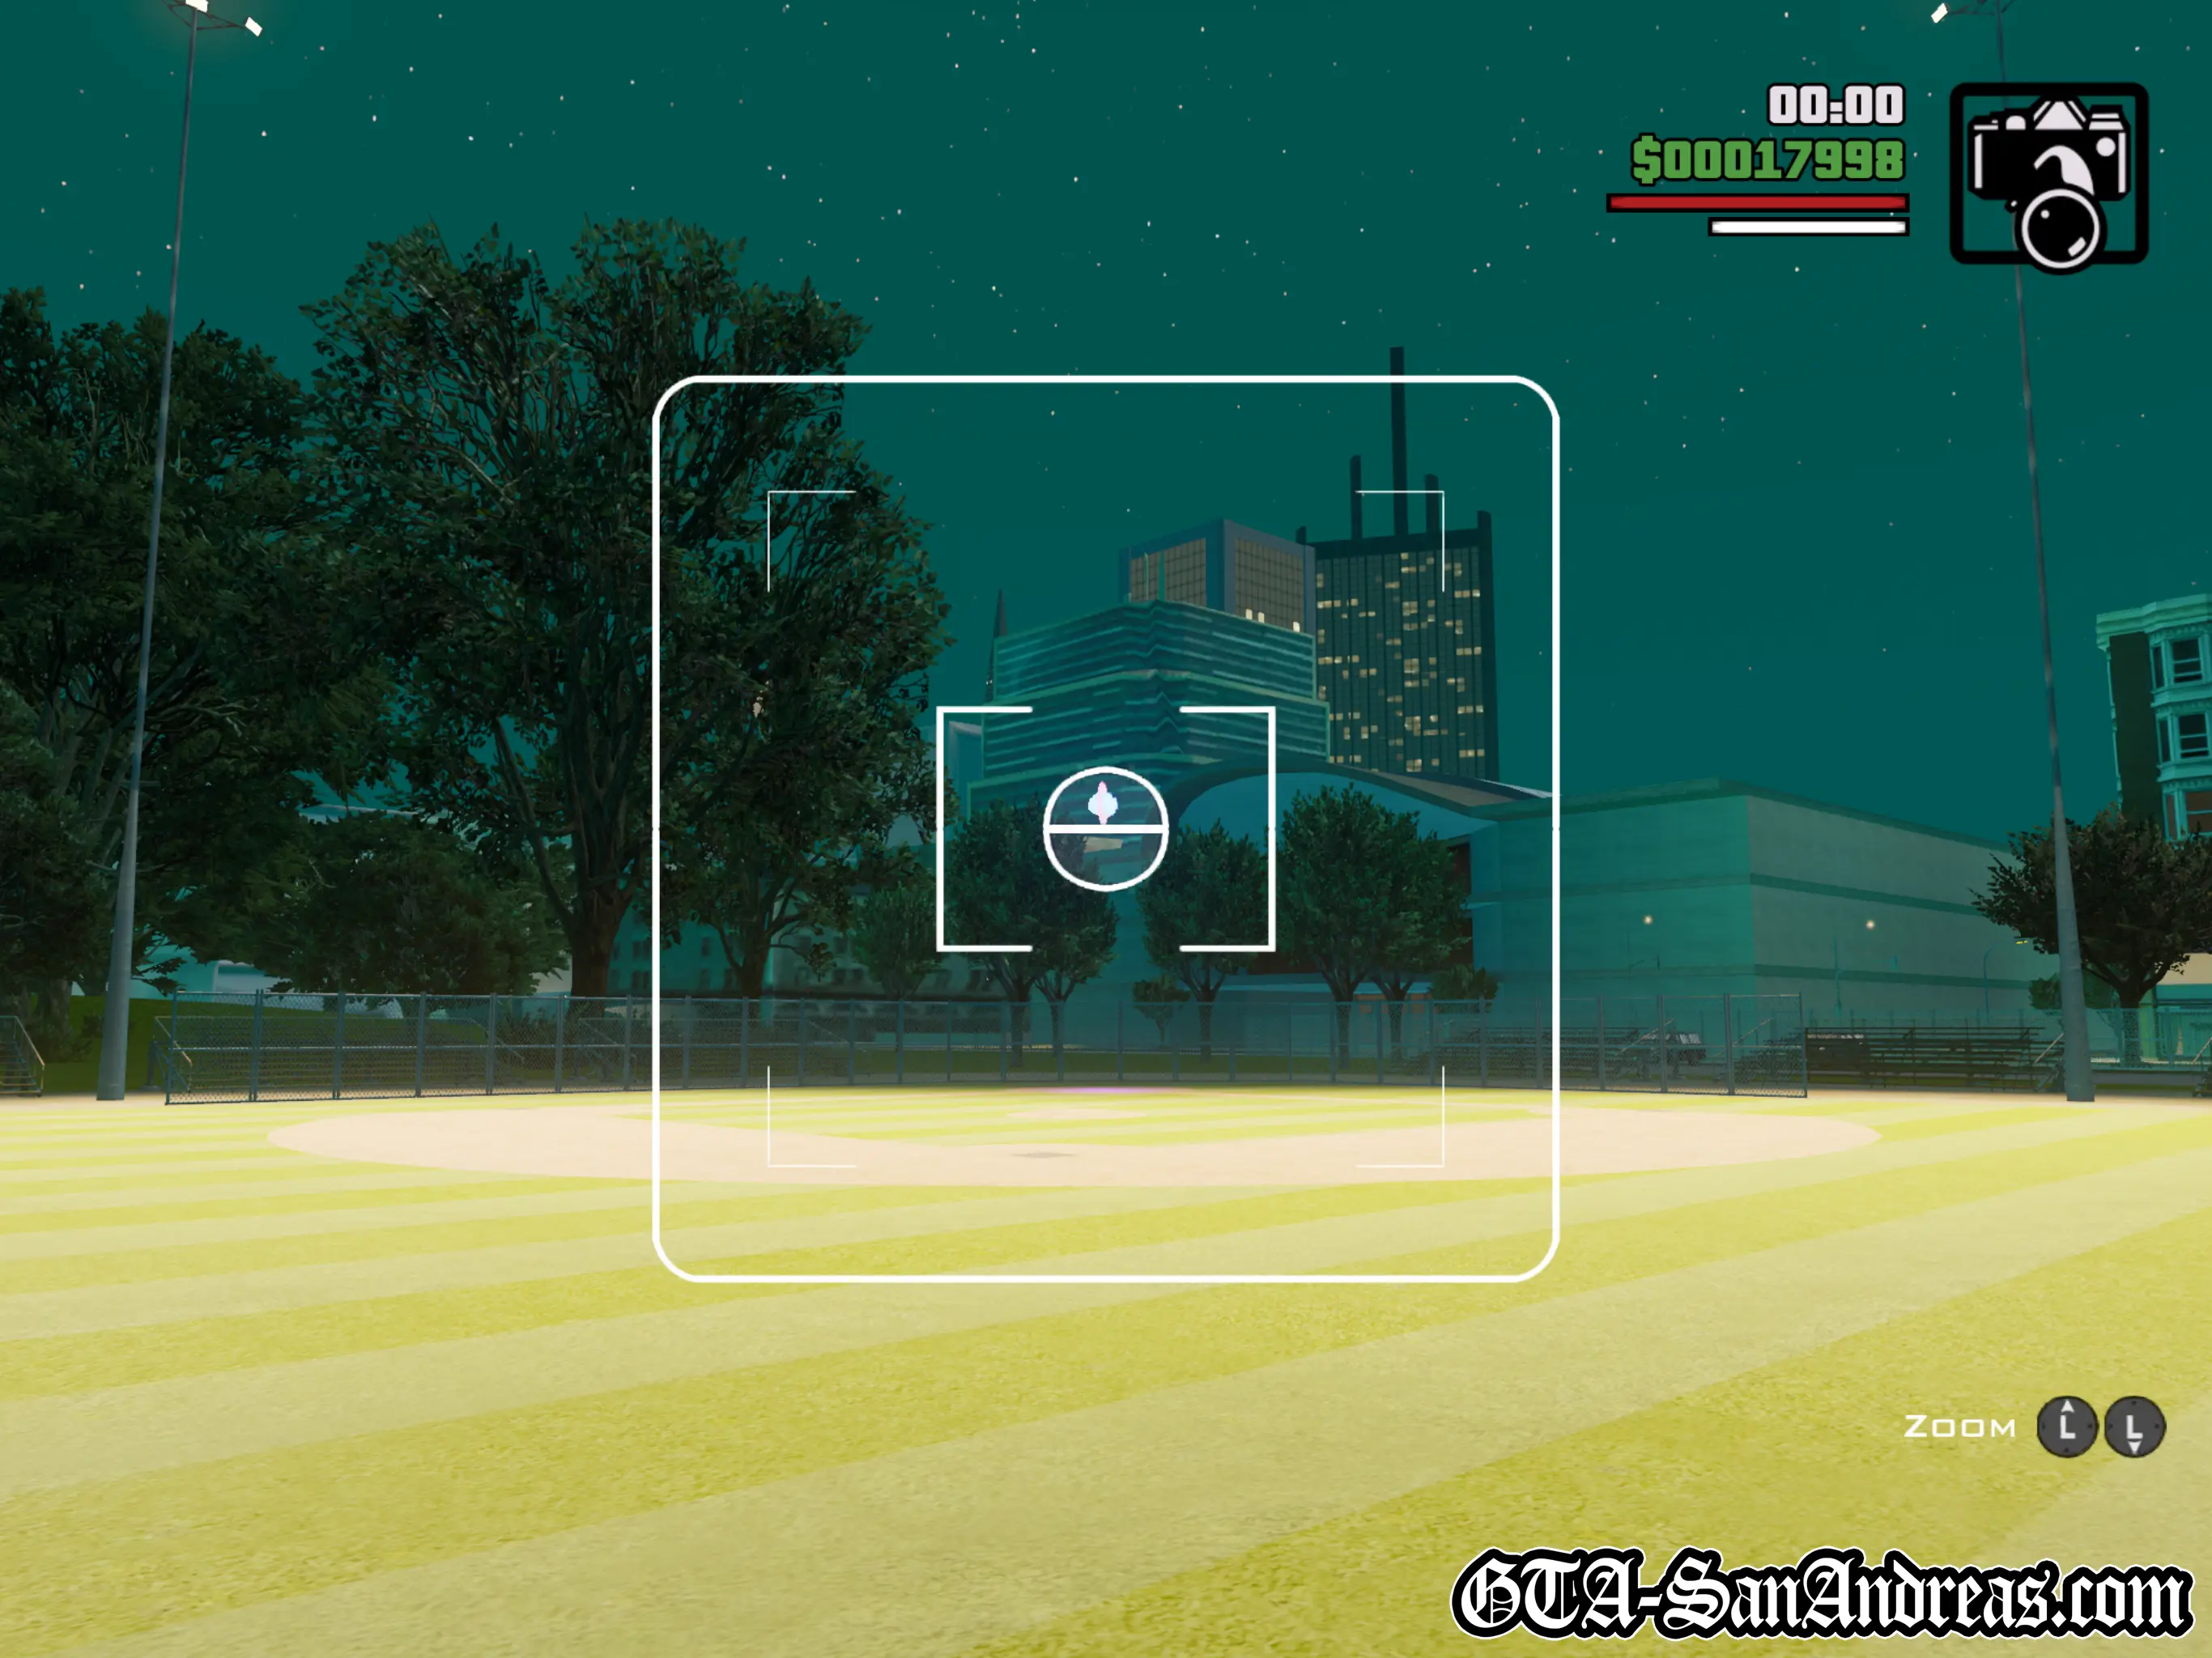
Snapshot #17
Location
Garcia - Hovering over the bleachers at the Northern-most baseball field.
Where To Stand
Stand on the grass of the baseball field, or the road nearby and you'll see this one quite easily.
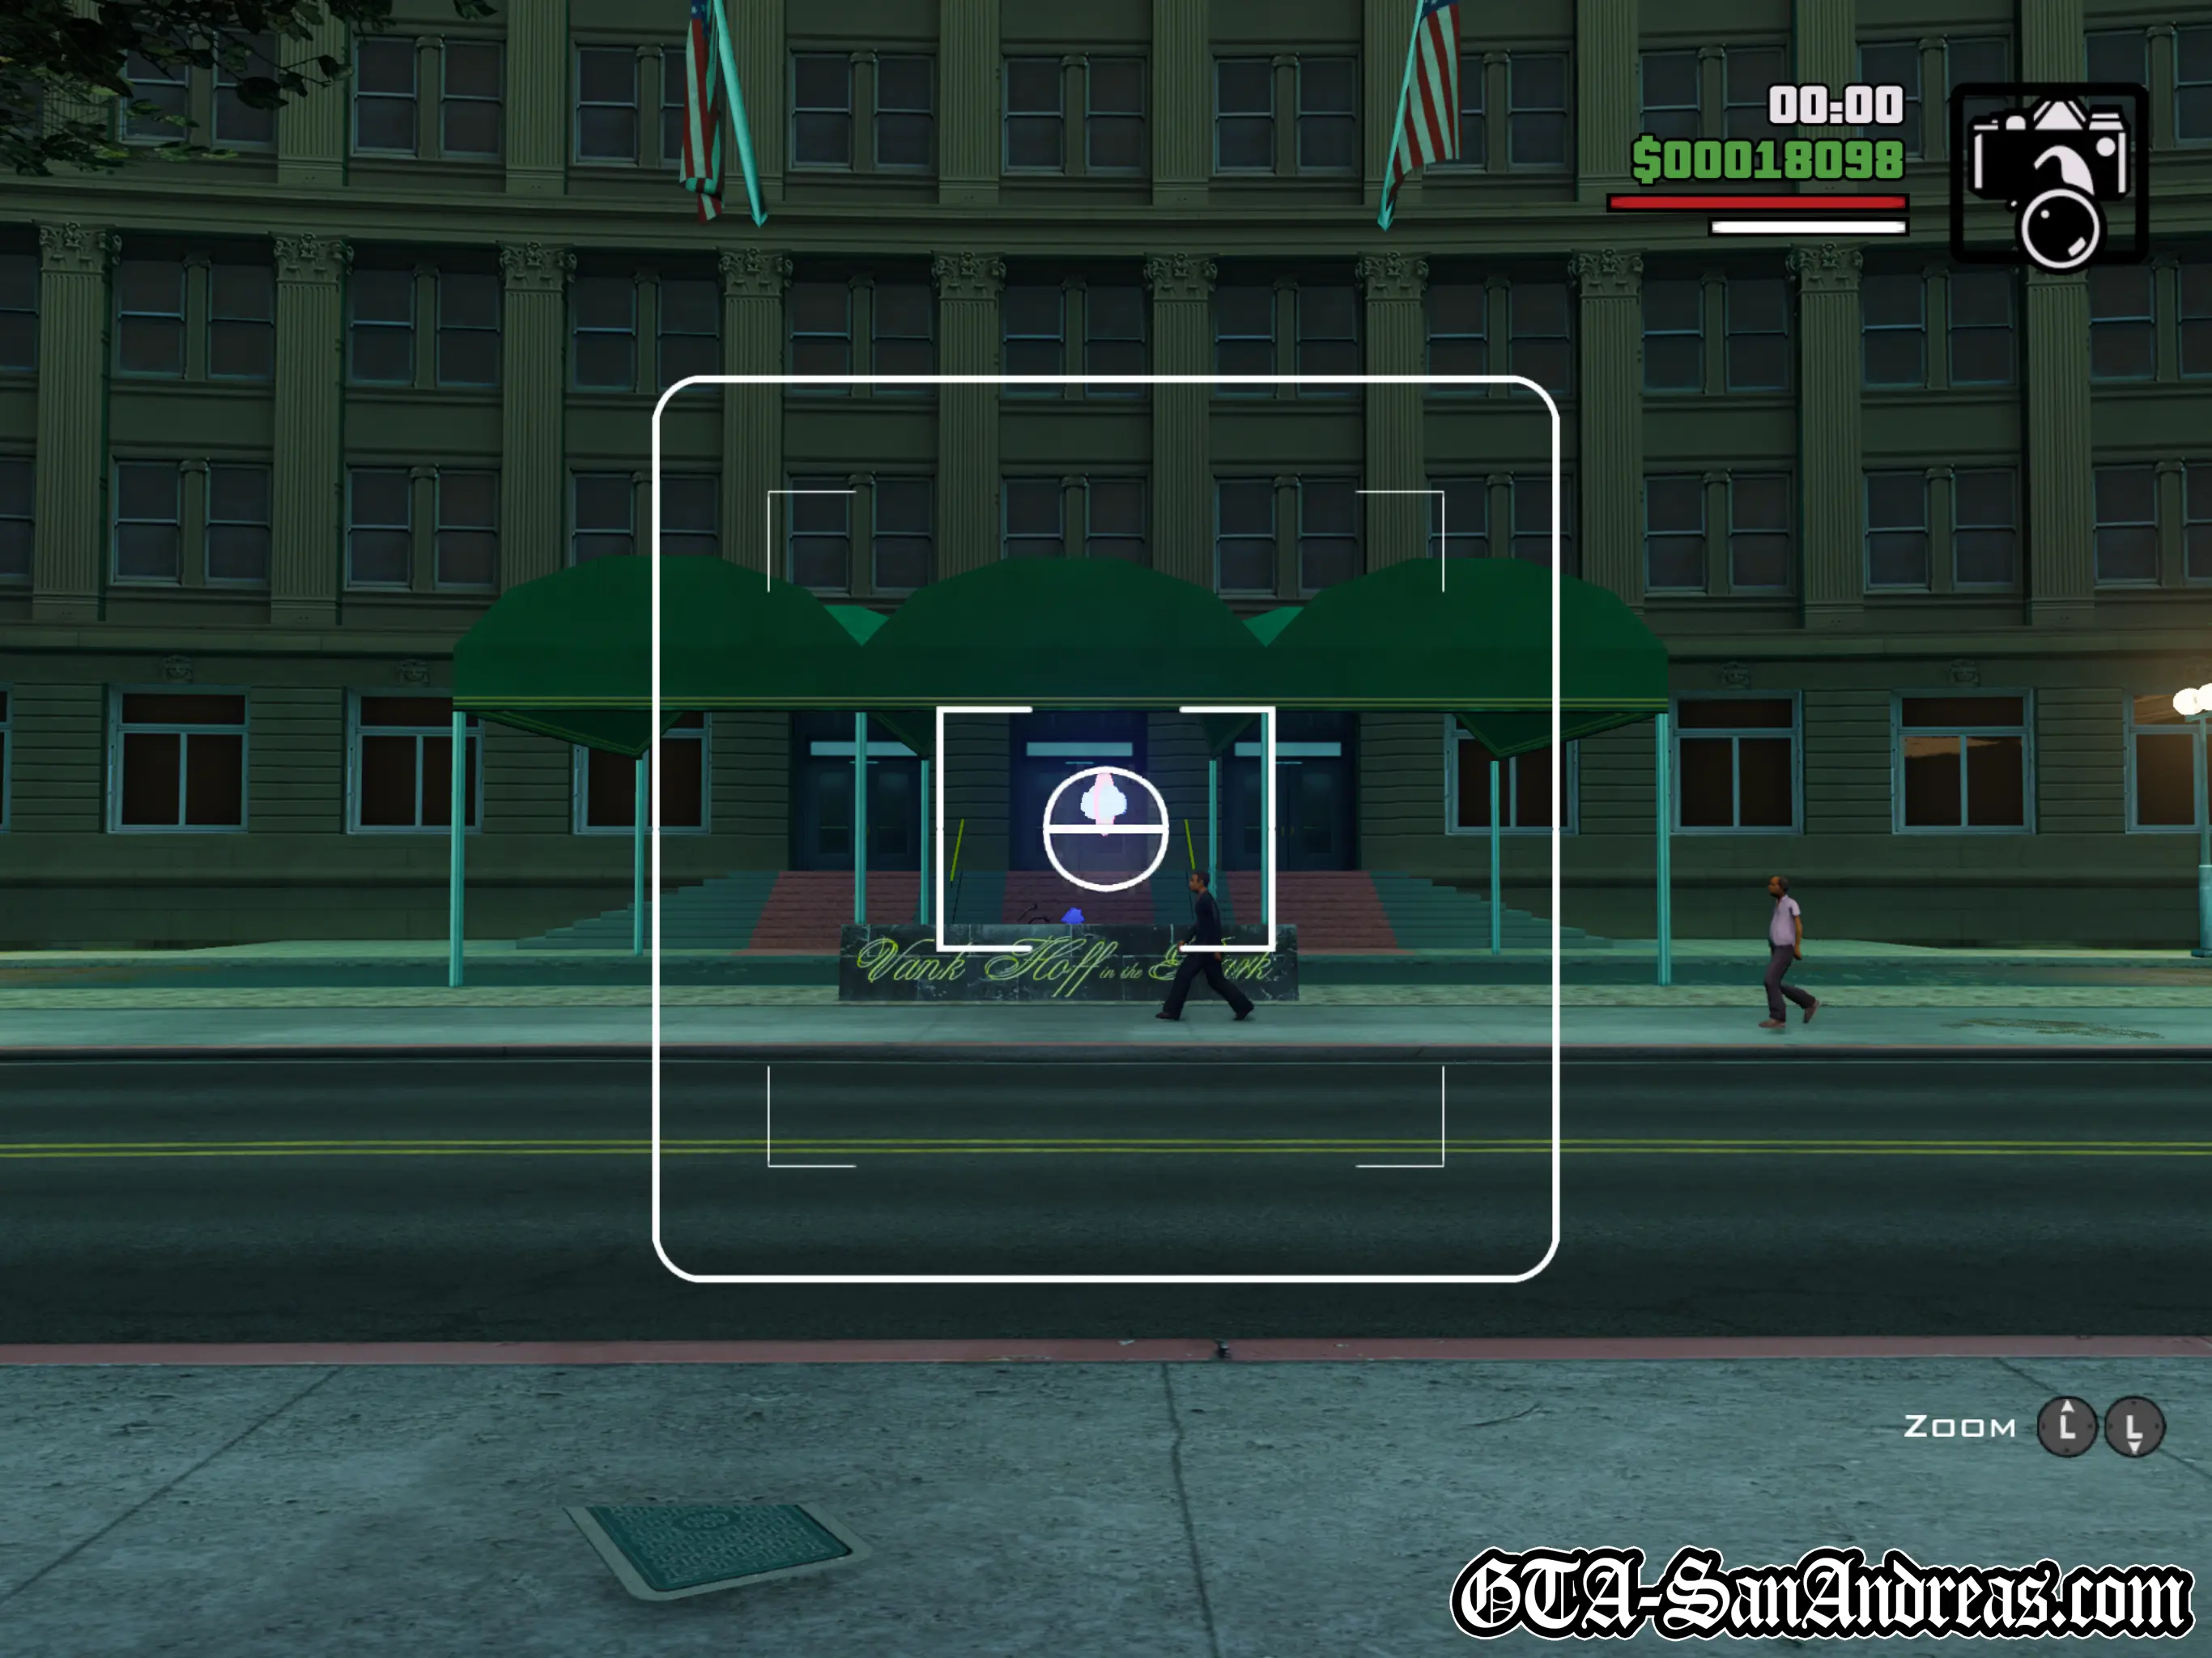
Snapshot #18
Location
Queens - Ground level, right in front of the Vank Hoff hotel sign.
Where To Stand
Anywhere on the road nearby.
Snapshot #19
Location
Queens - Behind the Vank Hoff hotel, floating mid-way up the building.
Where To Stand
On the road behind the hotel. I went down to the car park for a better shot, but it'll appear as long as you can see the back of the building.

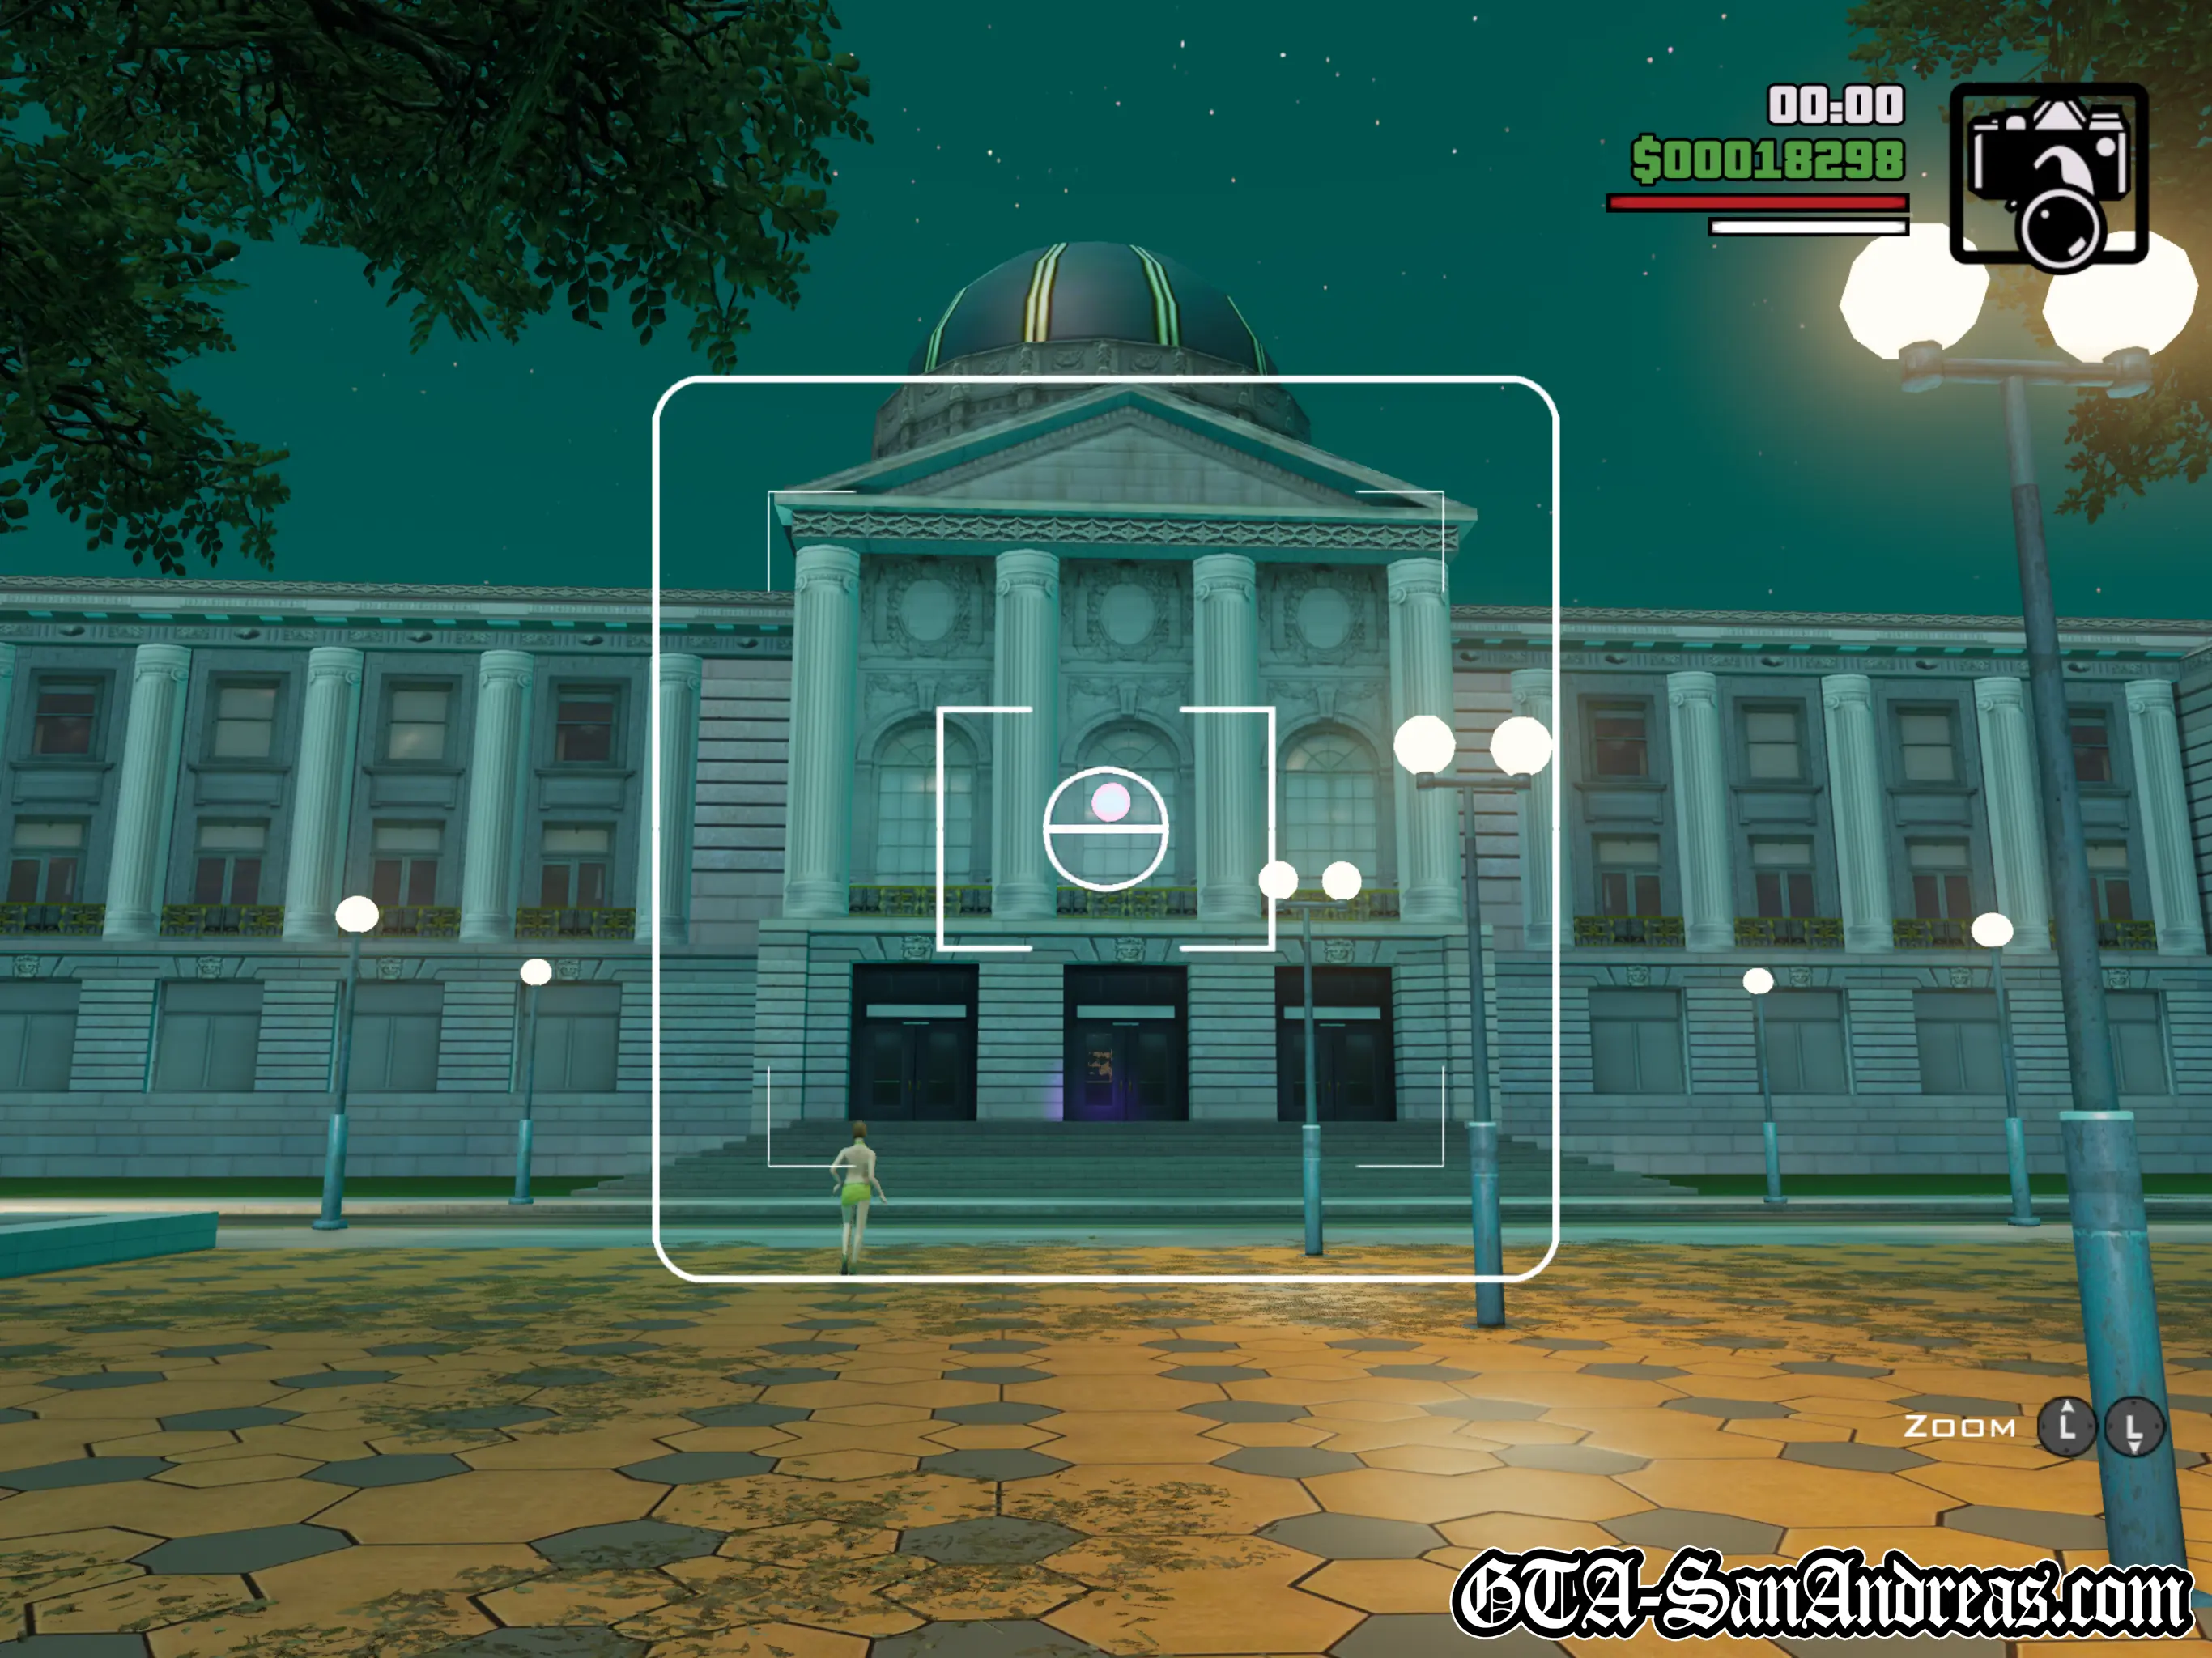
Snapshot #20
Location
City Hall - Floating in front of the city hall, East side.
Where To Stand
Stand in the pedestrianised area with fancy streetlights and you can easily see this from ground level.
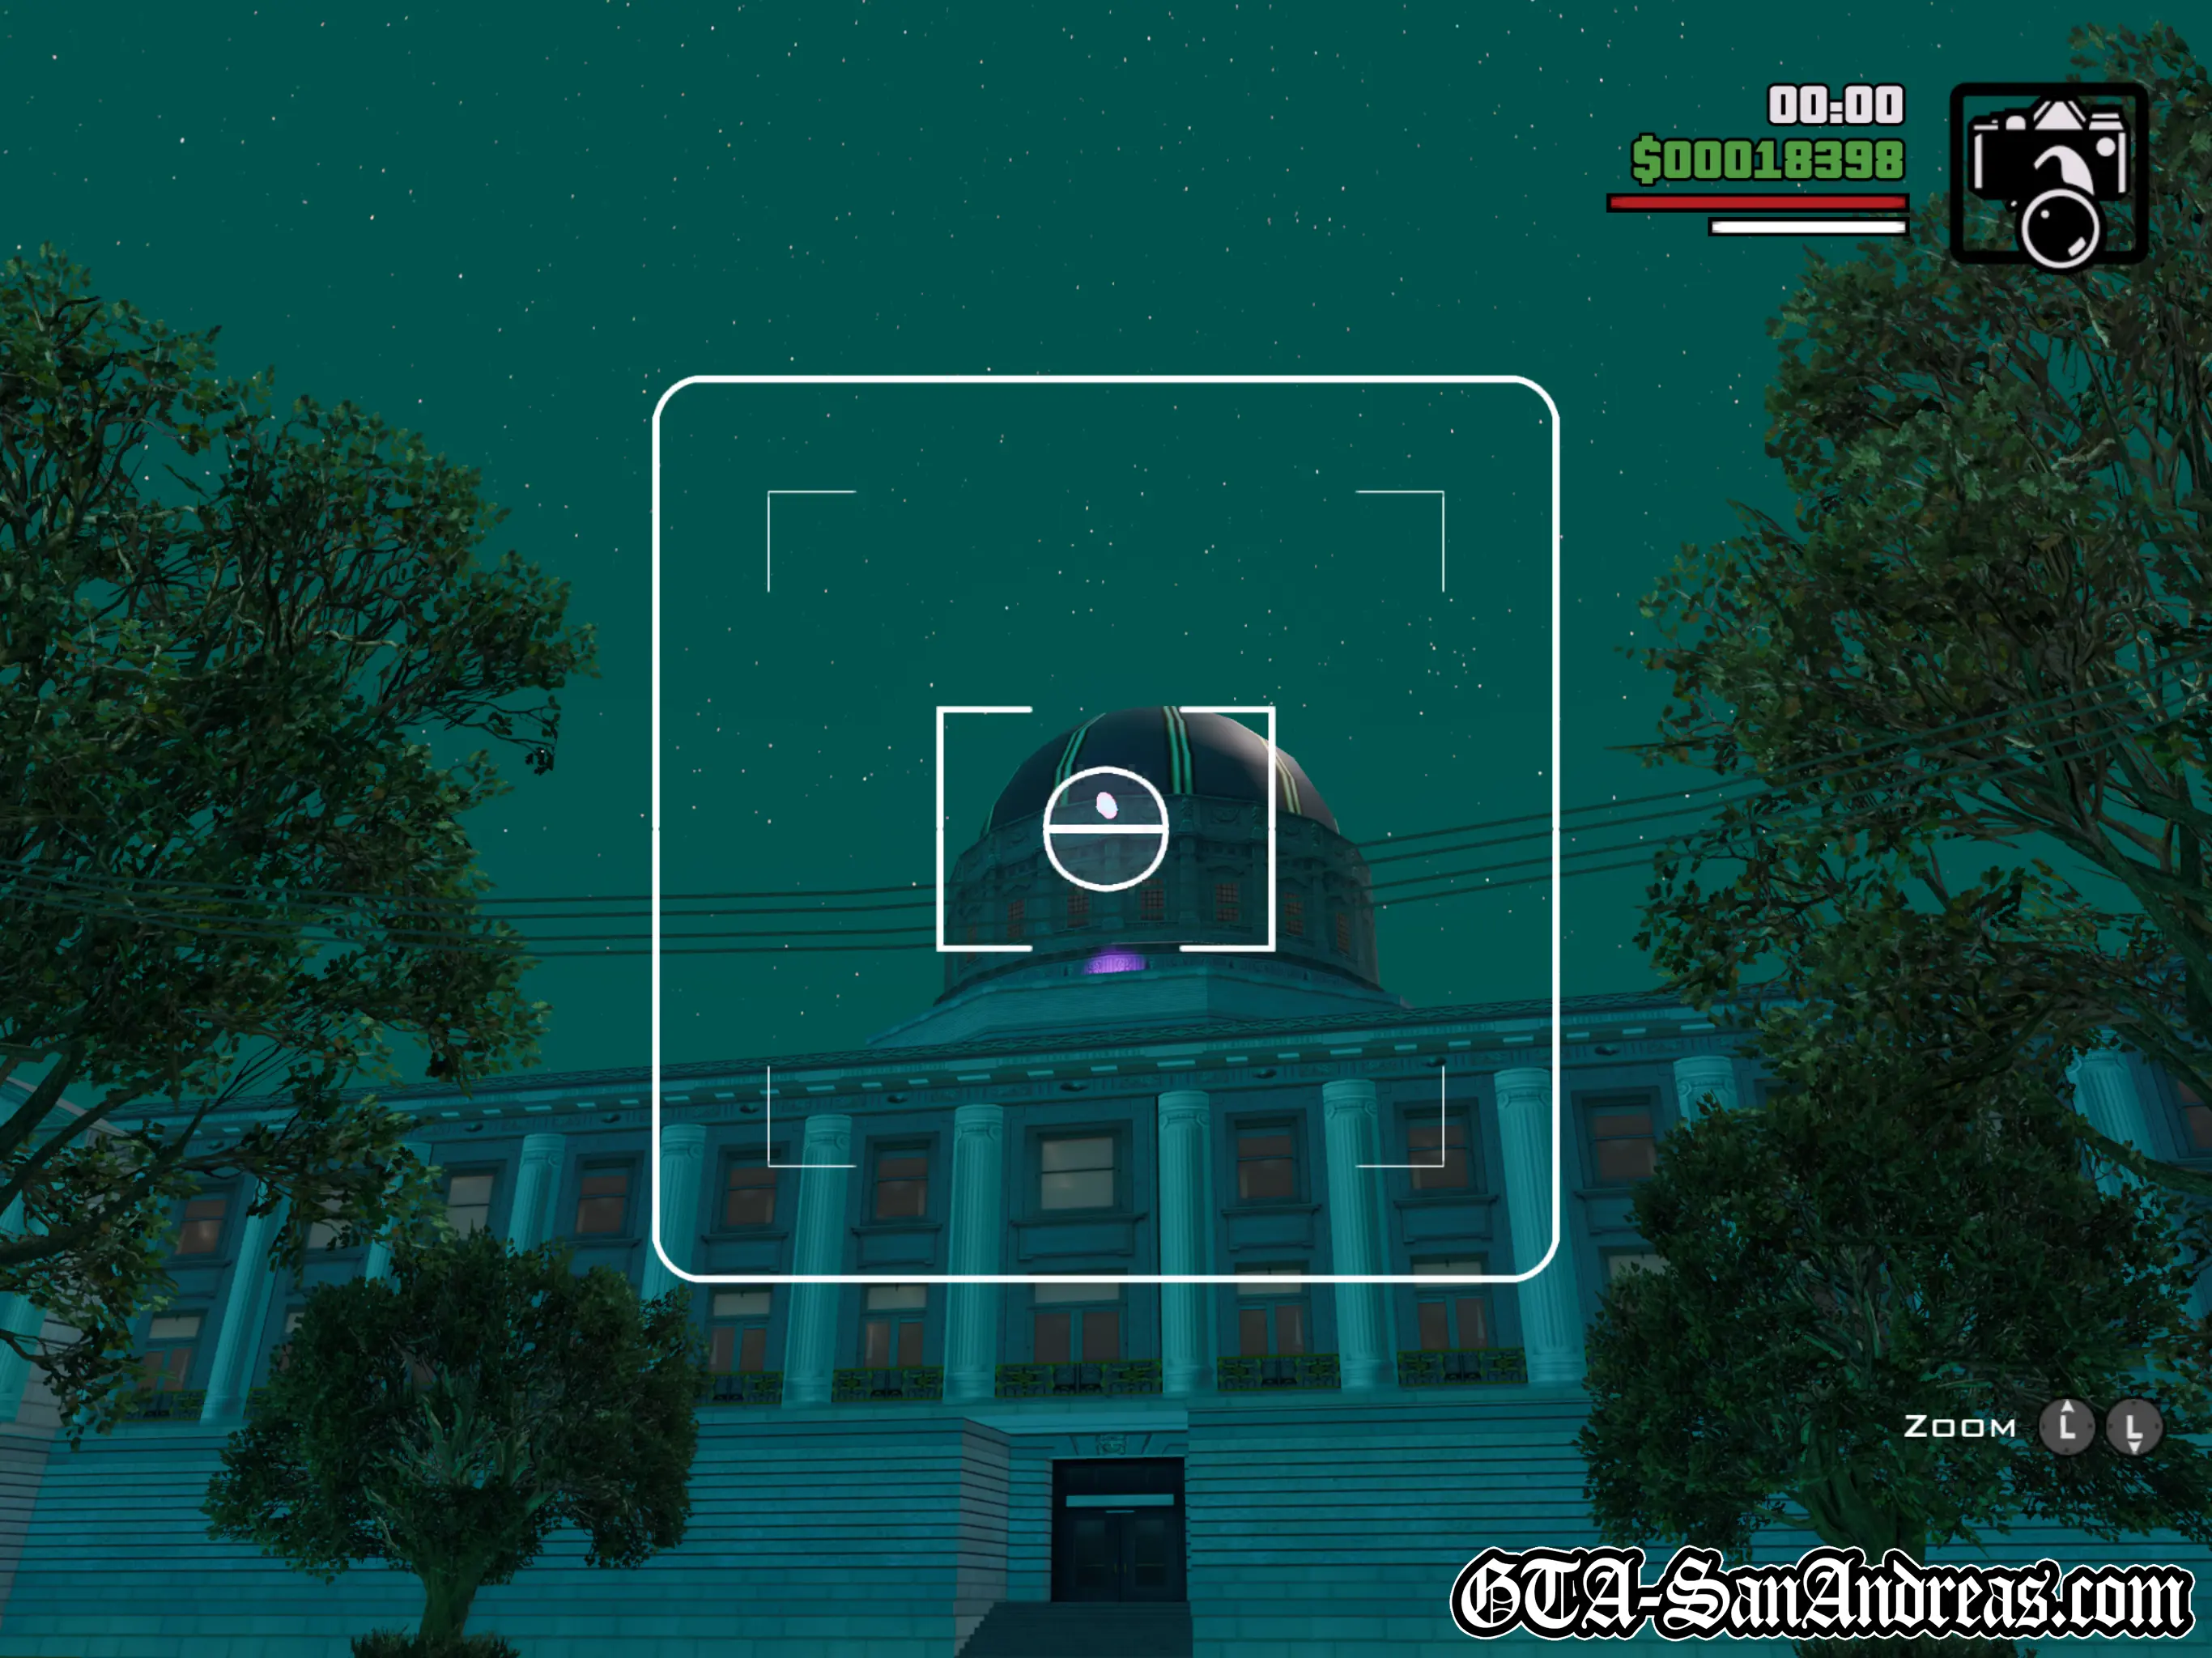
Snapshot #21
Location
City Hall - On the West side of the city hall, fairly high up next to the dome.
Where To Stand
Stand on the road or grass to the West of the city hall and you should be able to see it.
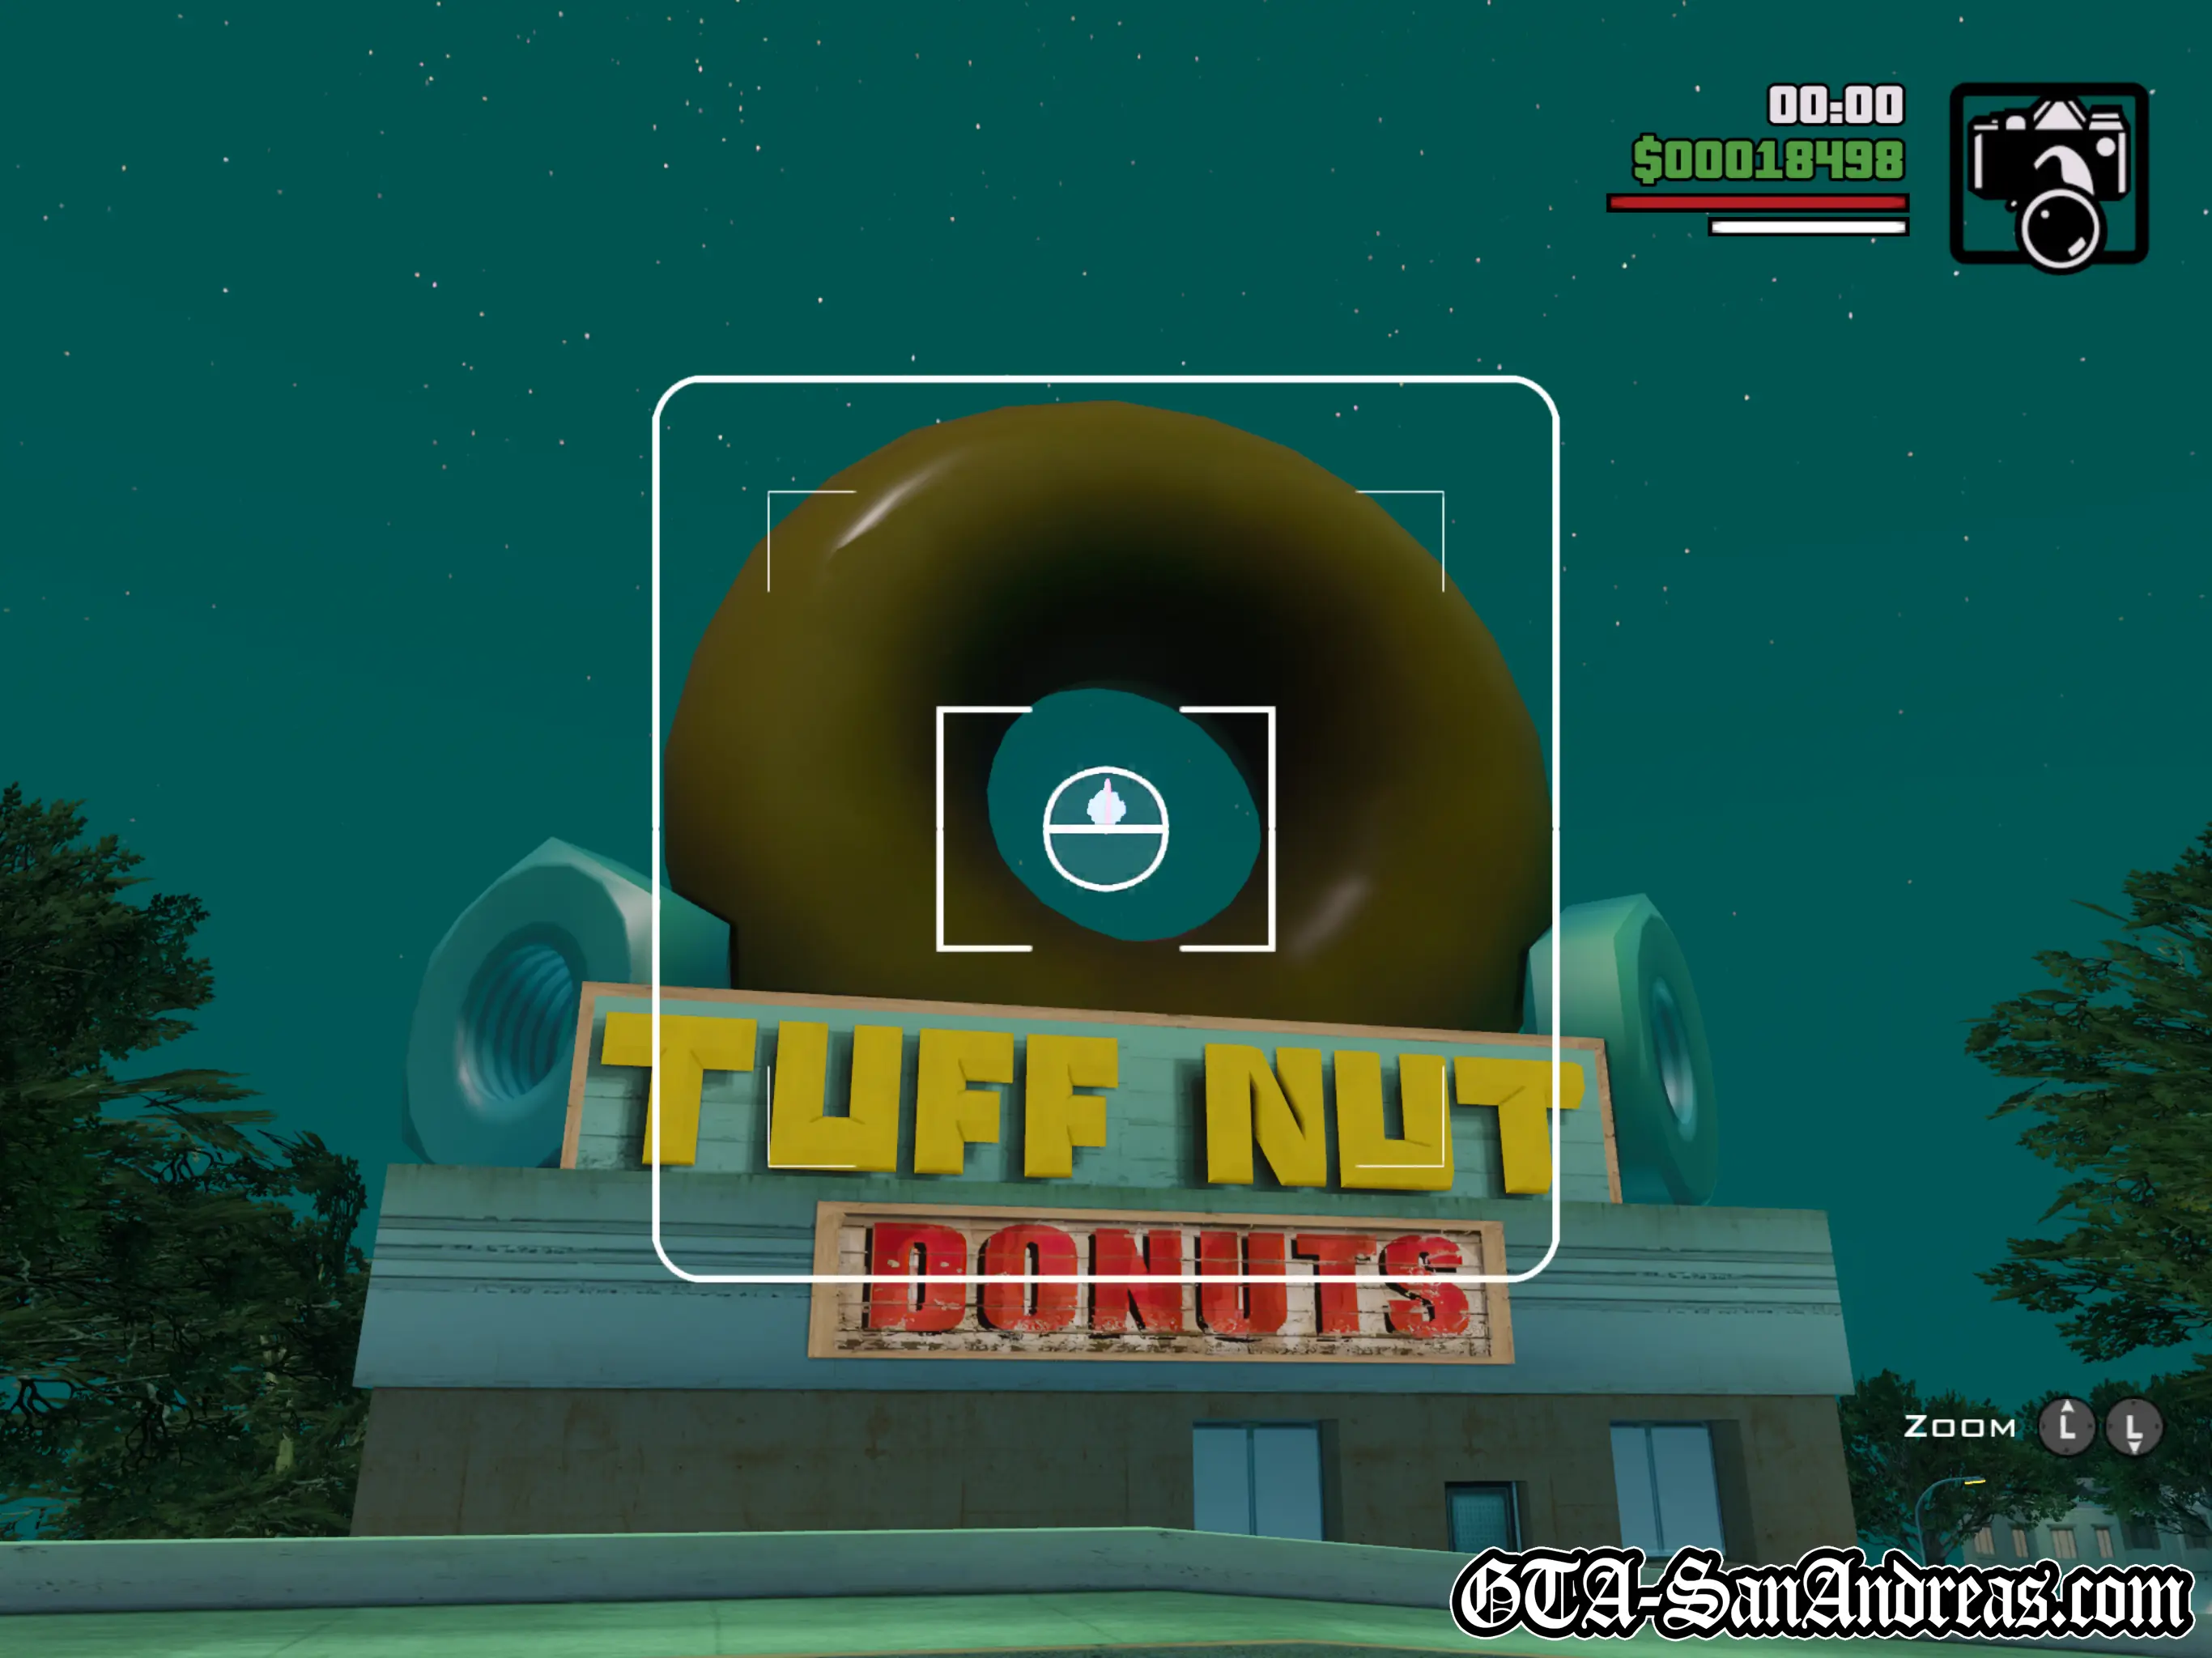
Snapshot #22
Location
Palisades - Right inside the ring of the Tuff Nut Donuts sign.
Where To Stand
Just stand across the road from the sign and you'll easily be able to snap this one.
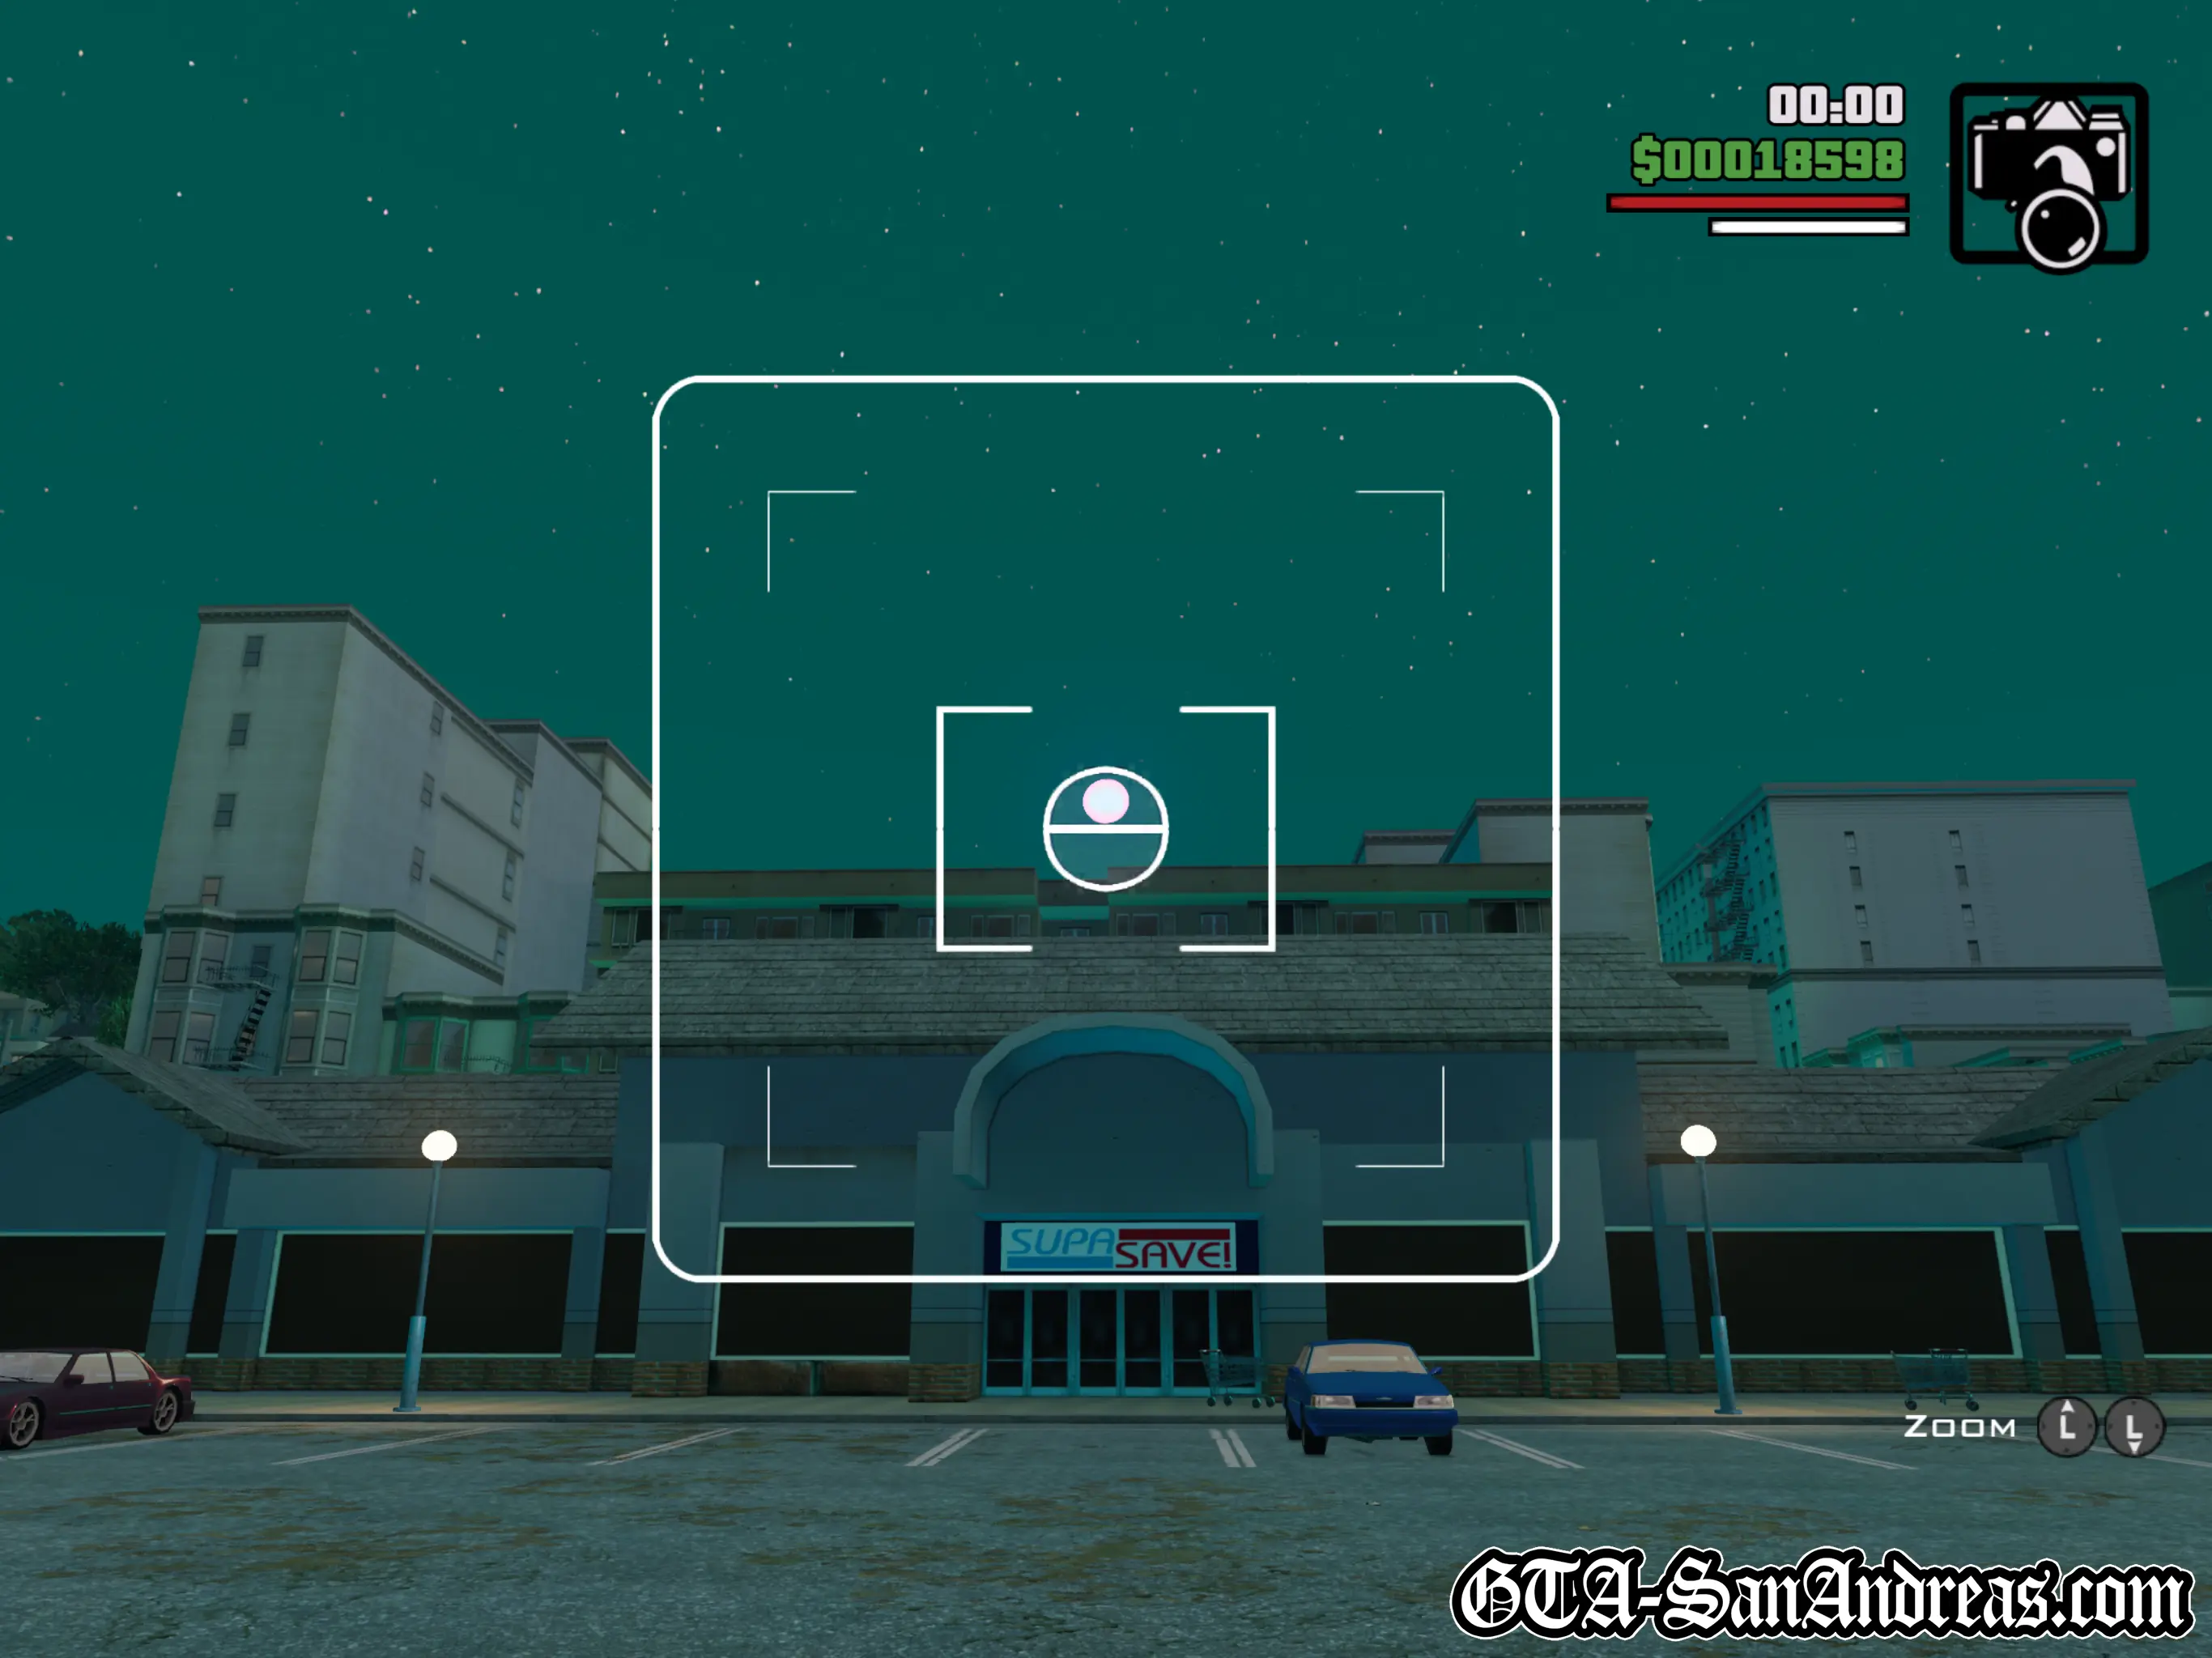
Snapshot #23
Location
Juniper Hill - Floating above Supa Save.
Where To Stand
Stand on the road or in the car park in front of the Supa Save building. There's a large empty space here so it's quite easy to find somewhere to take the snapshot.
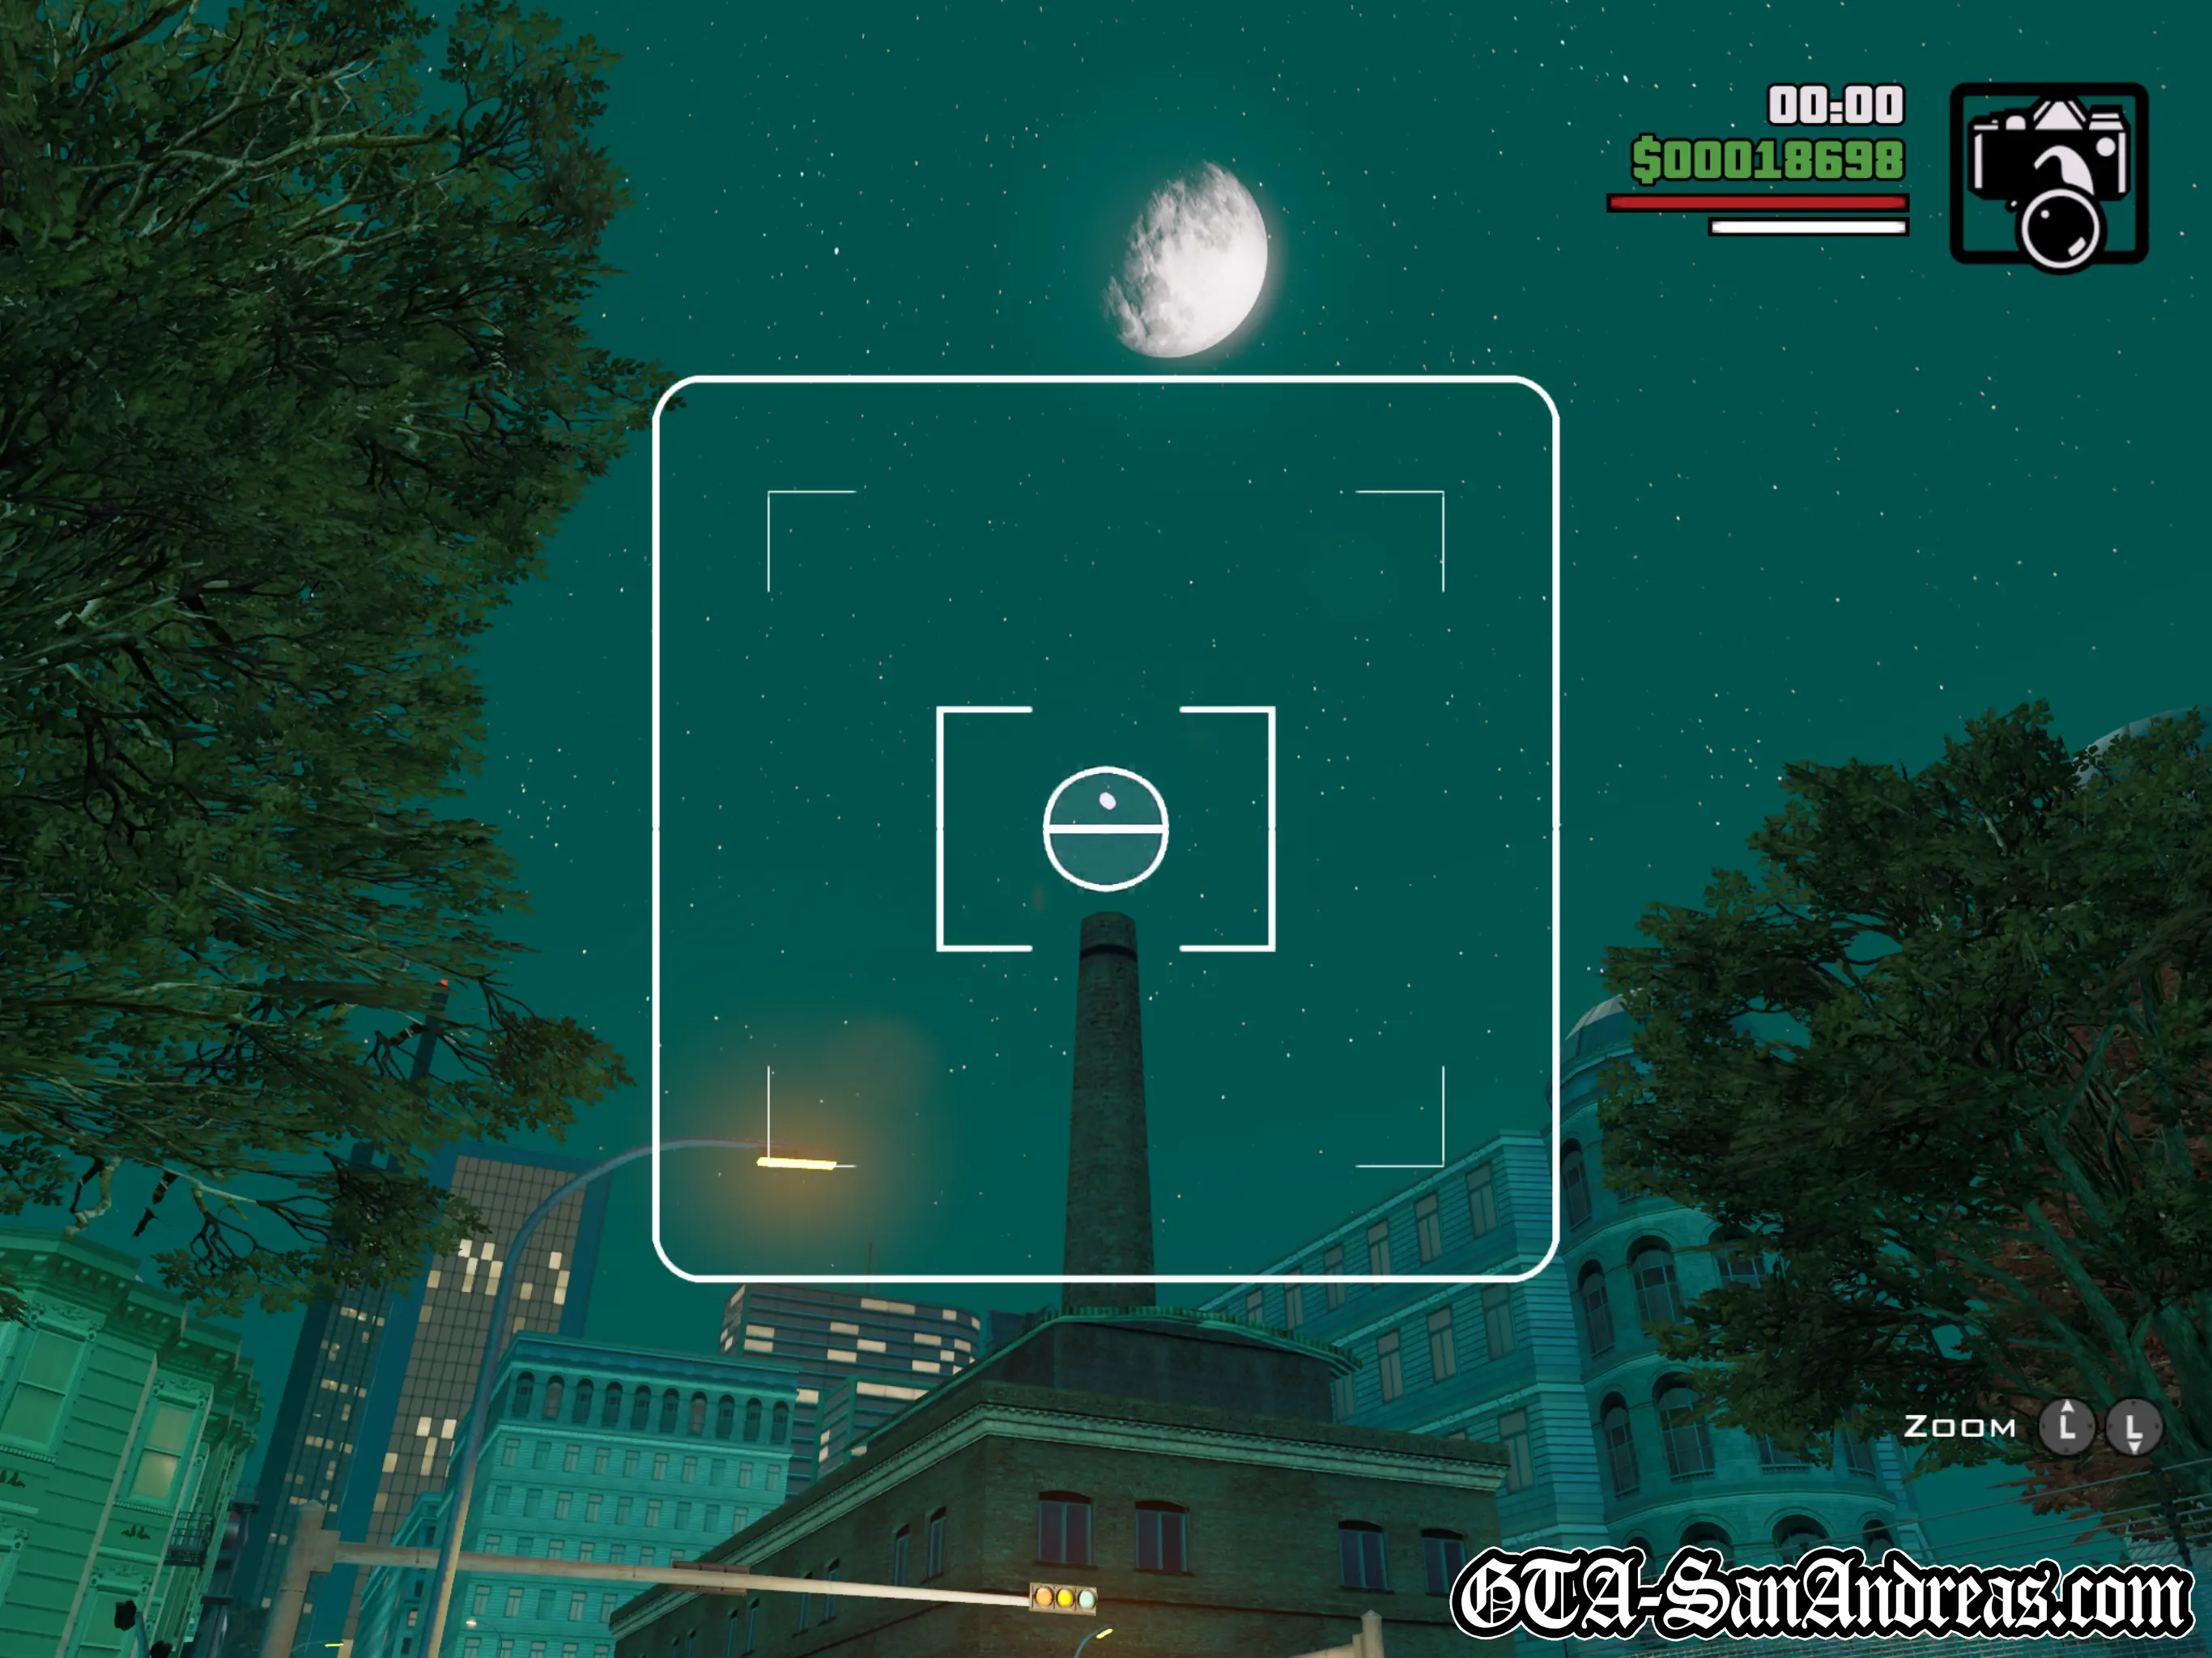
Snapshot #24
Location
King's - Hovering high above an old-looking brick chimney.
Where To Stand
The chimney is quite unique so you should be able to spot it. Once you get close to it, look up and the icon should be visible from anywhere on the road nearby.
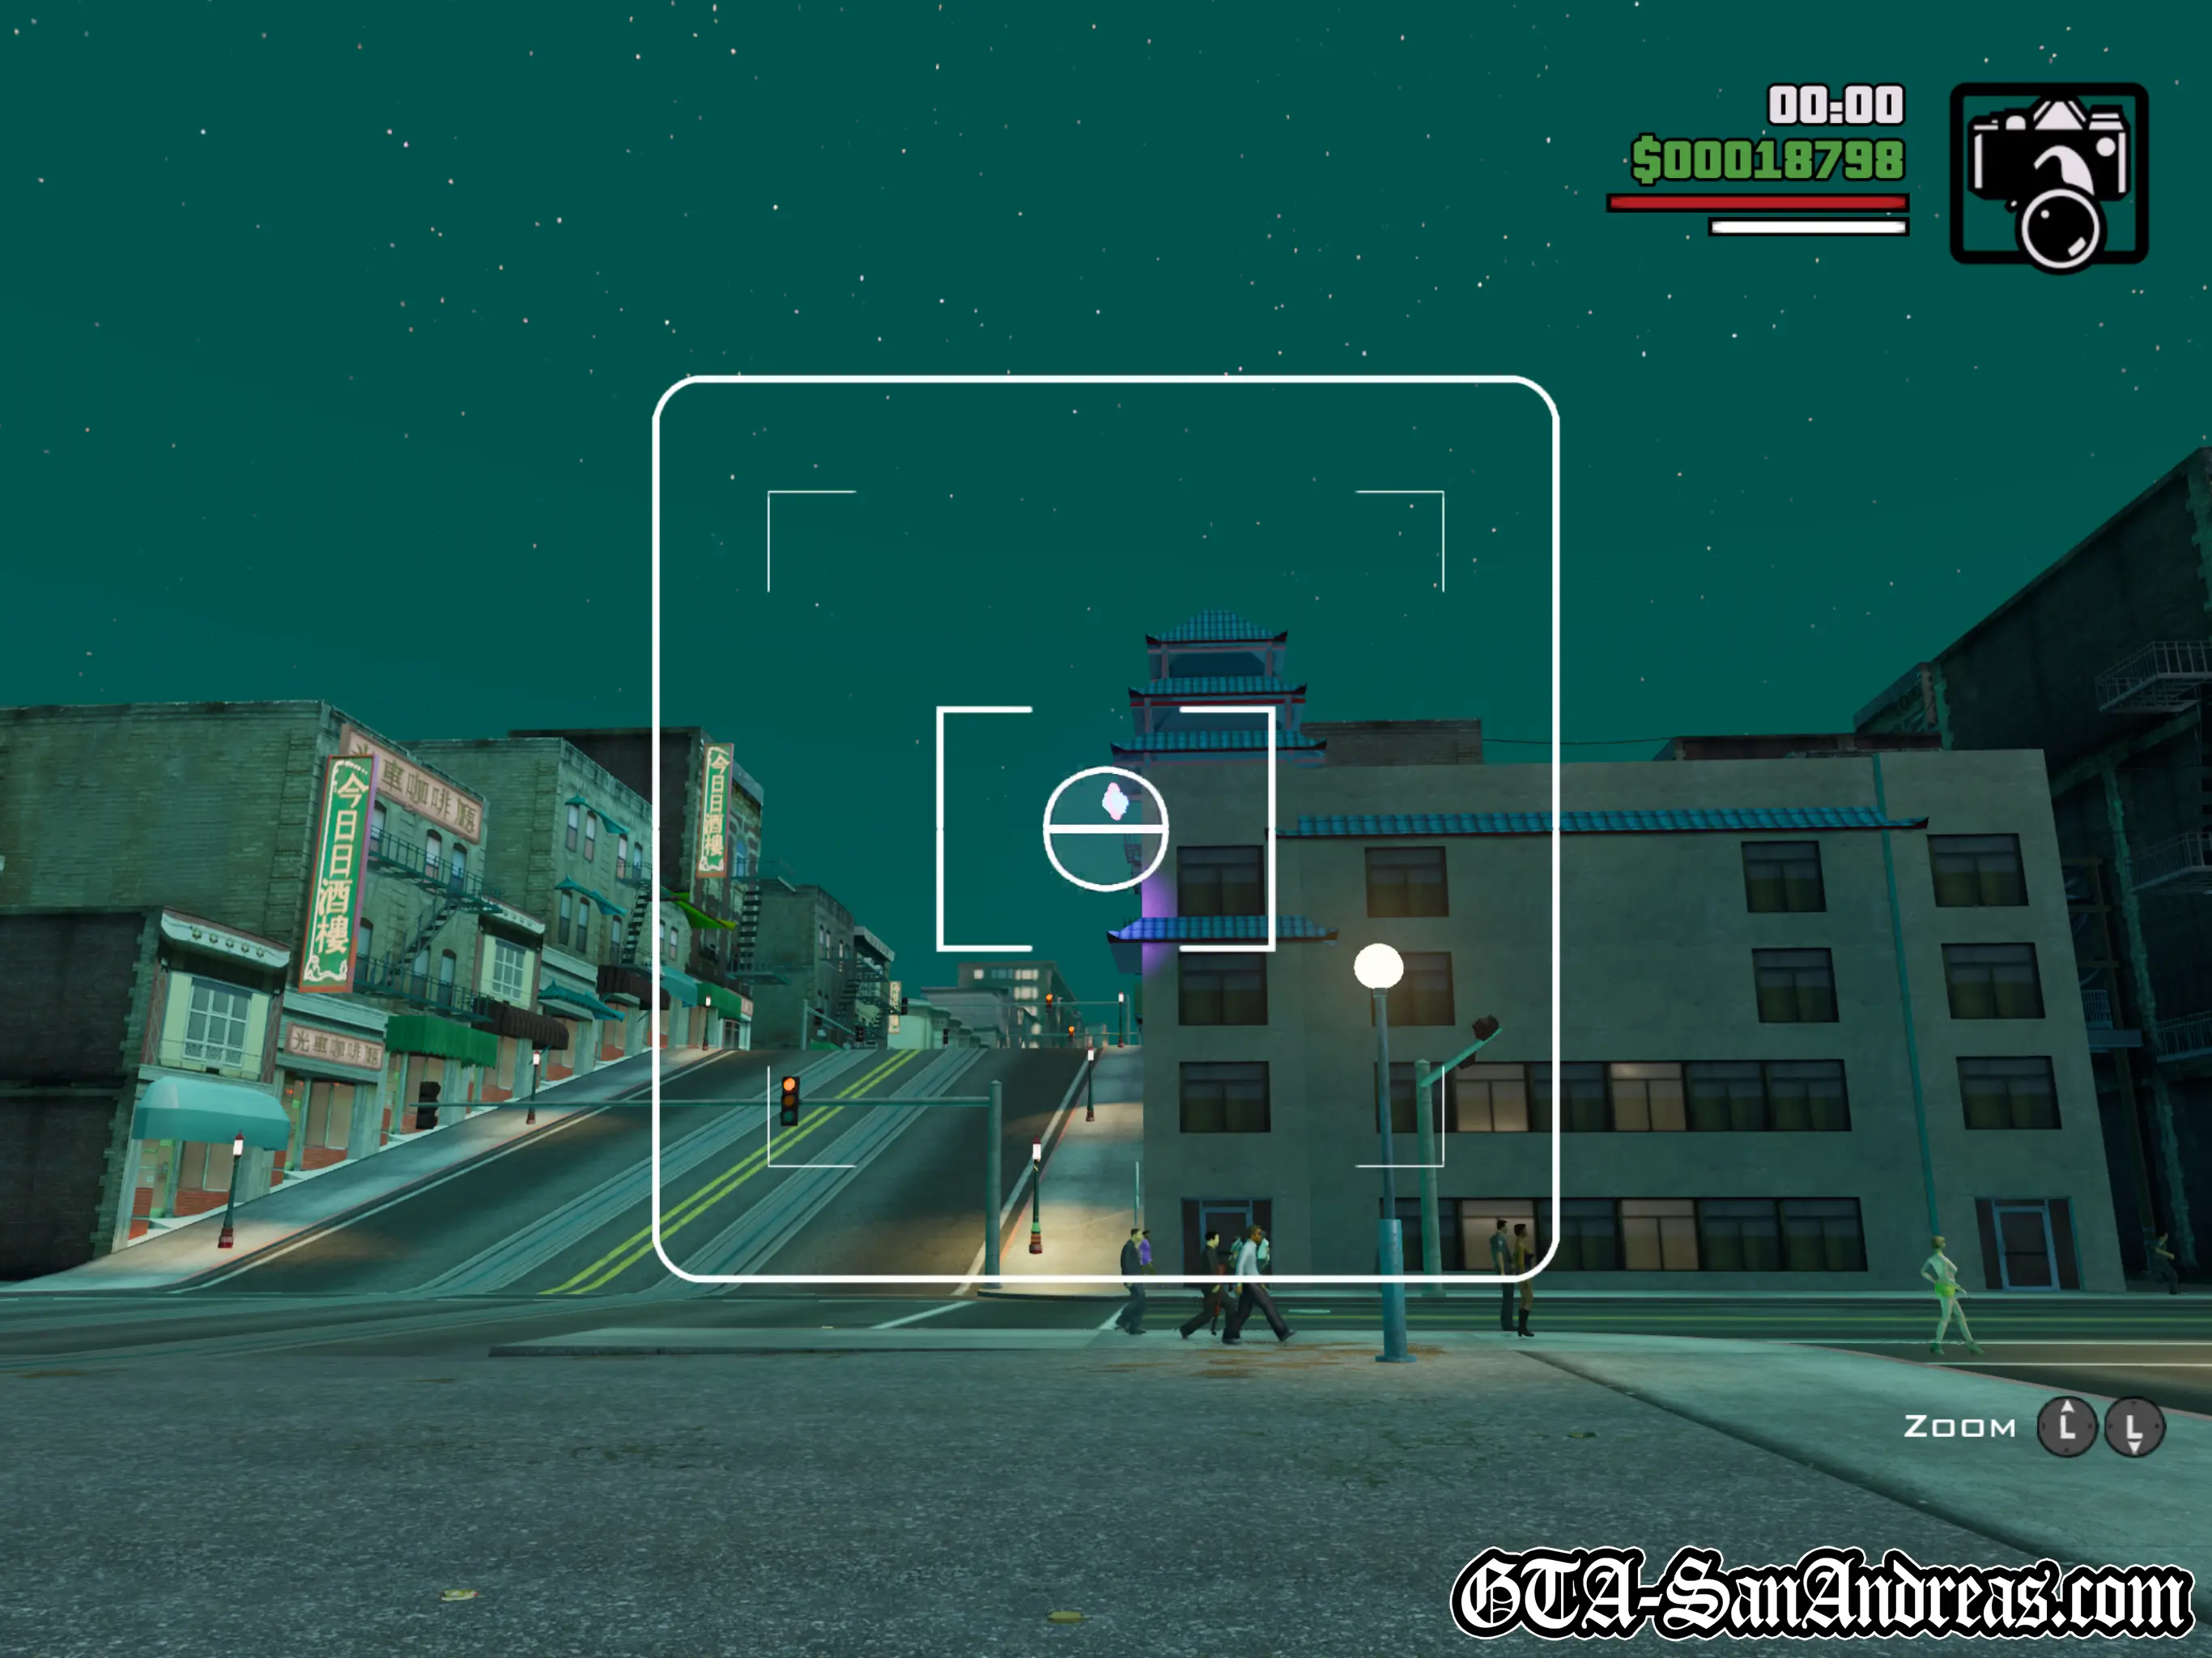
Snapshot #25
Location
Chinatown - Hovering to the side of the road at the bottom of the hill near Chinatown.
Where To Stand
Stand anywhere on the road at the bottom of the hill. If you're facing directly up the hill (to the North), it'll be slightly to the right.
Snapshot #26
Location
Chinatown - Floating on top of the fancy Chinatown entrance.
Where To Stand
Stand across the road from the large entrance structure and you'll spot this one quite easily.

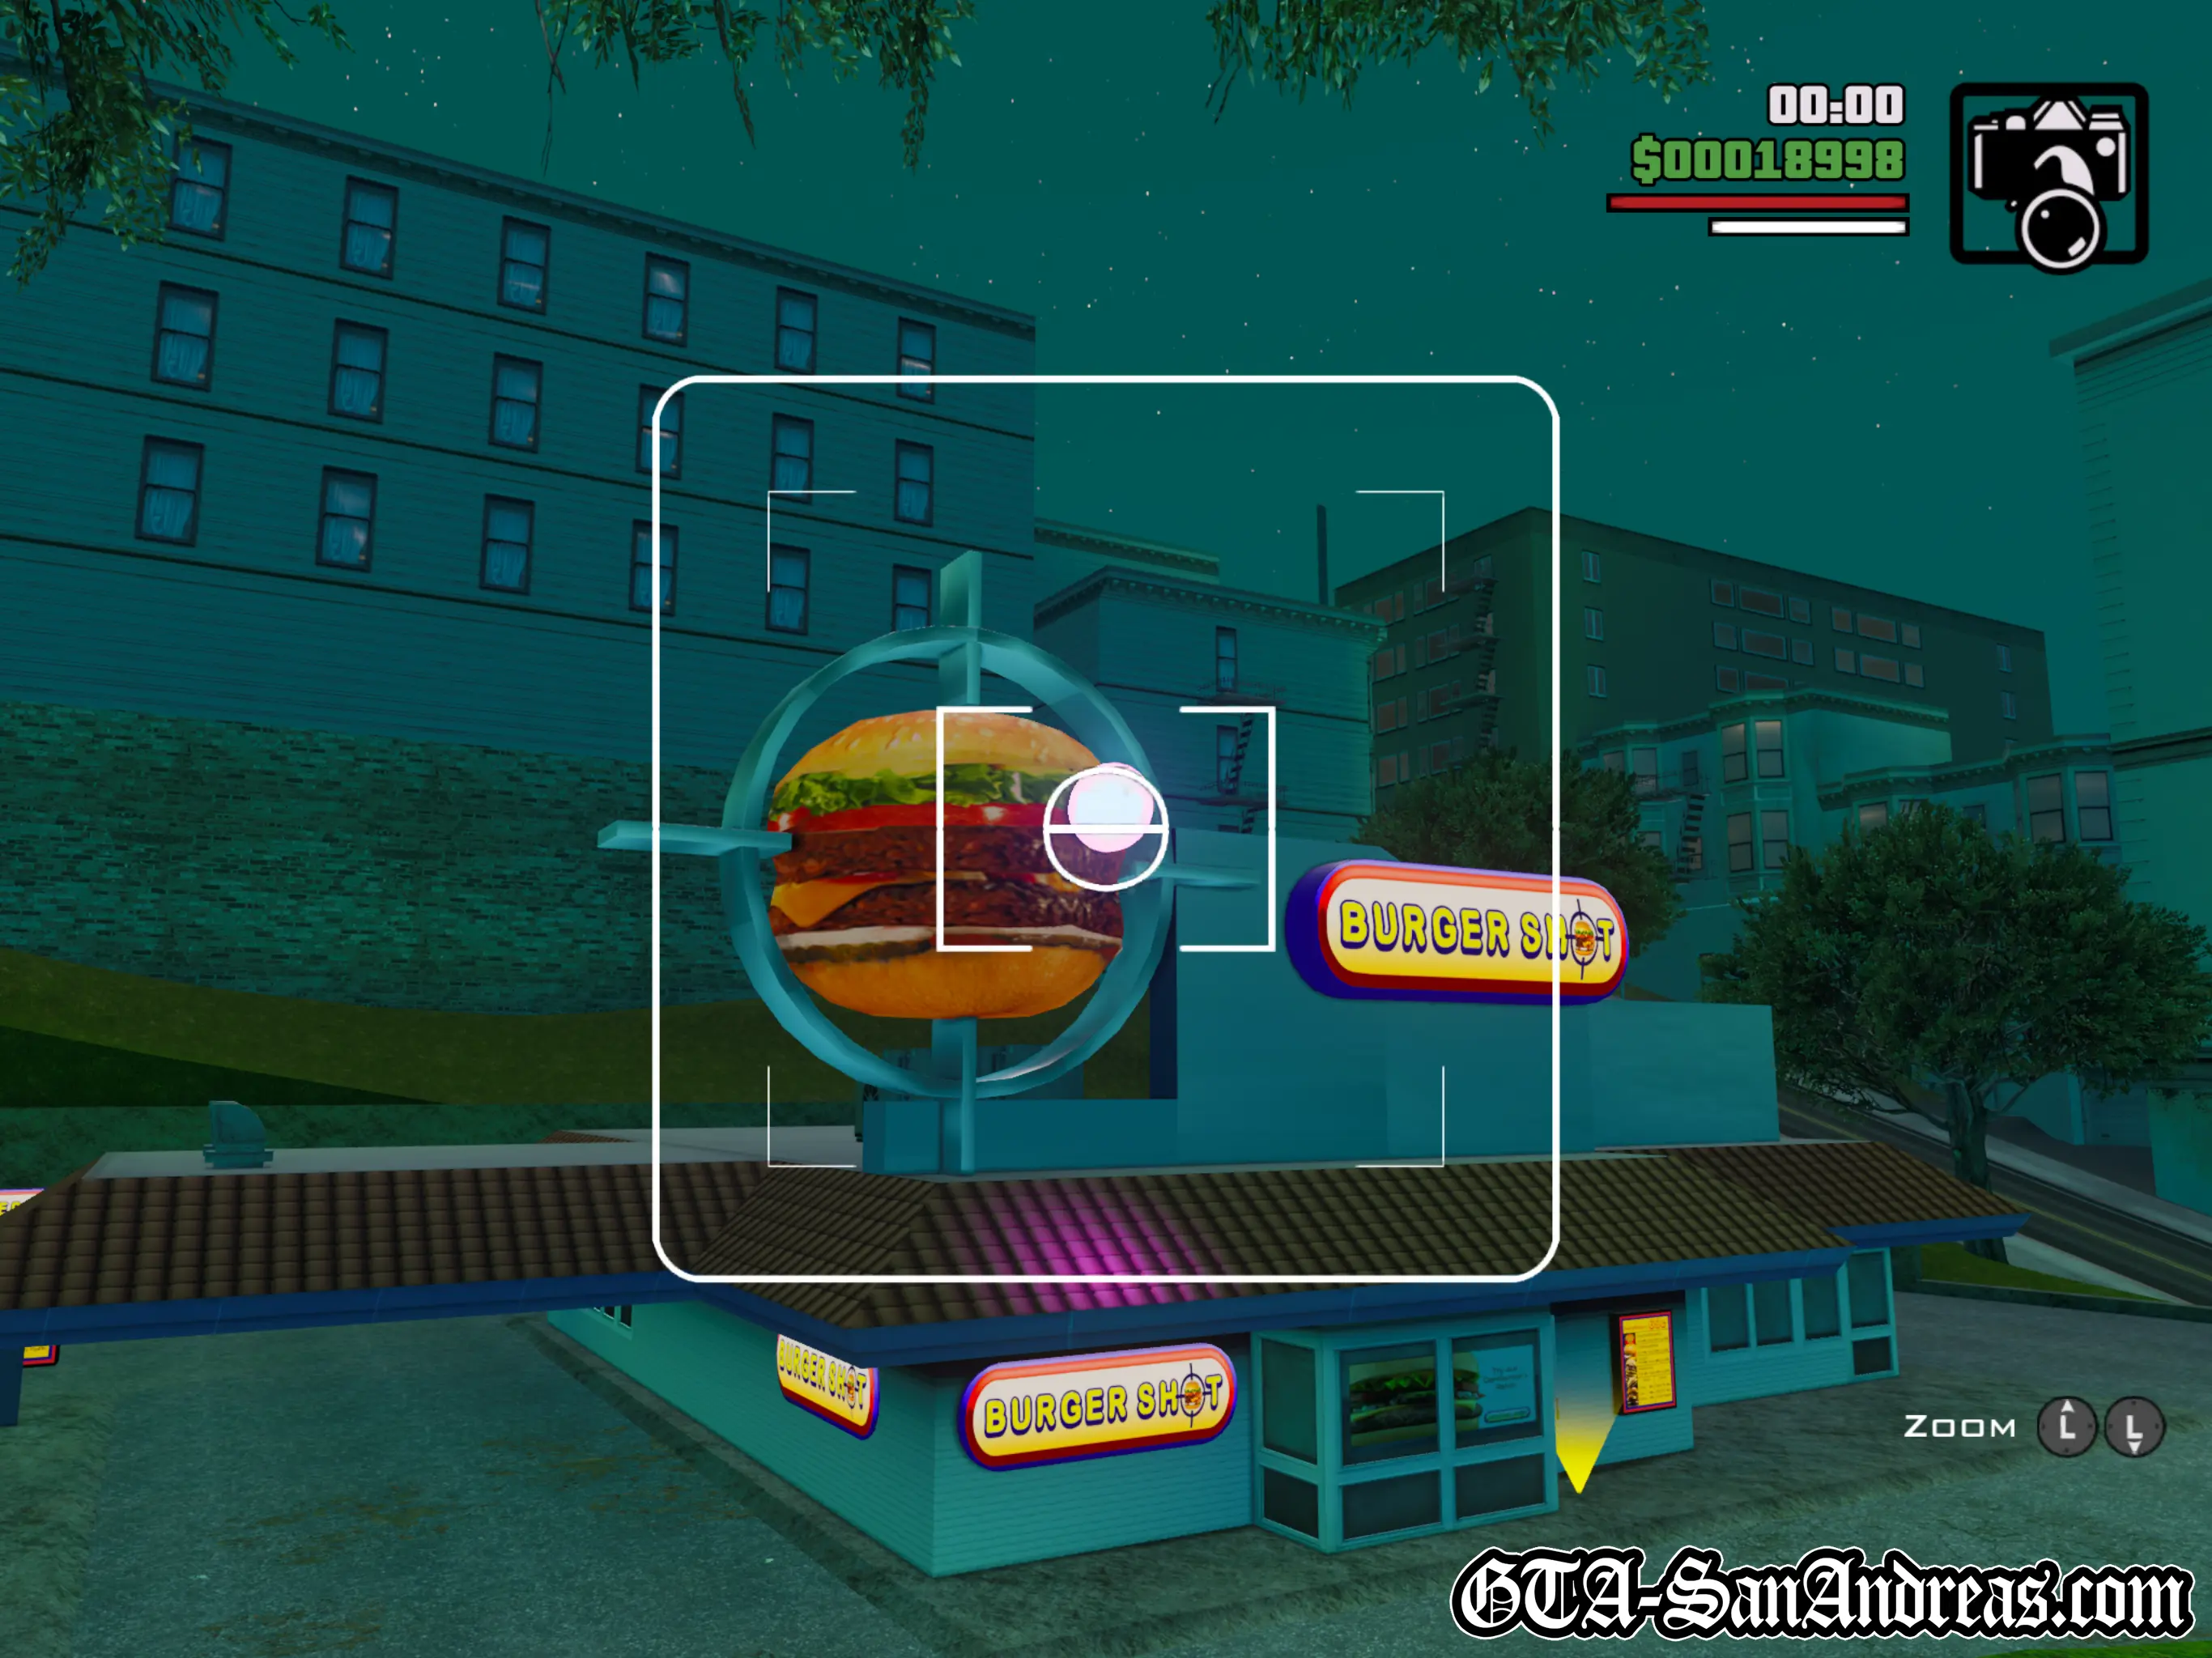
Snapshot #27
Location
Juniper Hollow - Right in front of the spinning burger on top of Burger Shot.
Where To Stand
Very easy, just stand on the road in front of Burger Shot.
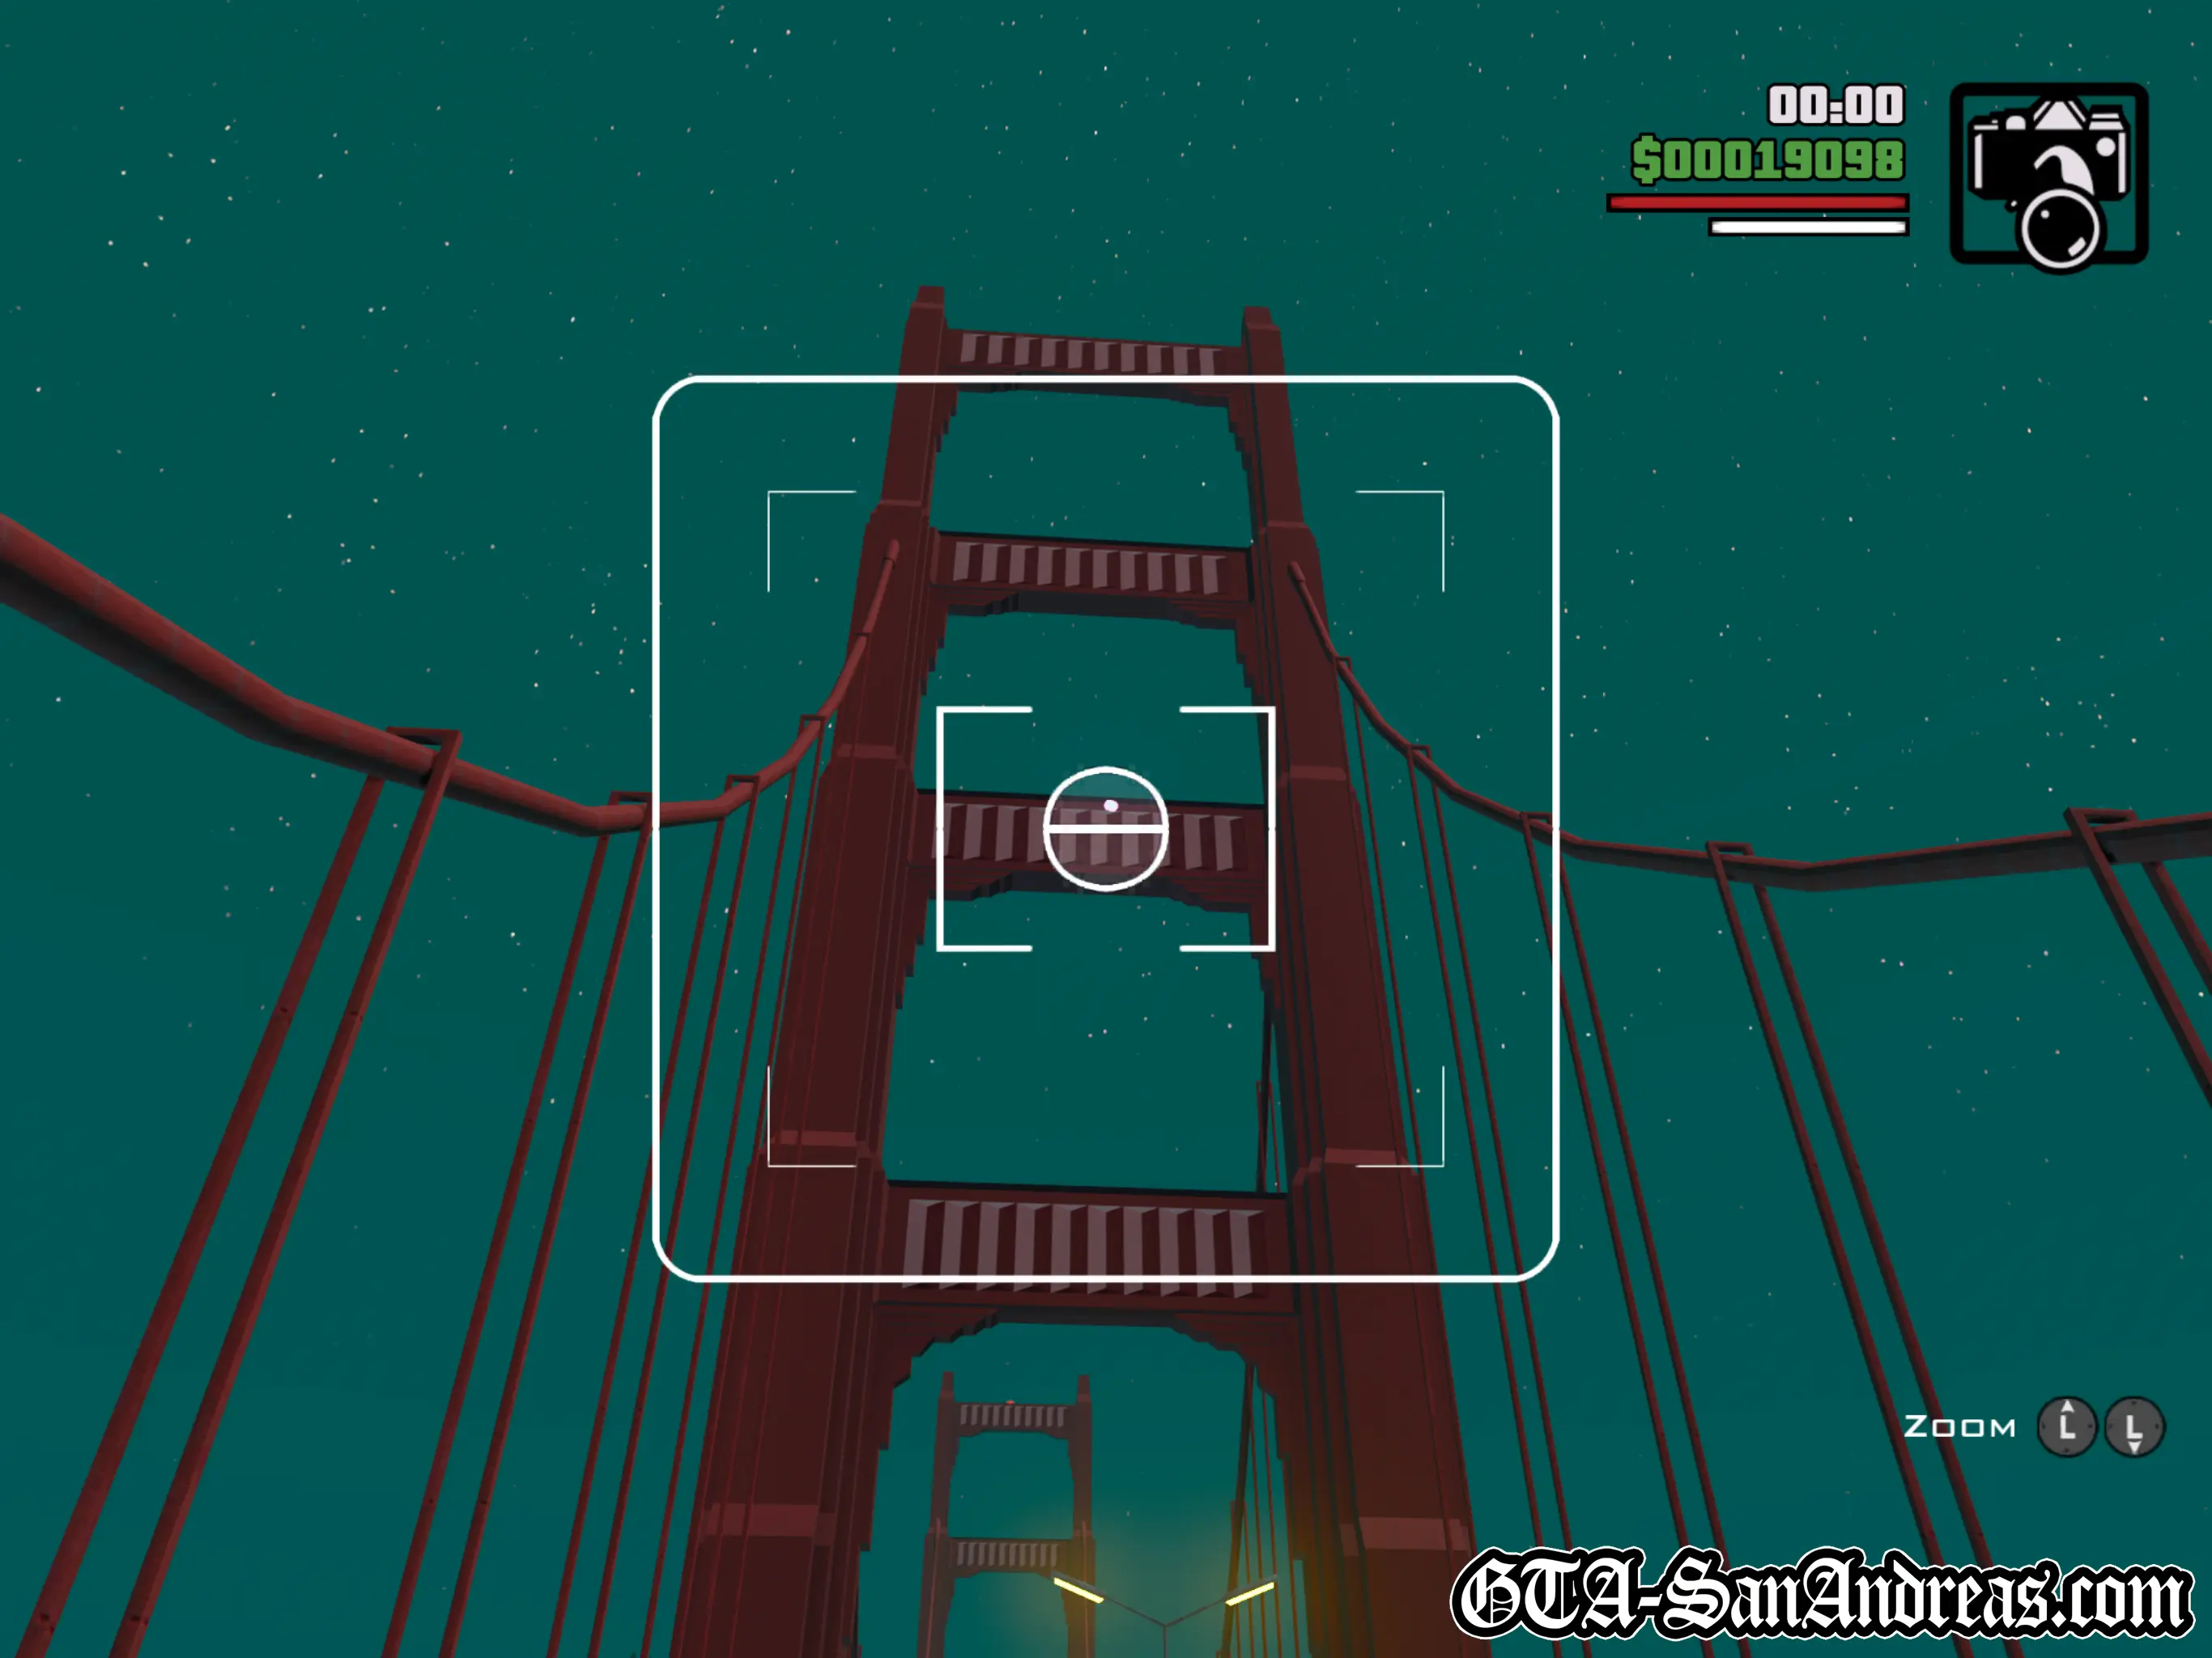
Snapshot #28
Location
Gant Bridge - High up on the 2nd support beam of Gant Bridge. It's on the first tower nearest to San Fierro. You'll need to be facing North to see it.
Where To Stand
Head a little way across the bridge from San Fierro and keep looking up at the 2nd support beam. You need to get quite close before it appears.
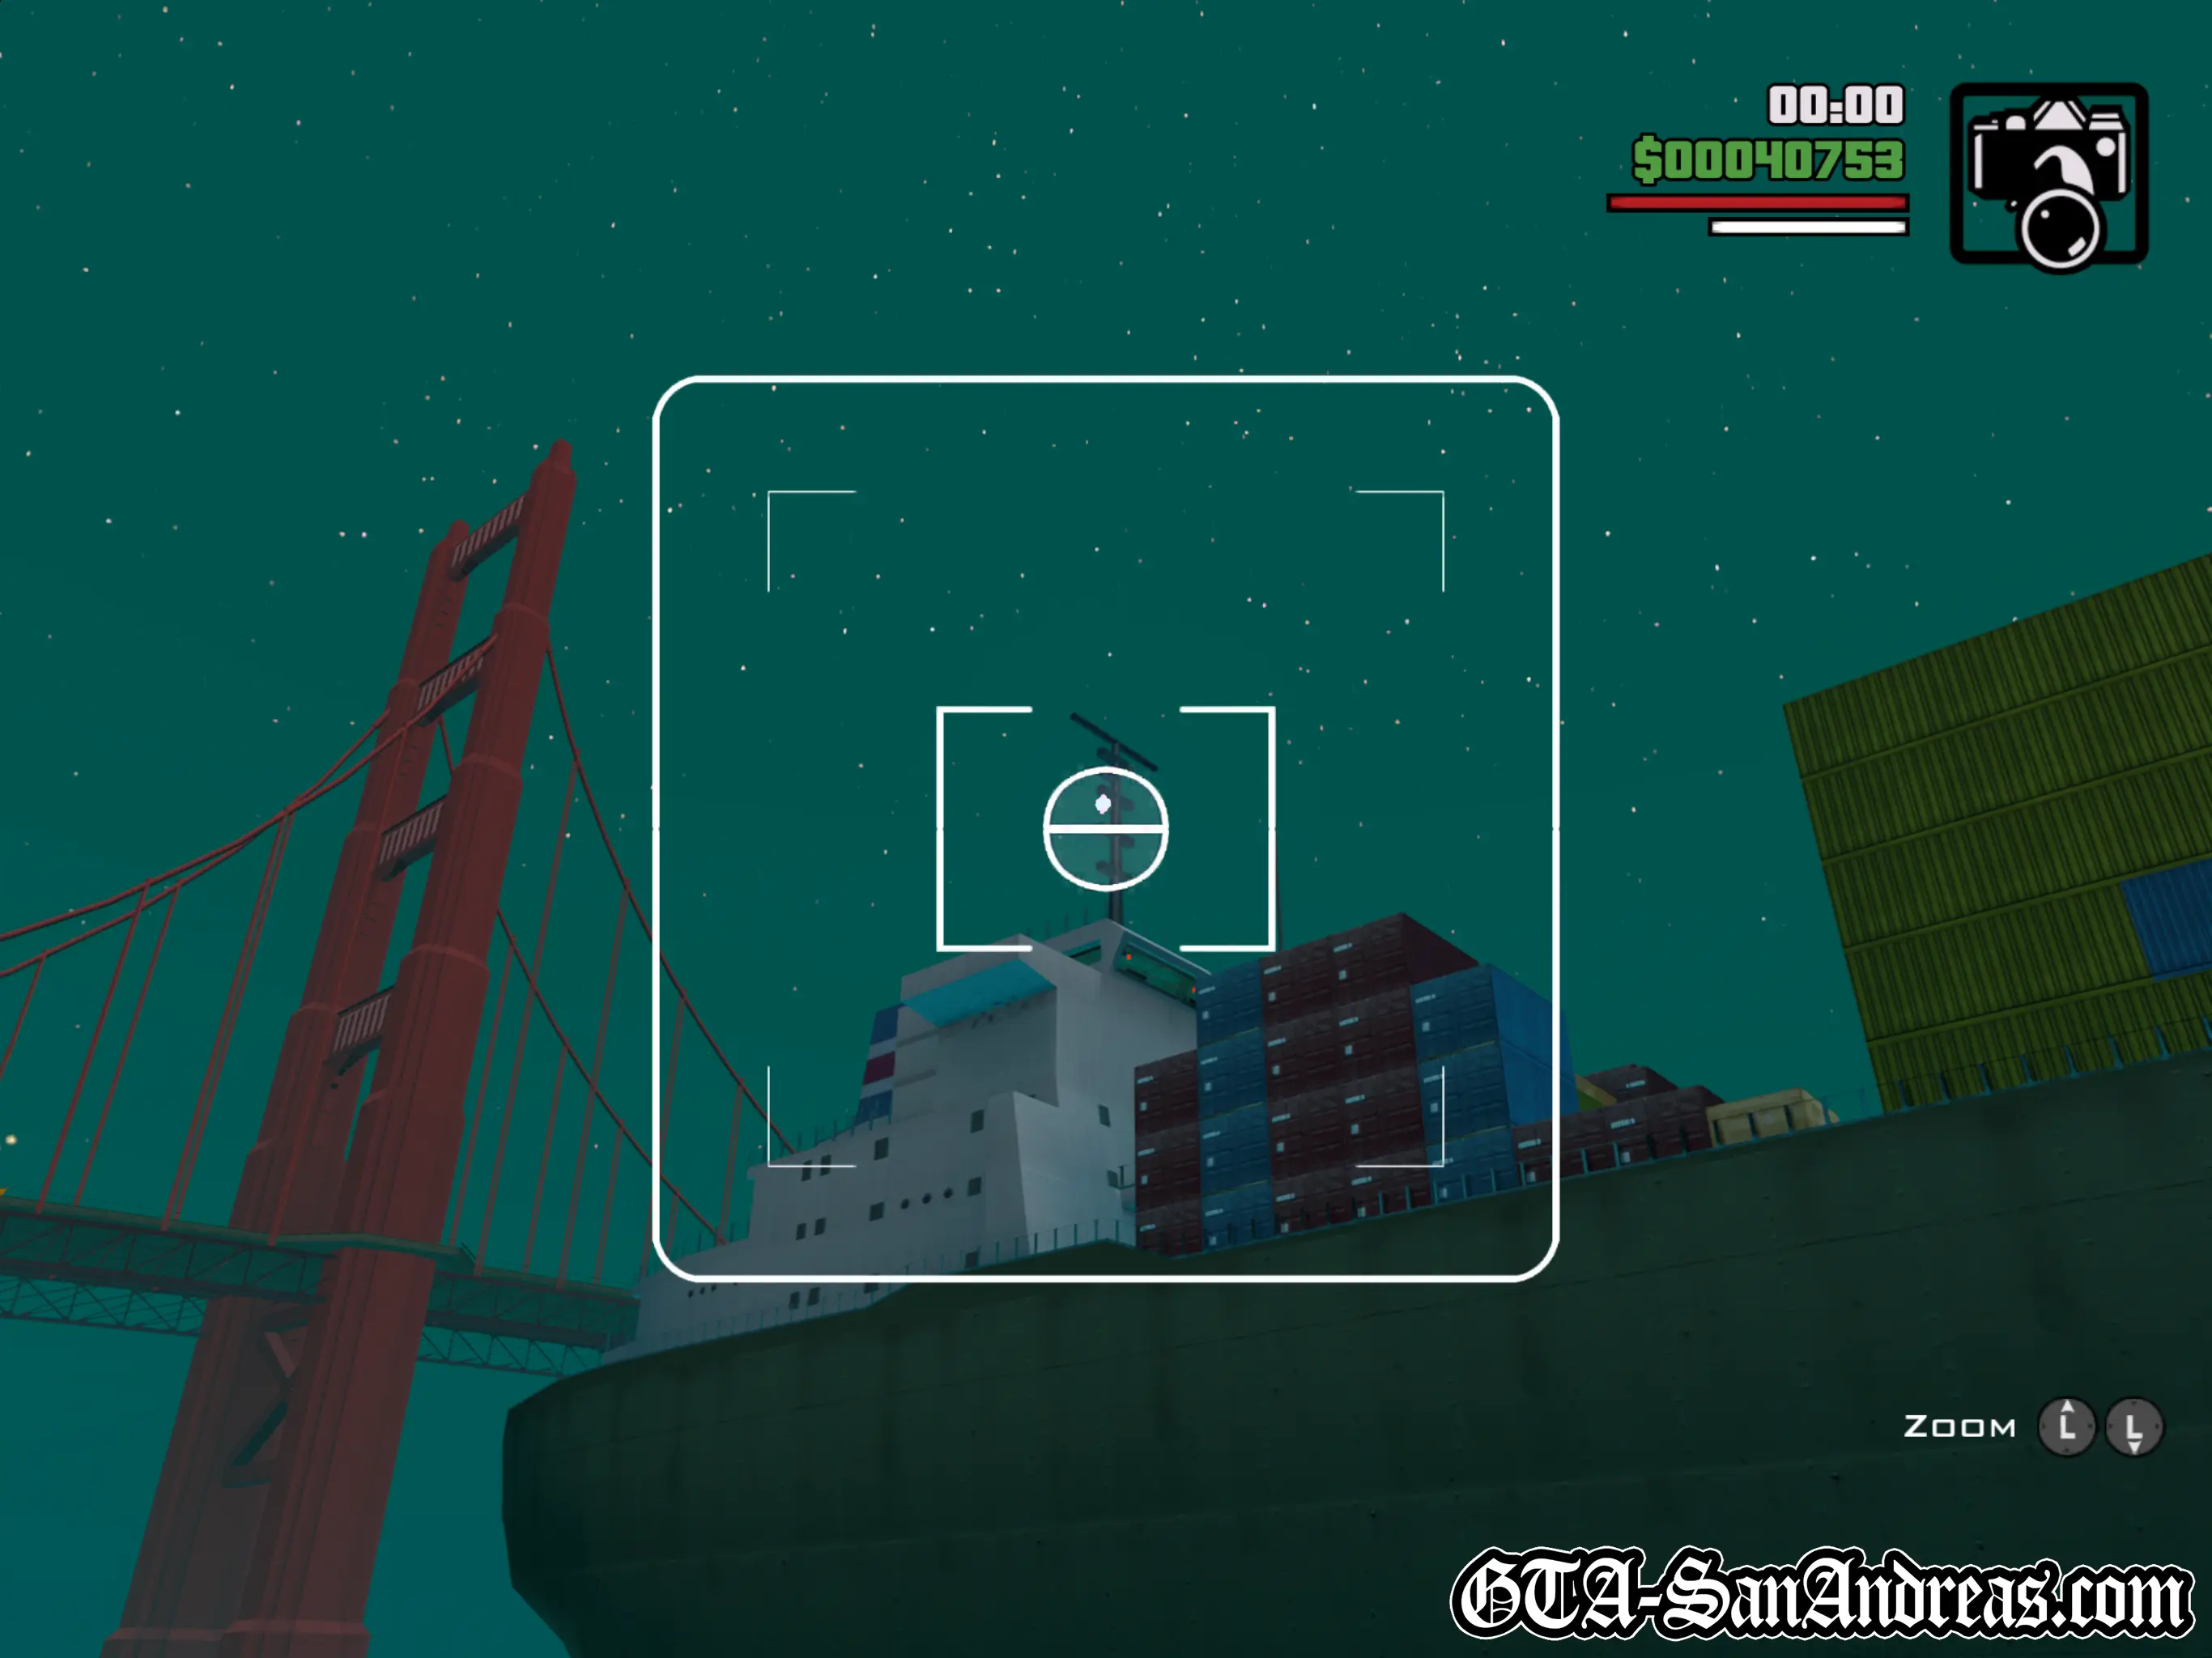
Snapshot #29
Location
San Fierro Bay - This snapshot isn't accessible from dry land. You'll either have to land a helicopter on top of the ship, or steal a boat and park it closer to the ship so the snapshot icon appears.
Where To Stand
If you land a helicopter on top of the ship, you'll see it easily when looking towards the bow of the ship to the West. In the screenshot, I was standing on the back of a boat to the South, about 100 yards from the ship.
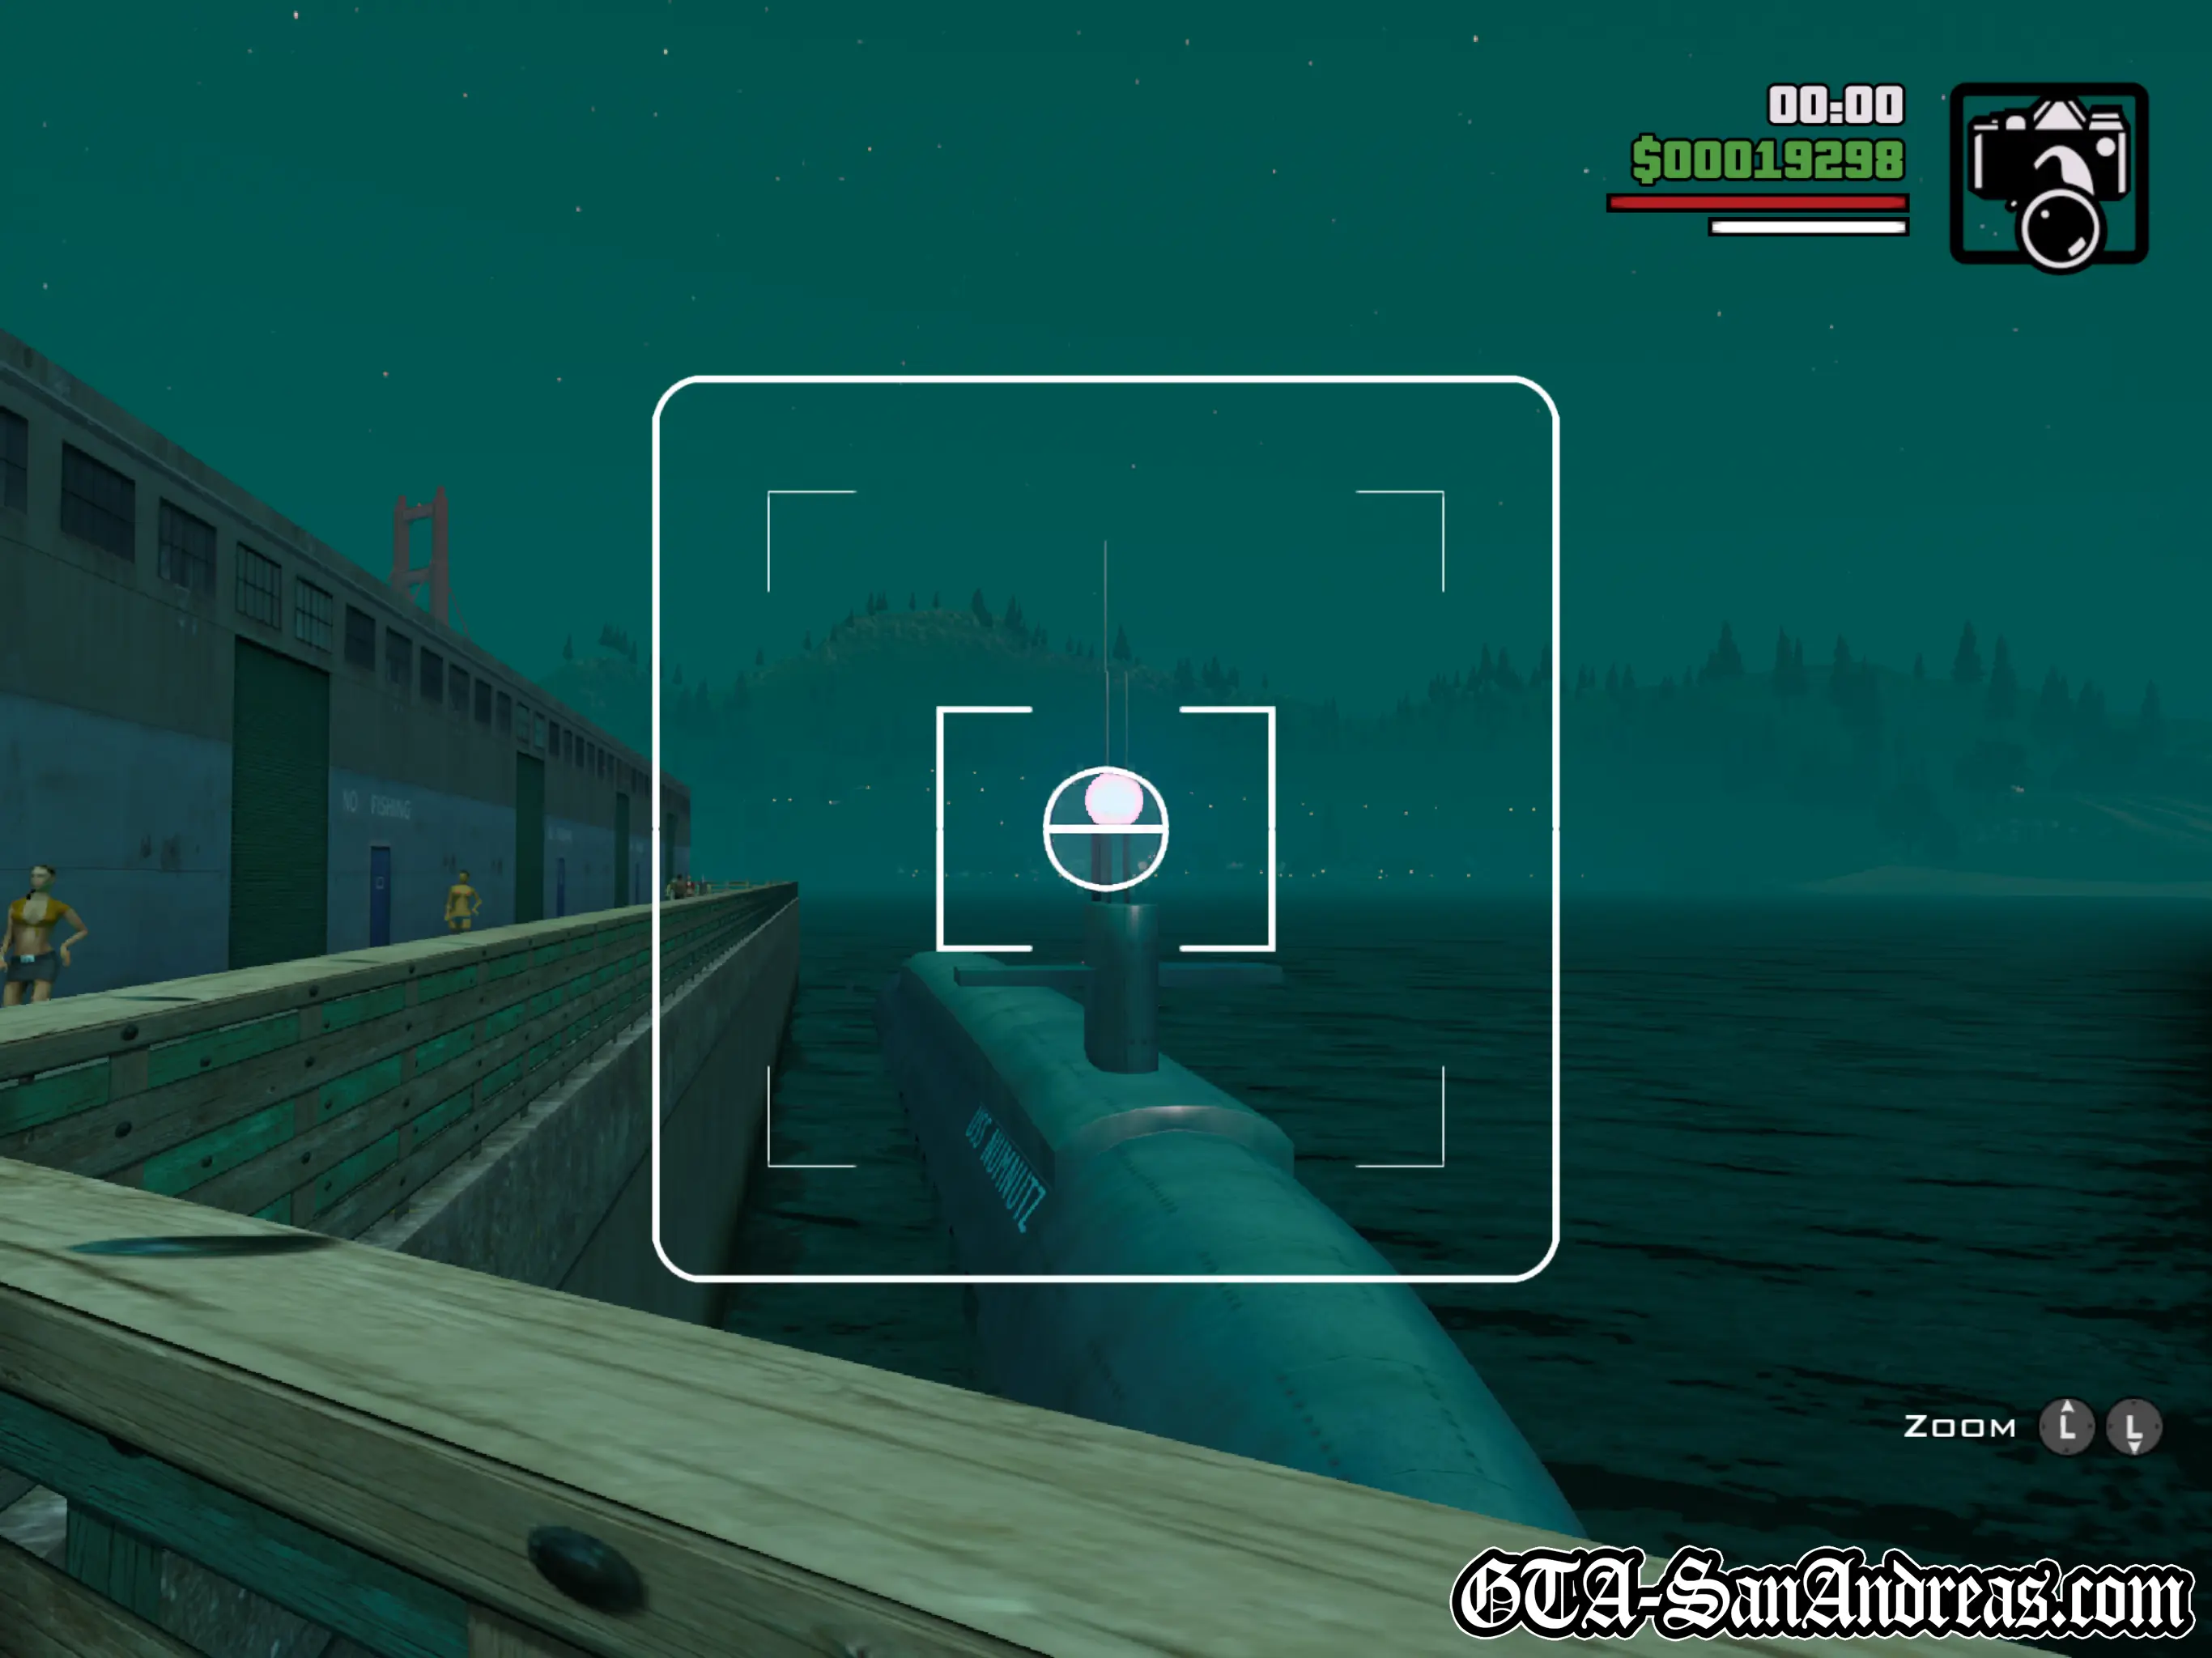
Snapshot #30
Location
Esplanade North - Sitting on top of a submarine next to the harbor.
Where To Stand
Anywhere on the path near the submarine.
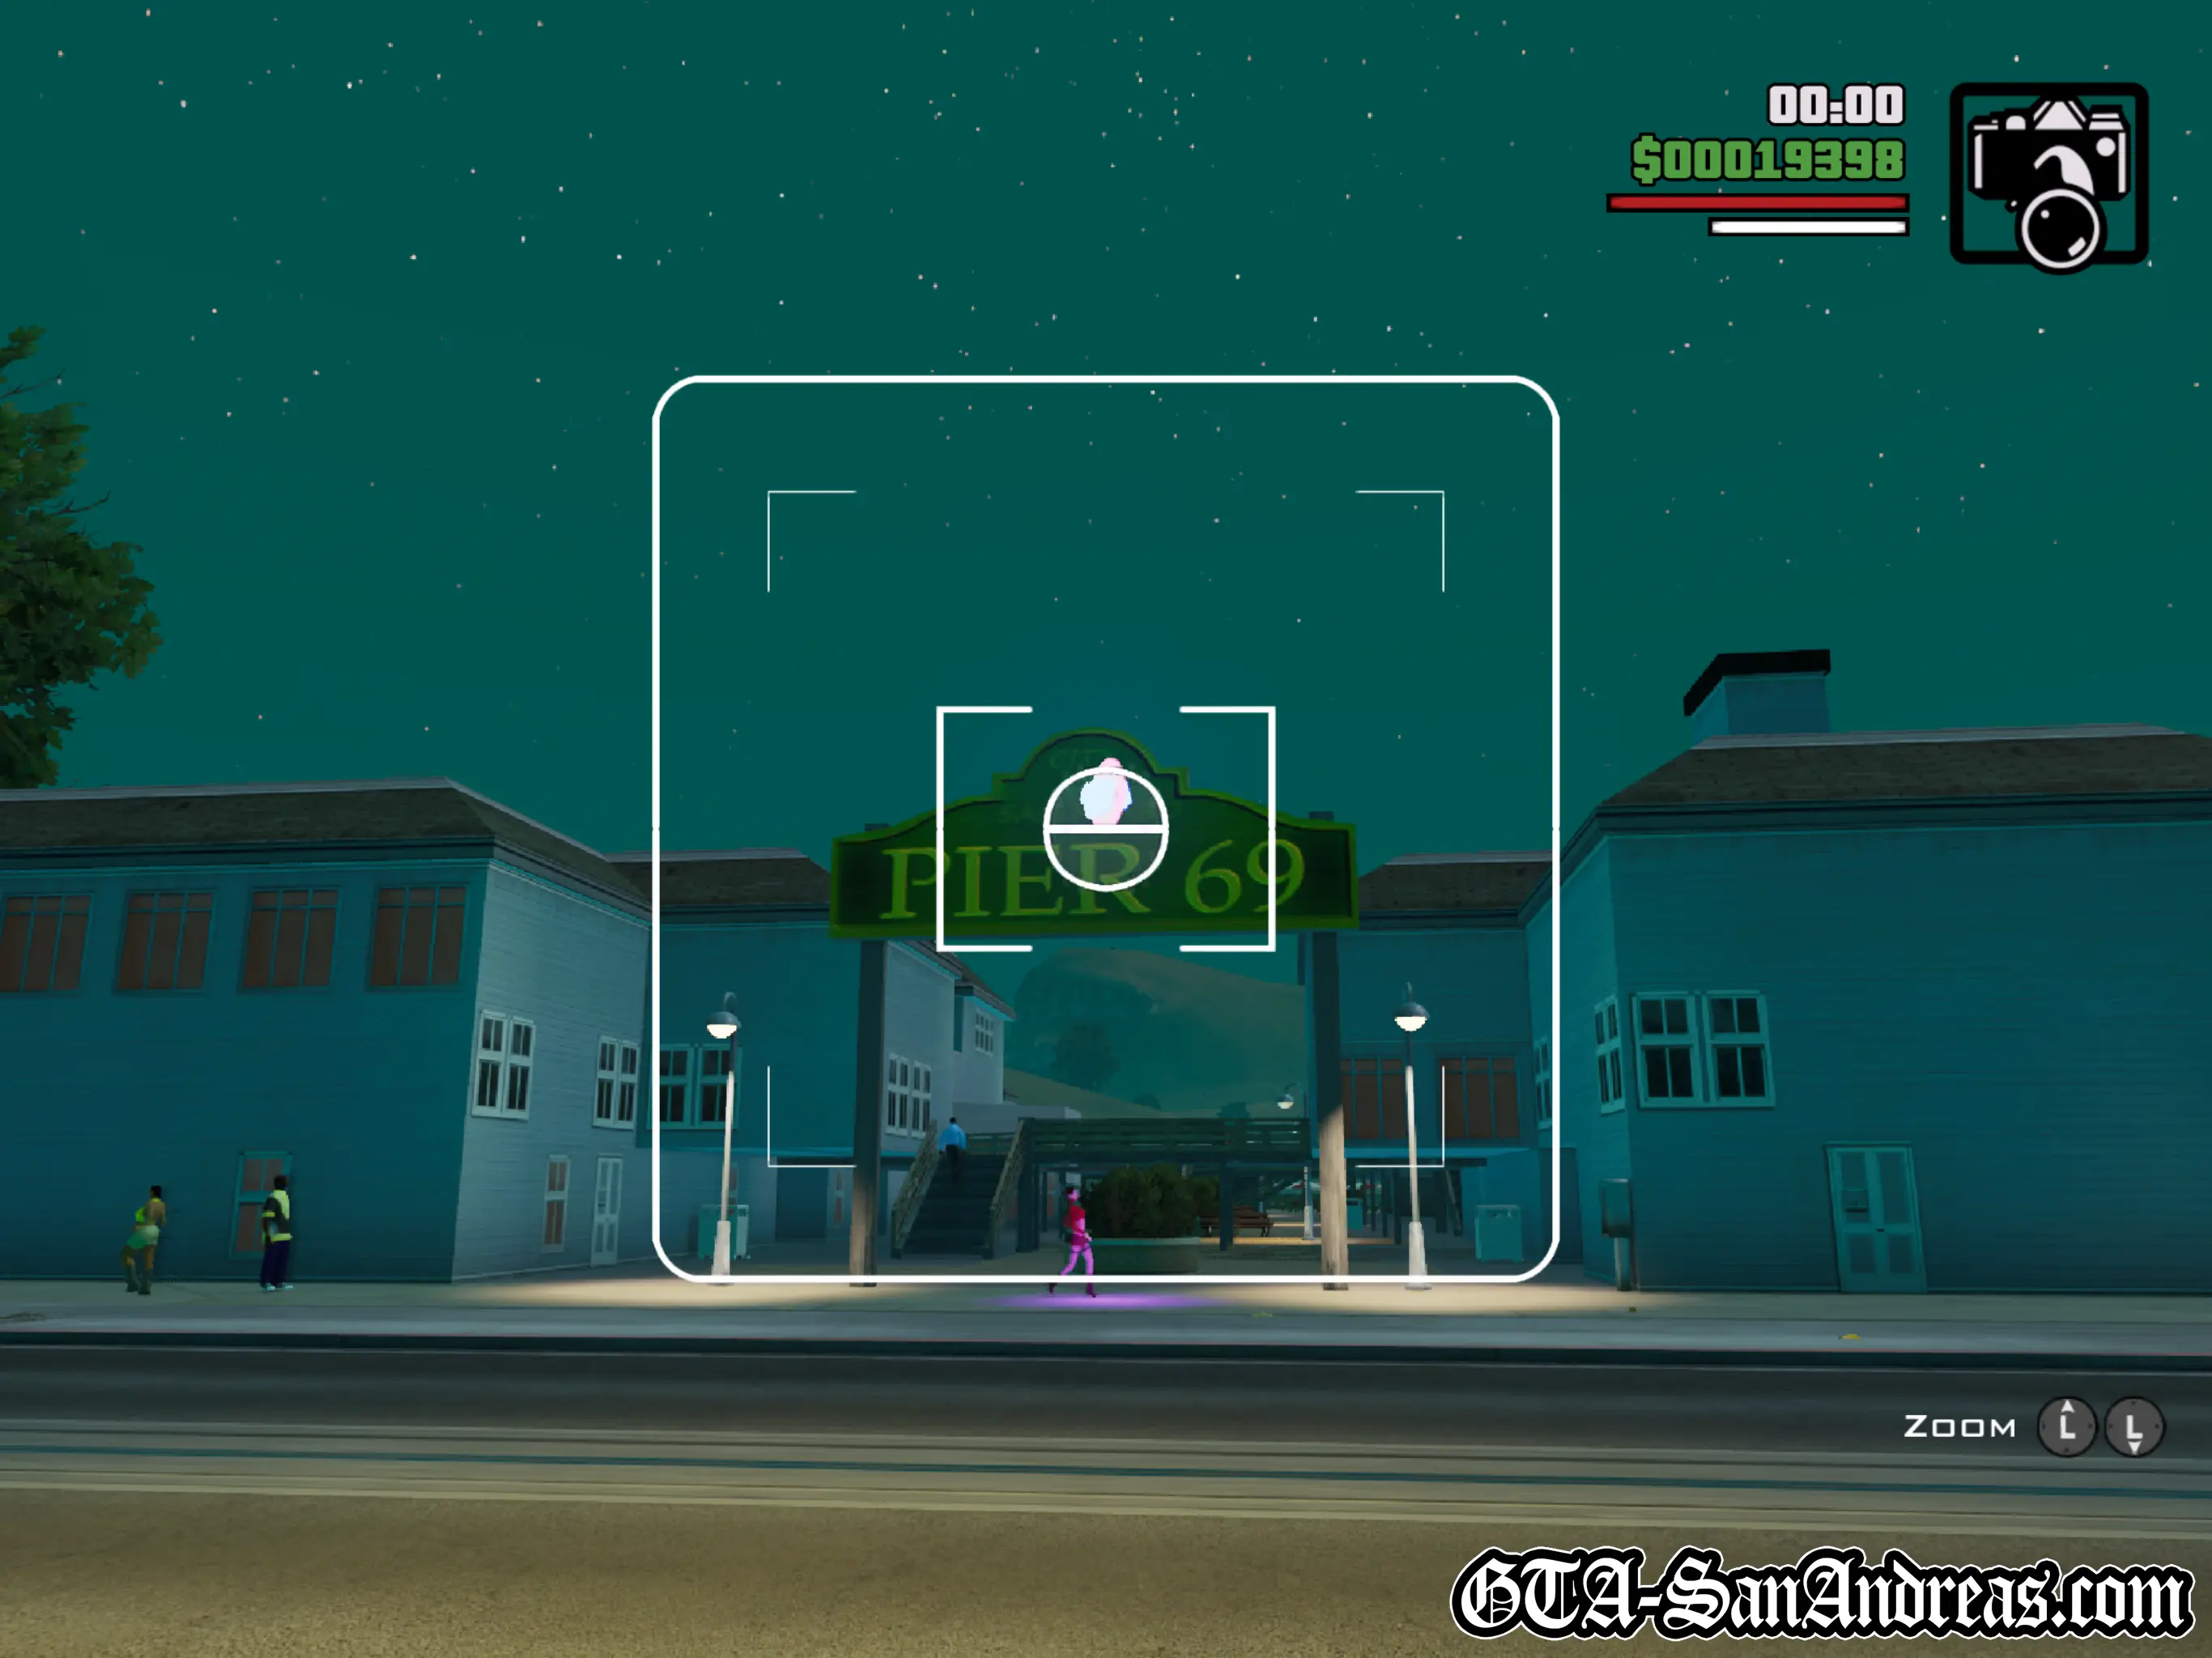
Snapshot #31
Location
Esplanade North - Right in front of the sign for Pier 69.
Where To Stand
On the road in front of the sign. Very easy.
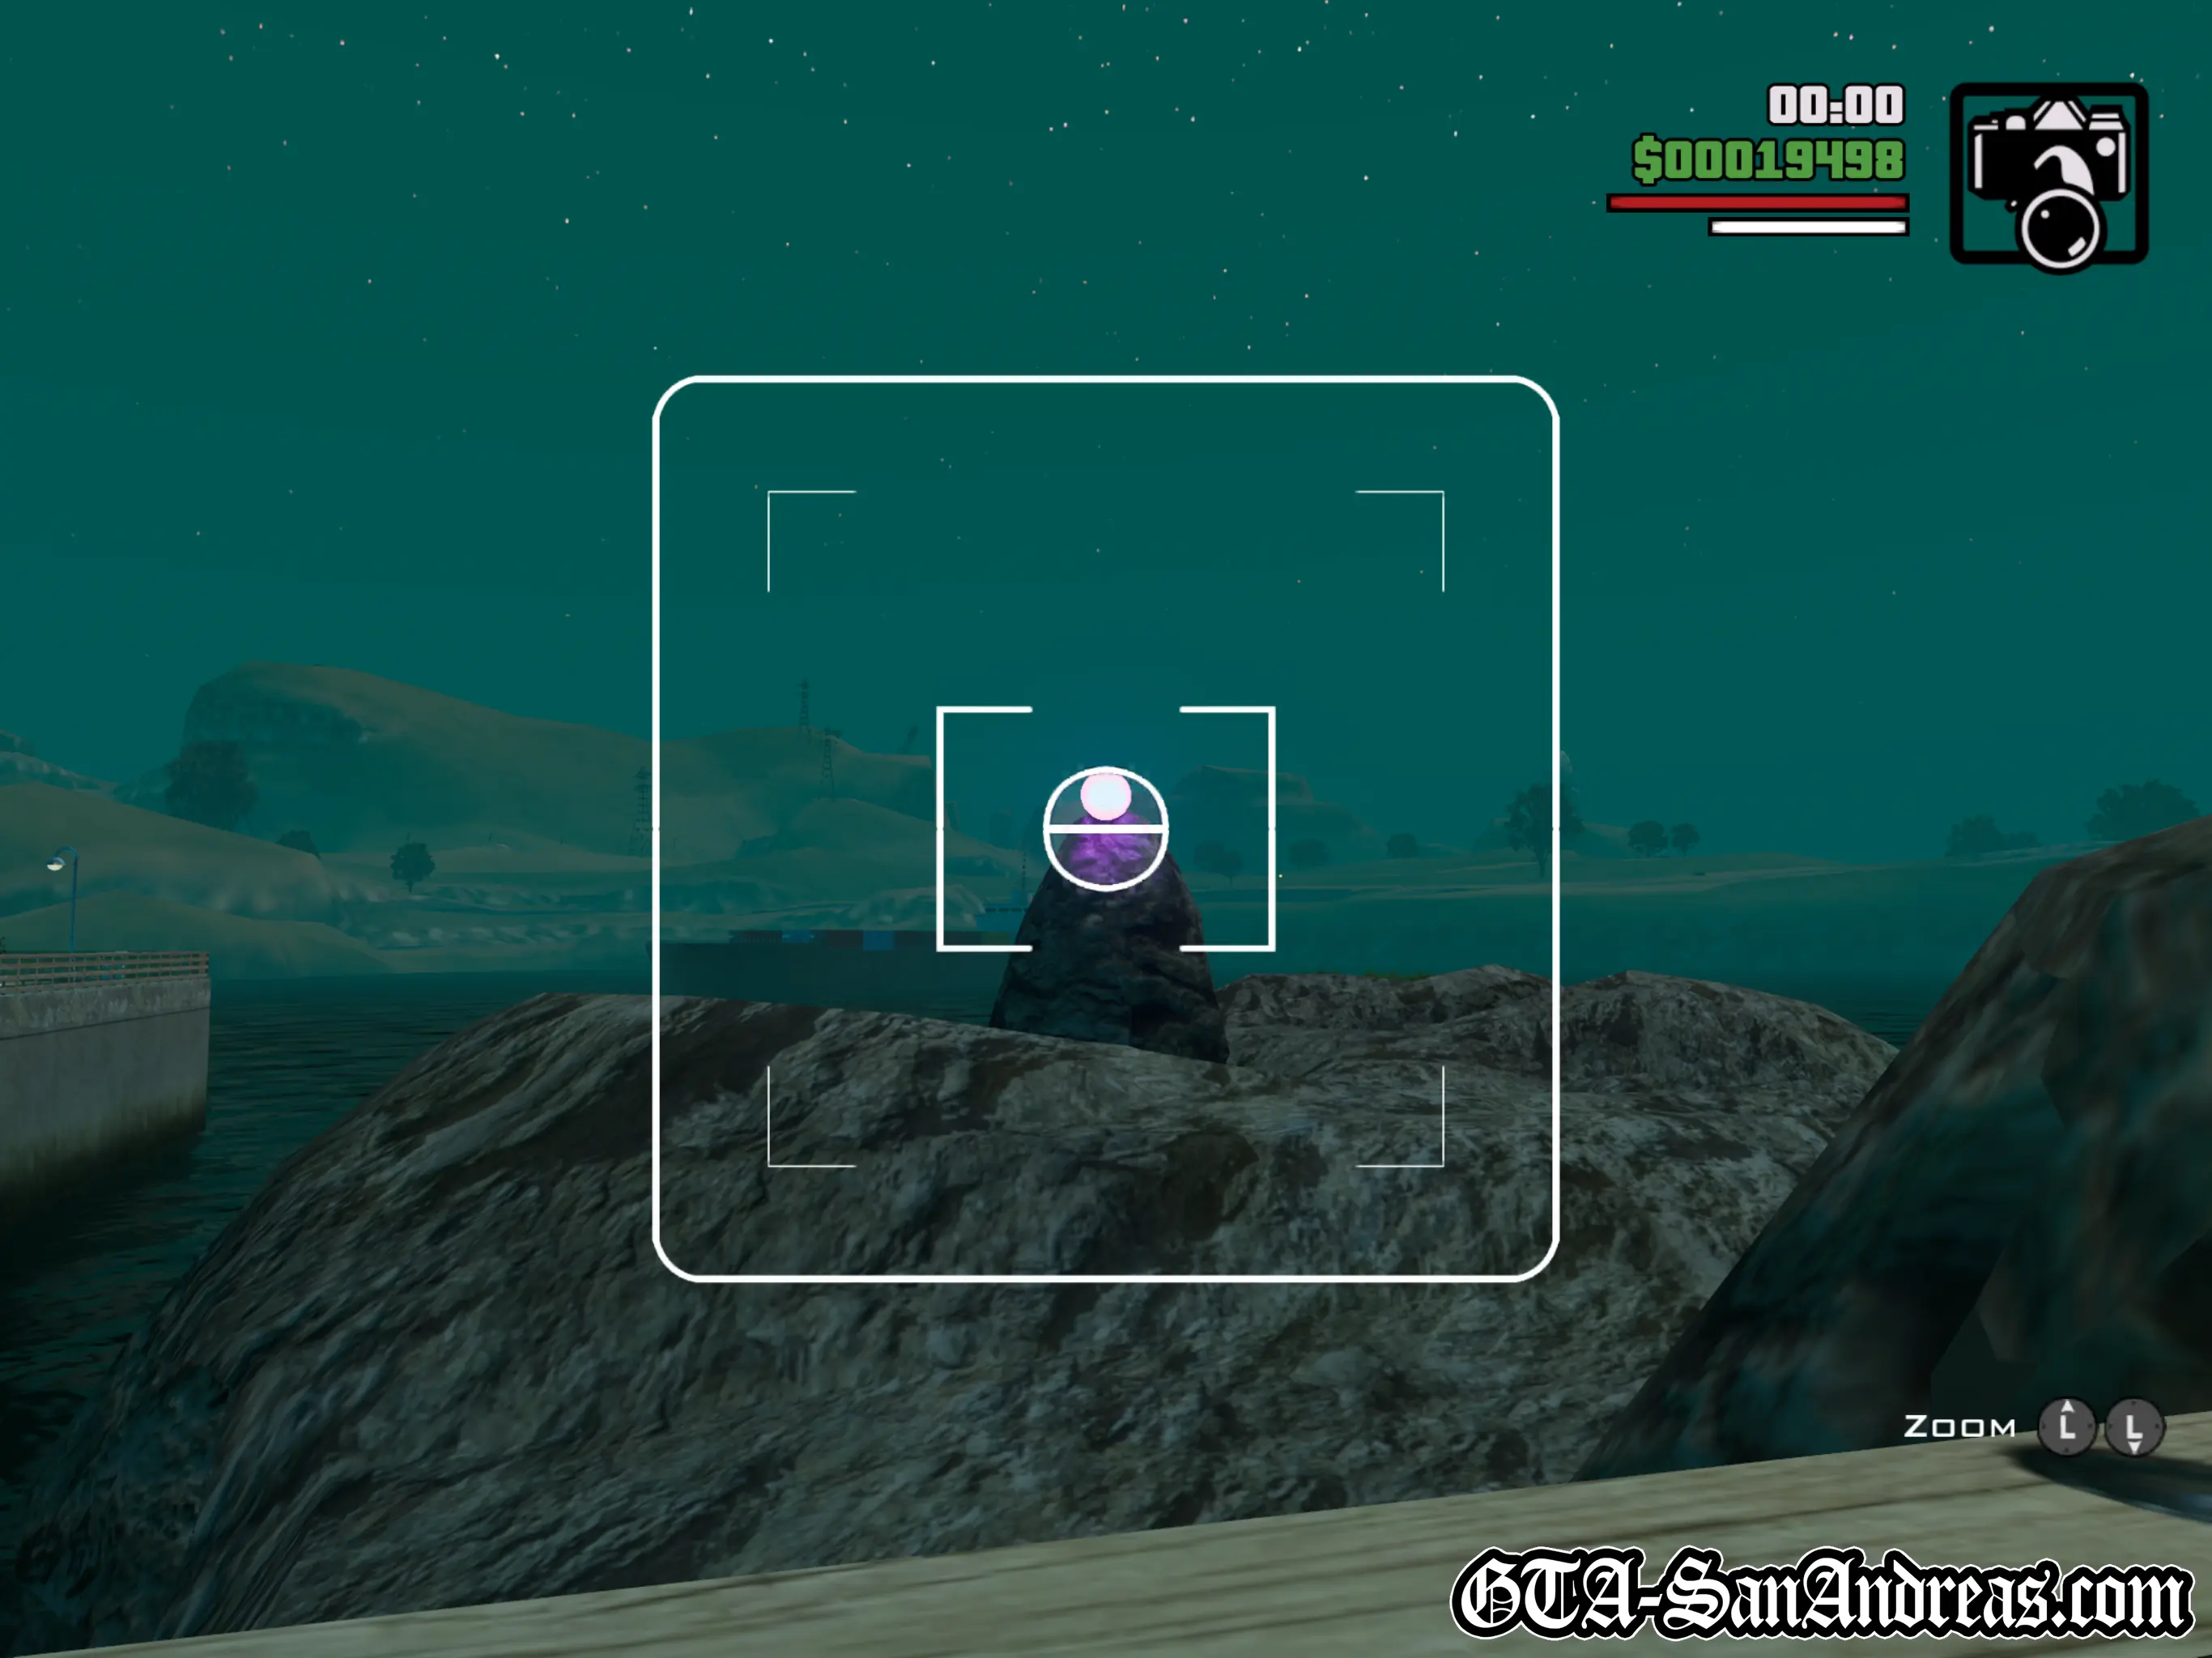
Snapshot #32
Location
Esplanade North - Sitting on top of some rocks in the harbor.
Where To Stand
Similar to the submarine, just stand anywhere on the path near the rocks.
Snapshot #33
Location
Garver Bridge - High up at the top of the Garver Bridge, about half way between San Fierro and the desert. If you're trying to get this one as soon as you reach San Fierro, it isn't really accessible without a helicopter. The bridge is initially blocked with a large invisible wall so the only way to reach it is to fly over the side. If you're getting it later in the game you can just drive over the bridge.
Where To Stand
Stand on the bridge and edge closer to the support beams until the icon appears. You need to be pretty close before you can see it.
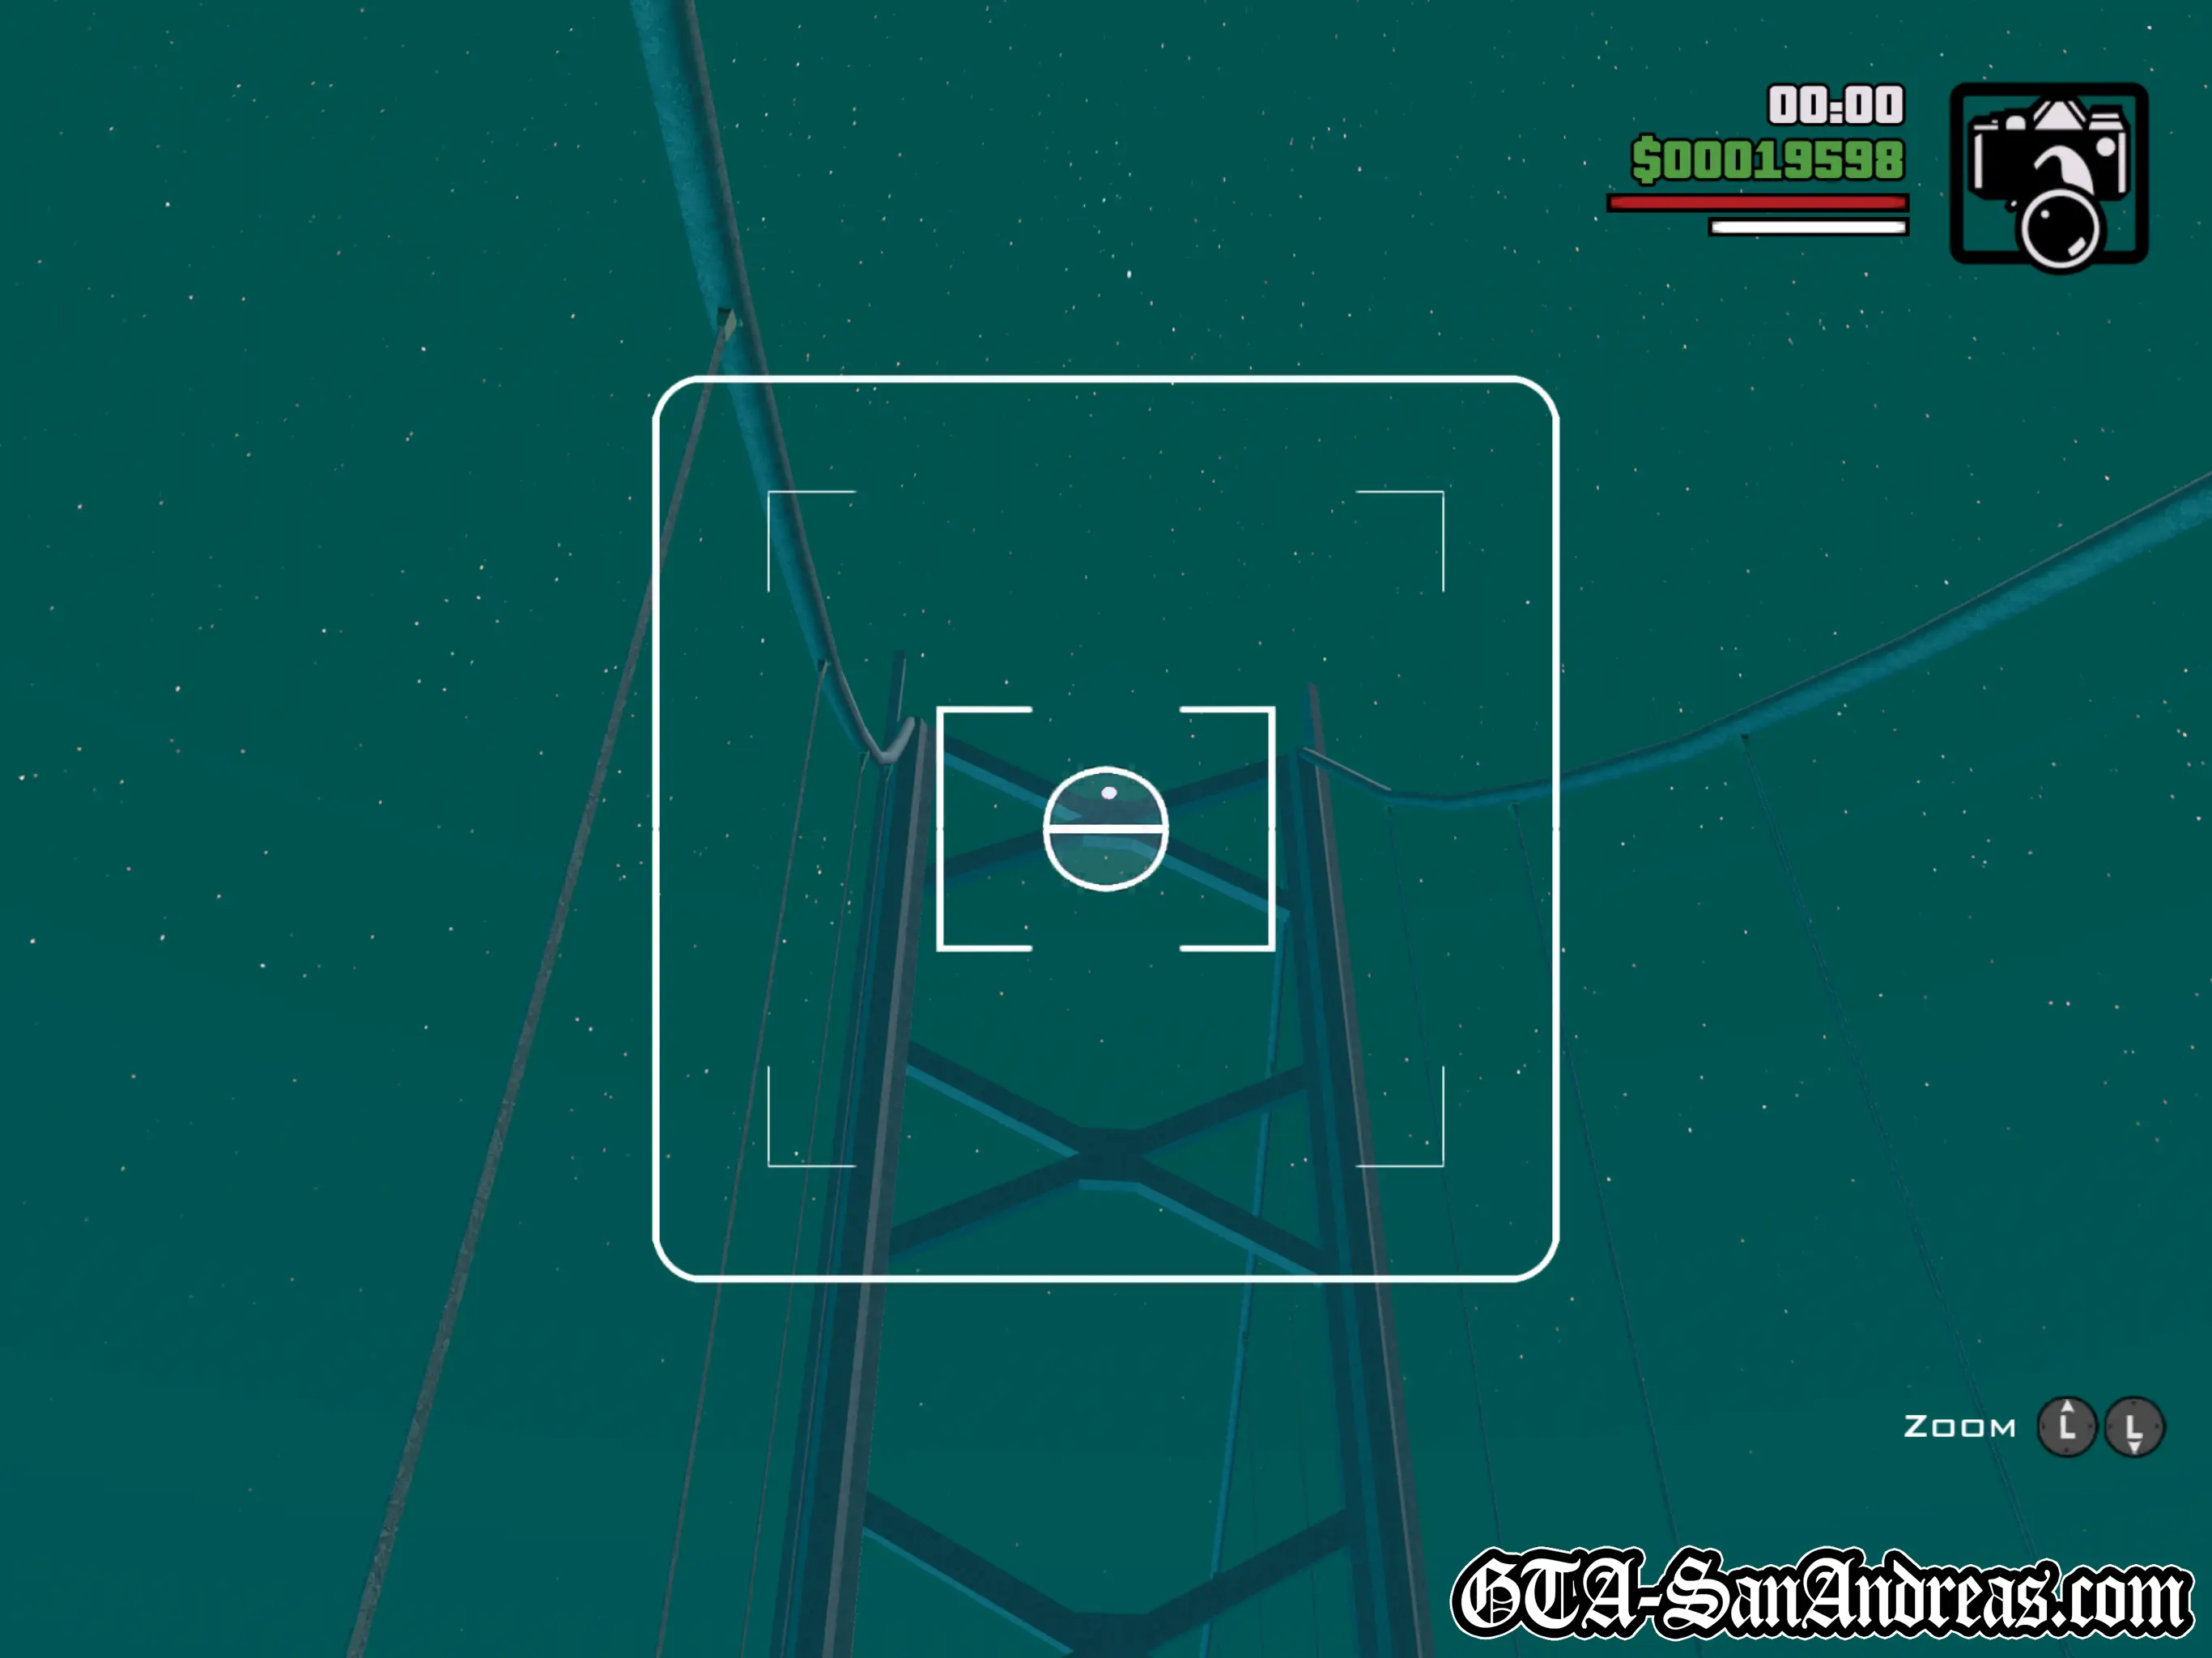
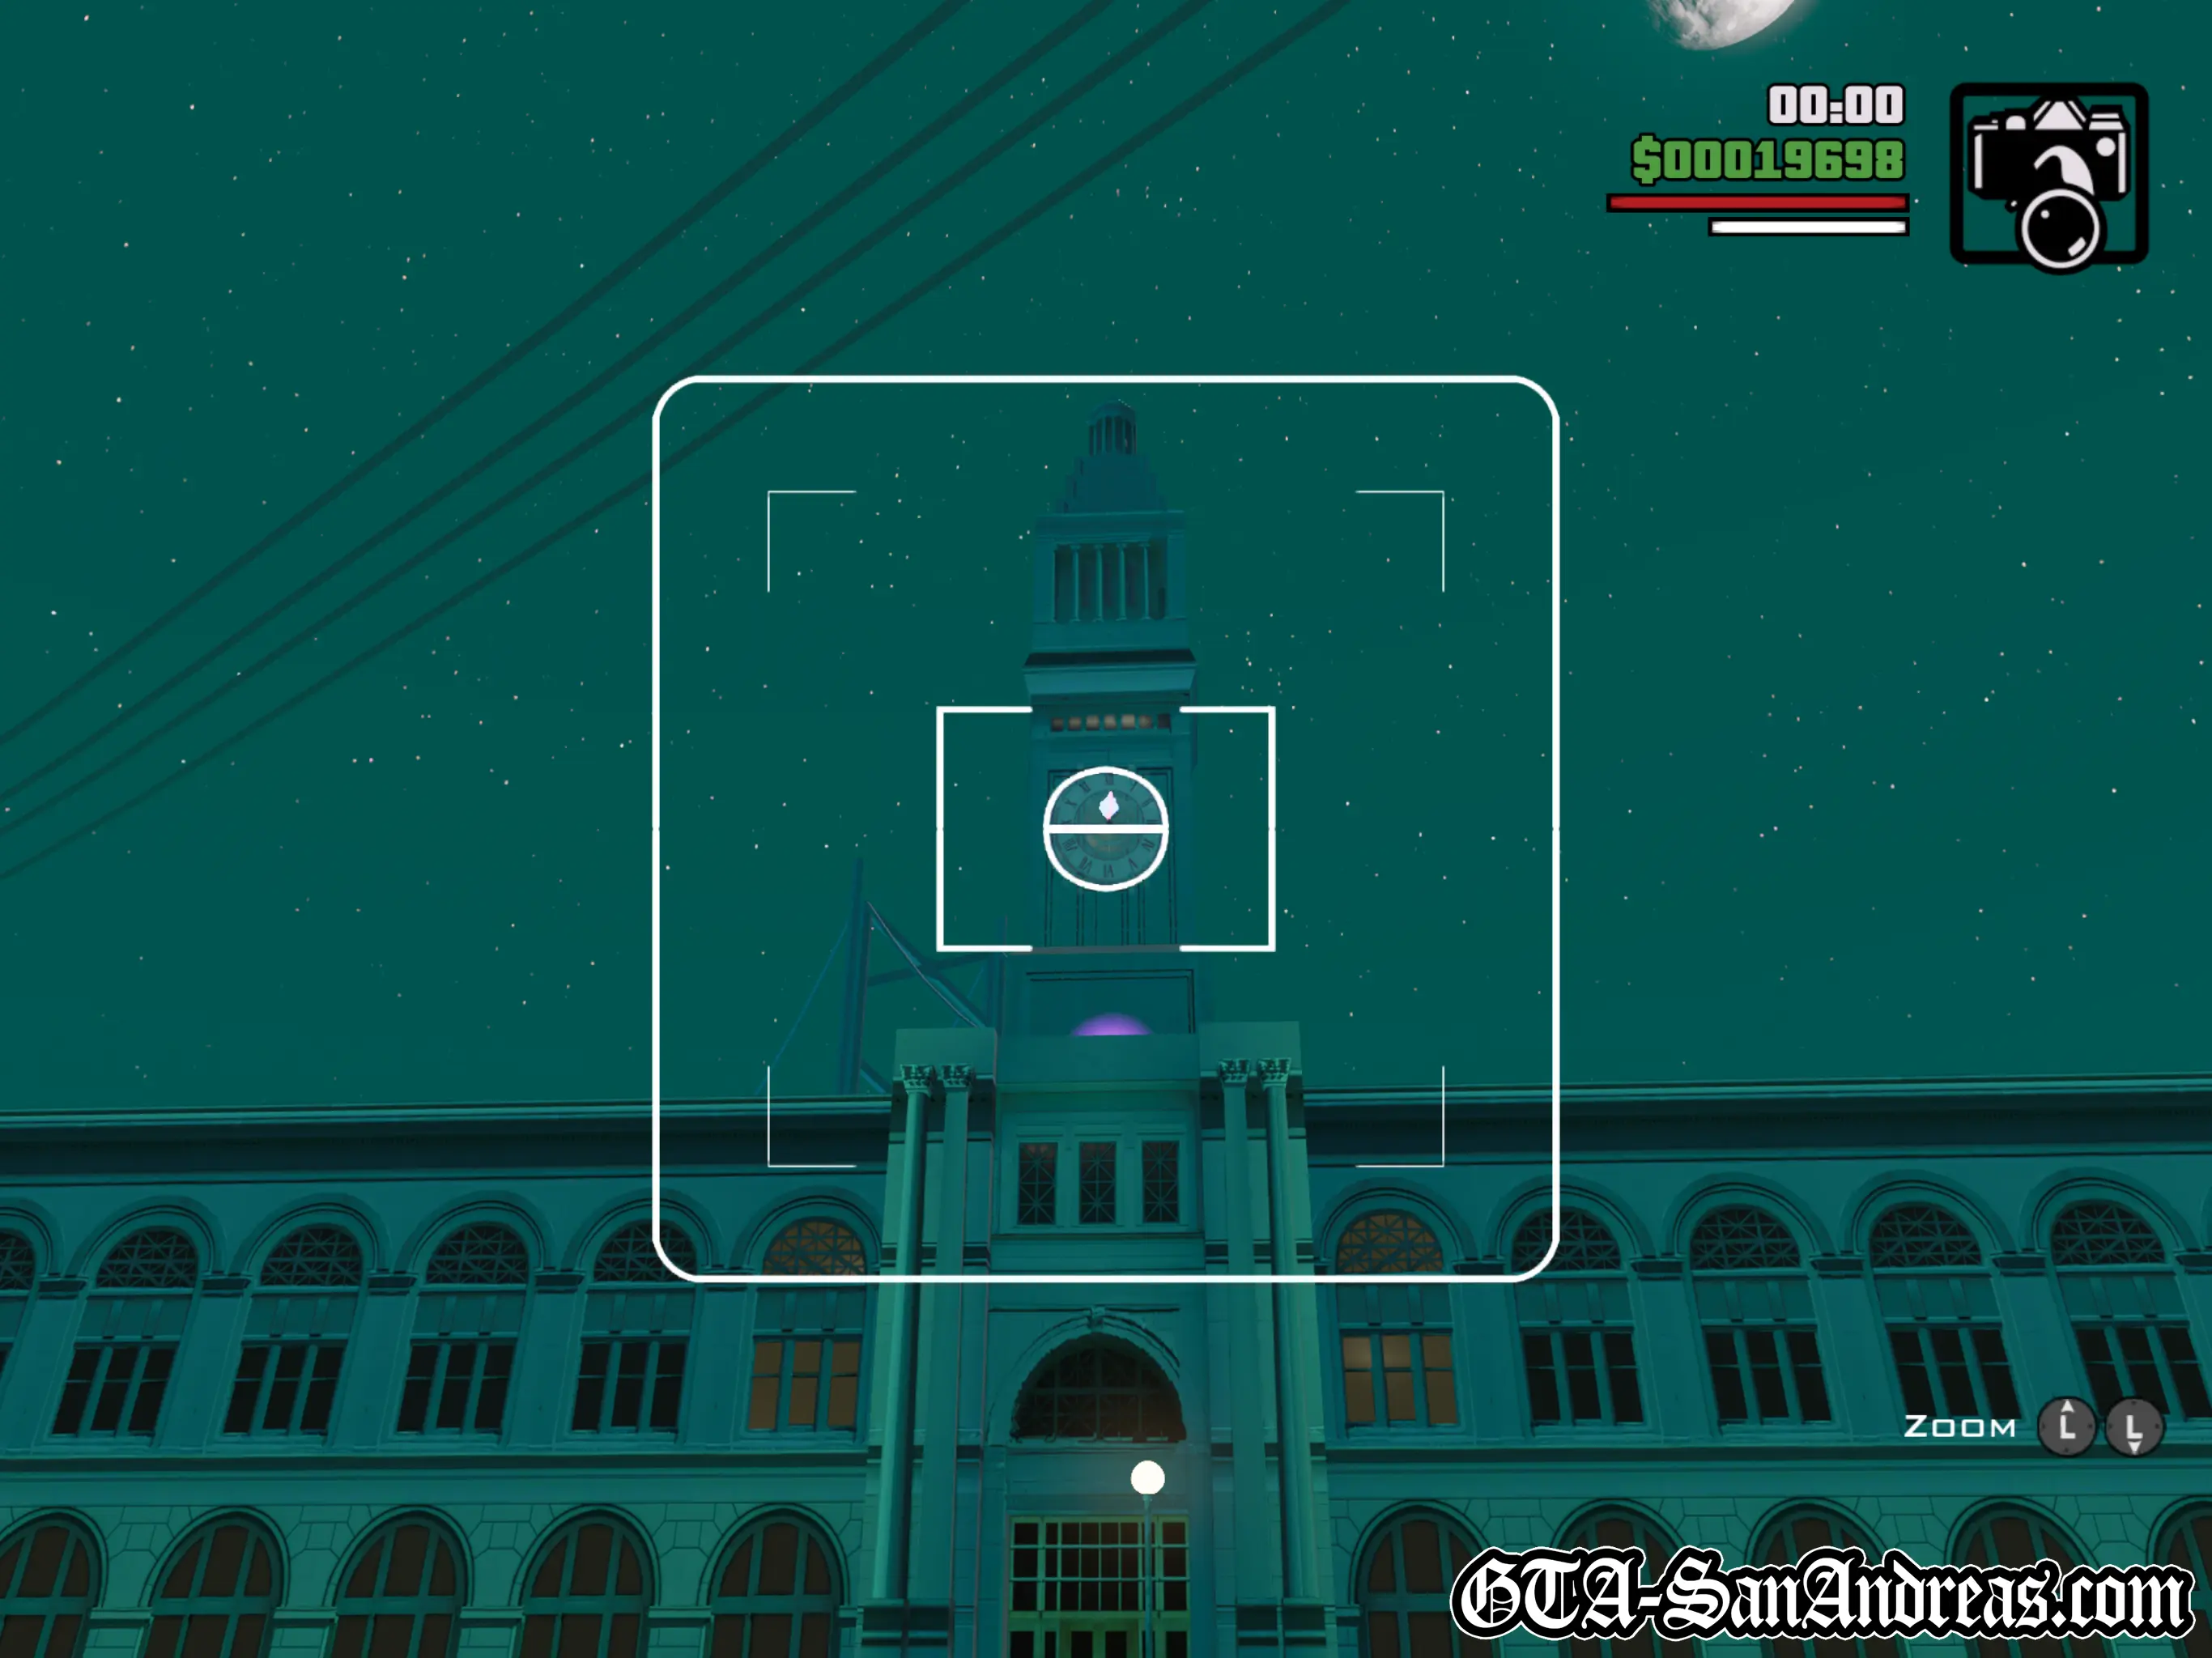
Snapshot #34
Location
Esplanade East - Right in front of the clock, mid-way up the tower.
Where To Stand
Just stand on the road in front of the clock tower, next to the tram tracks and look at the clock.
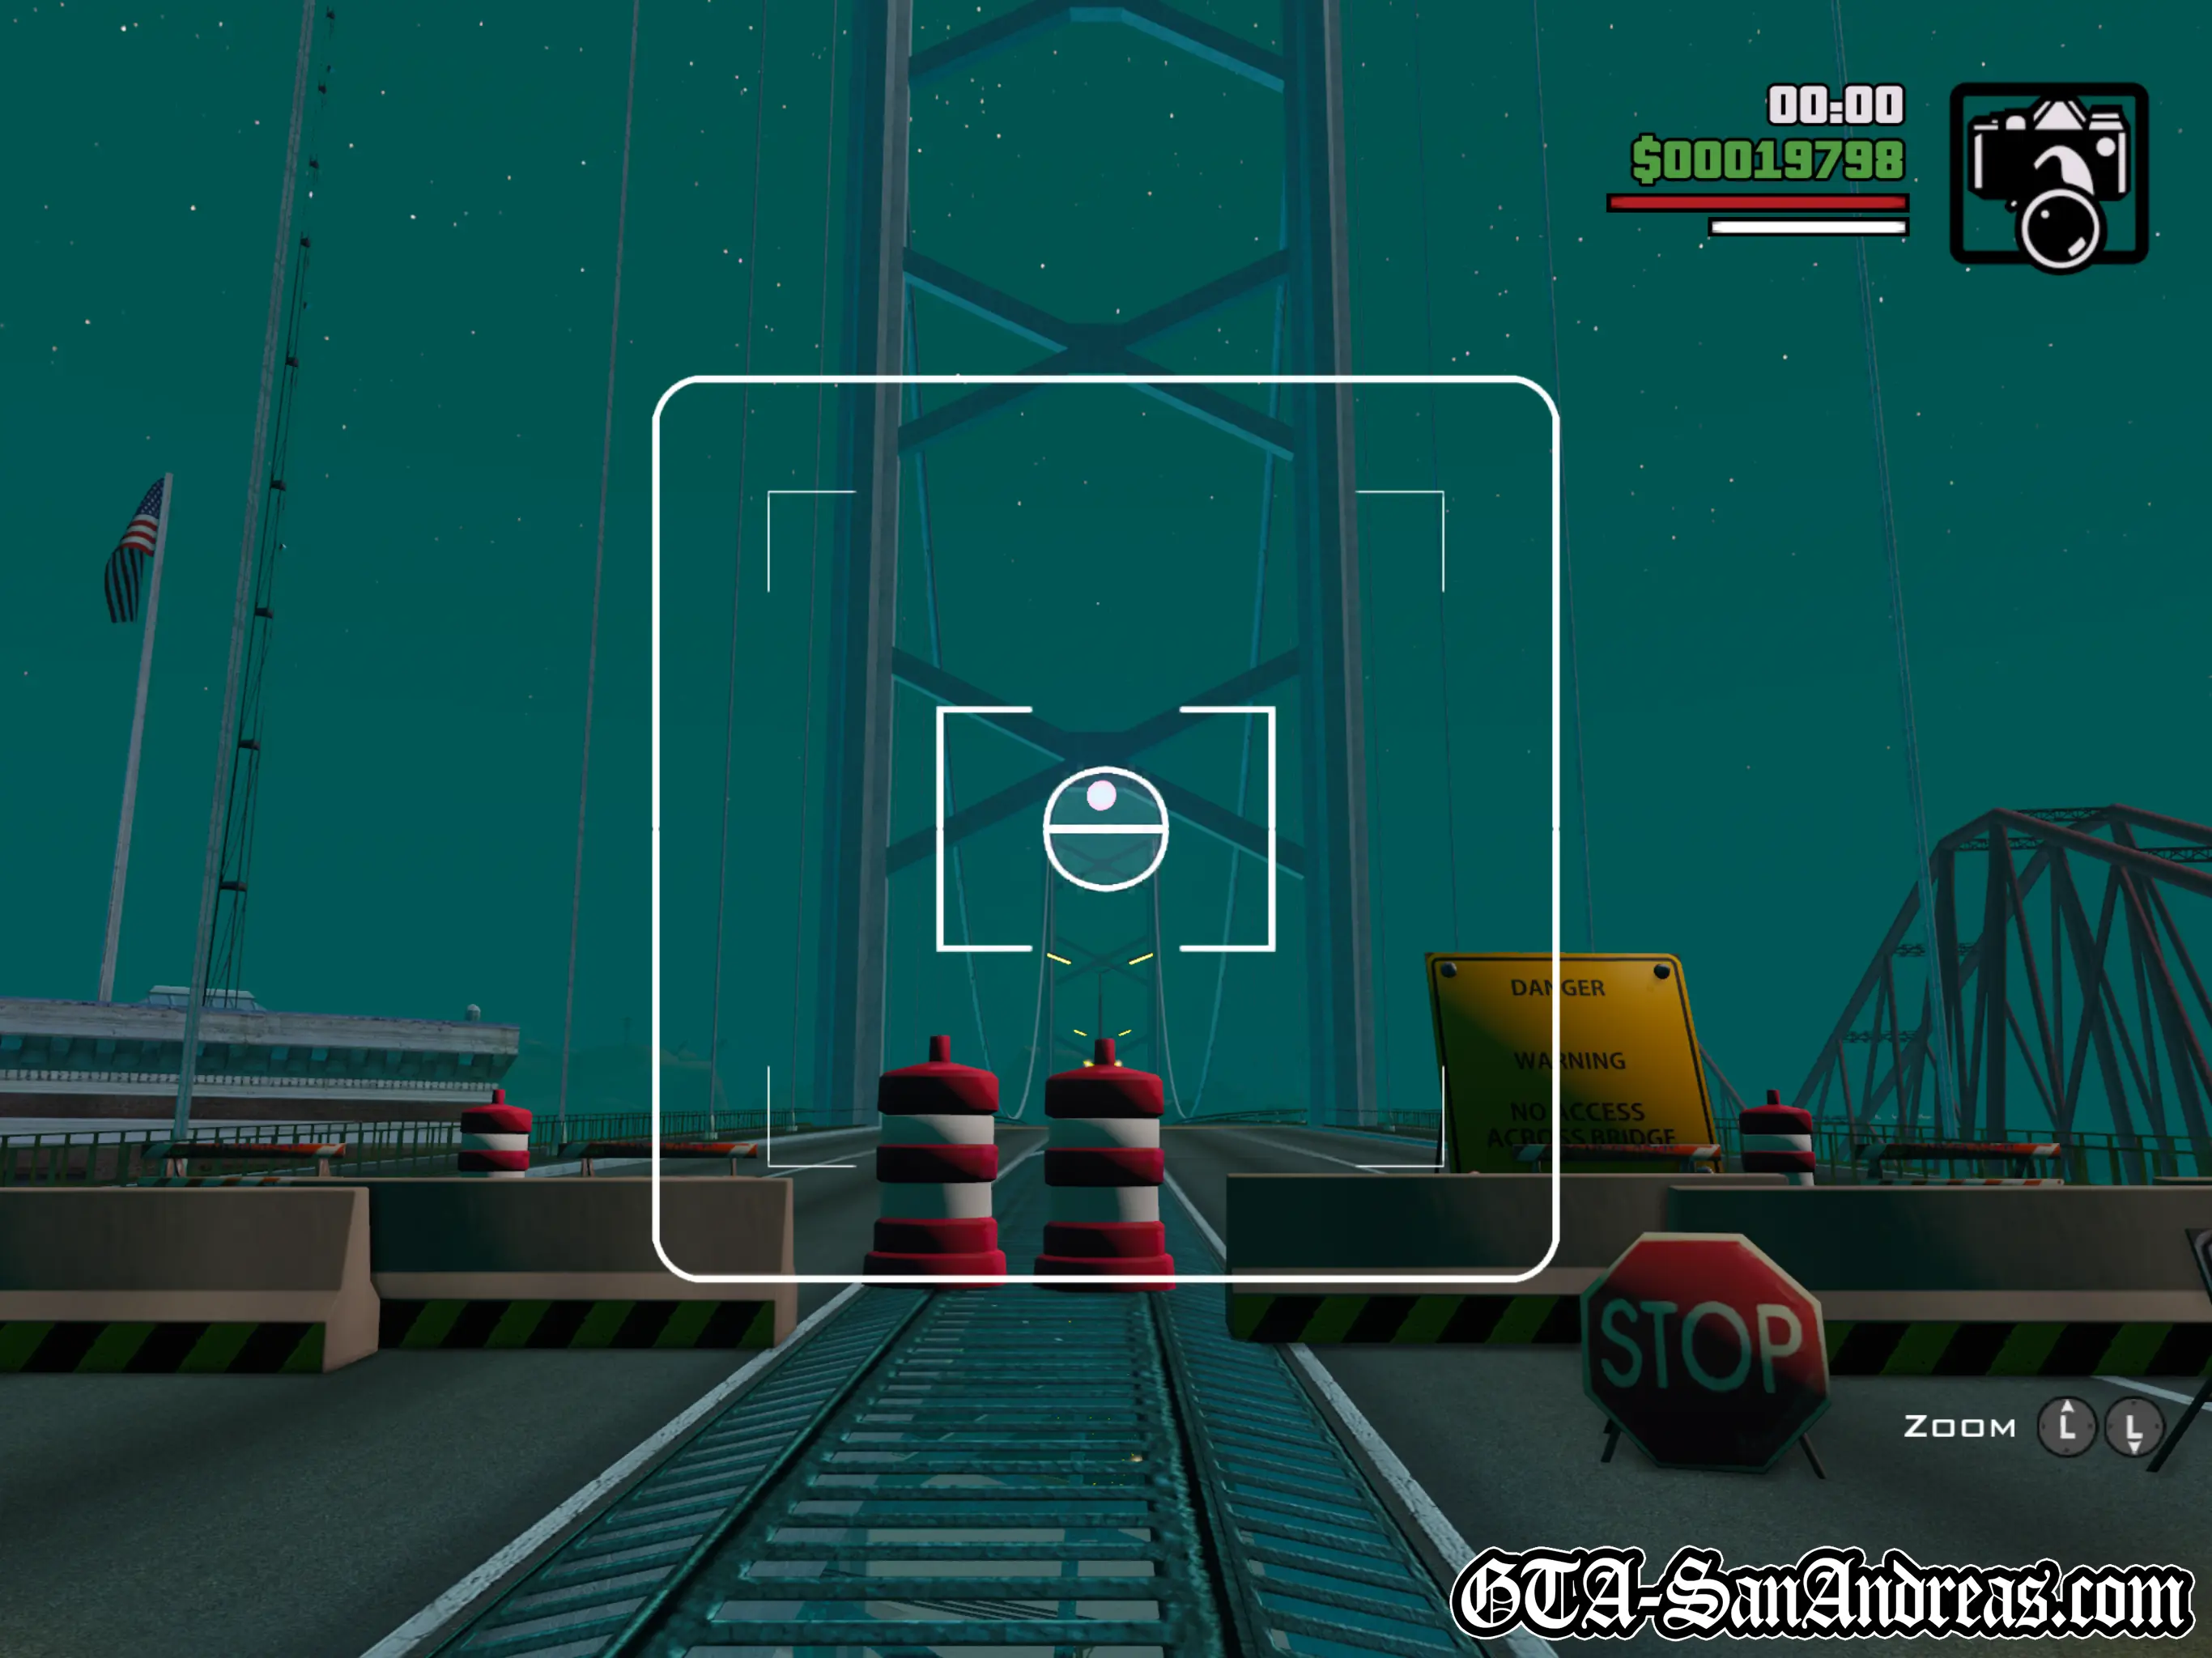
Snapshot #35
Location
Garver Bridge - Not far onto the Garver Bridge (San Fierro side). You can take the snapshot from the South-Western entrance to the bridge even if the road is blocked.
Where To Stand
Anywhere on the road at the San Fierro side of the bridge. It's not very high up, but you'll probably need to be on the bridge to see it.
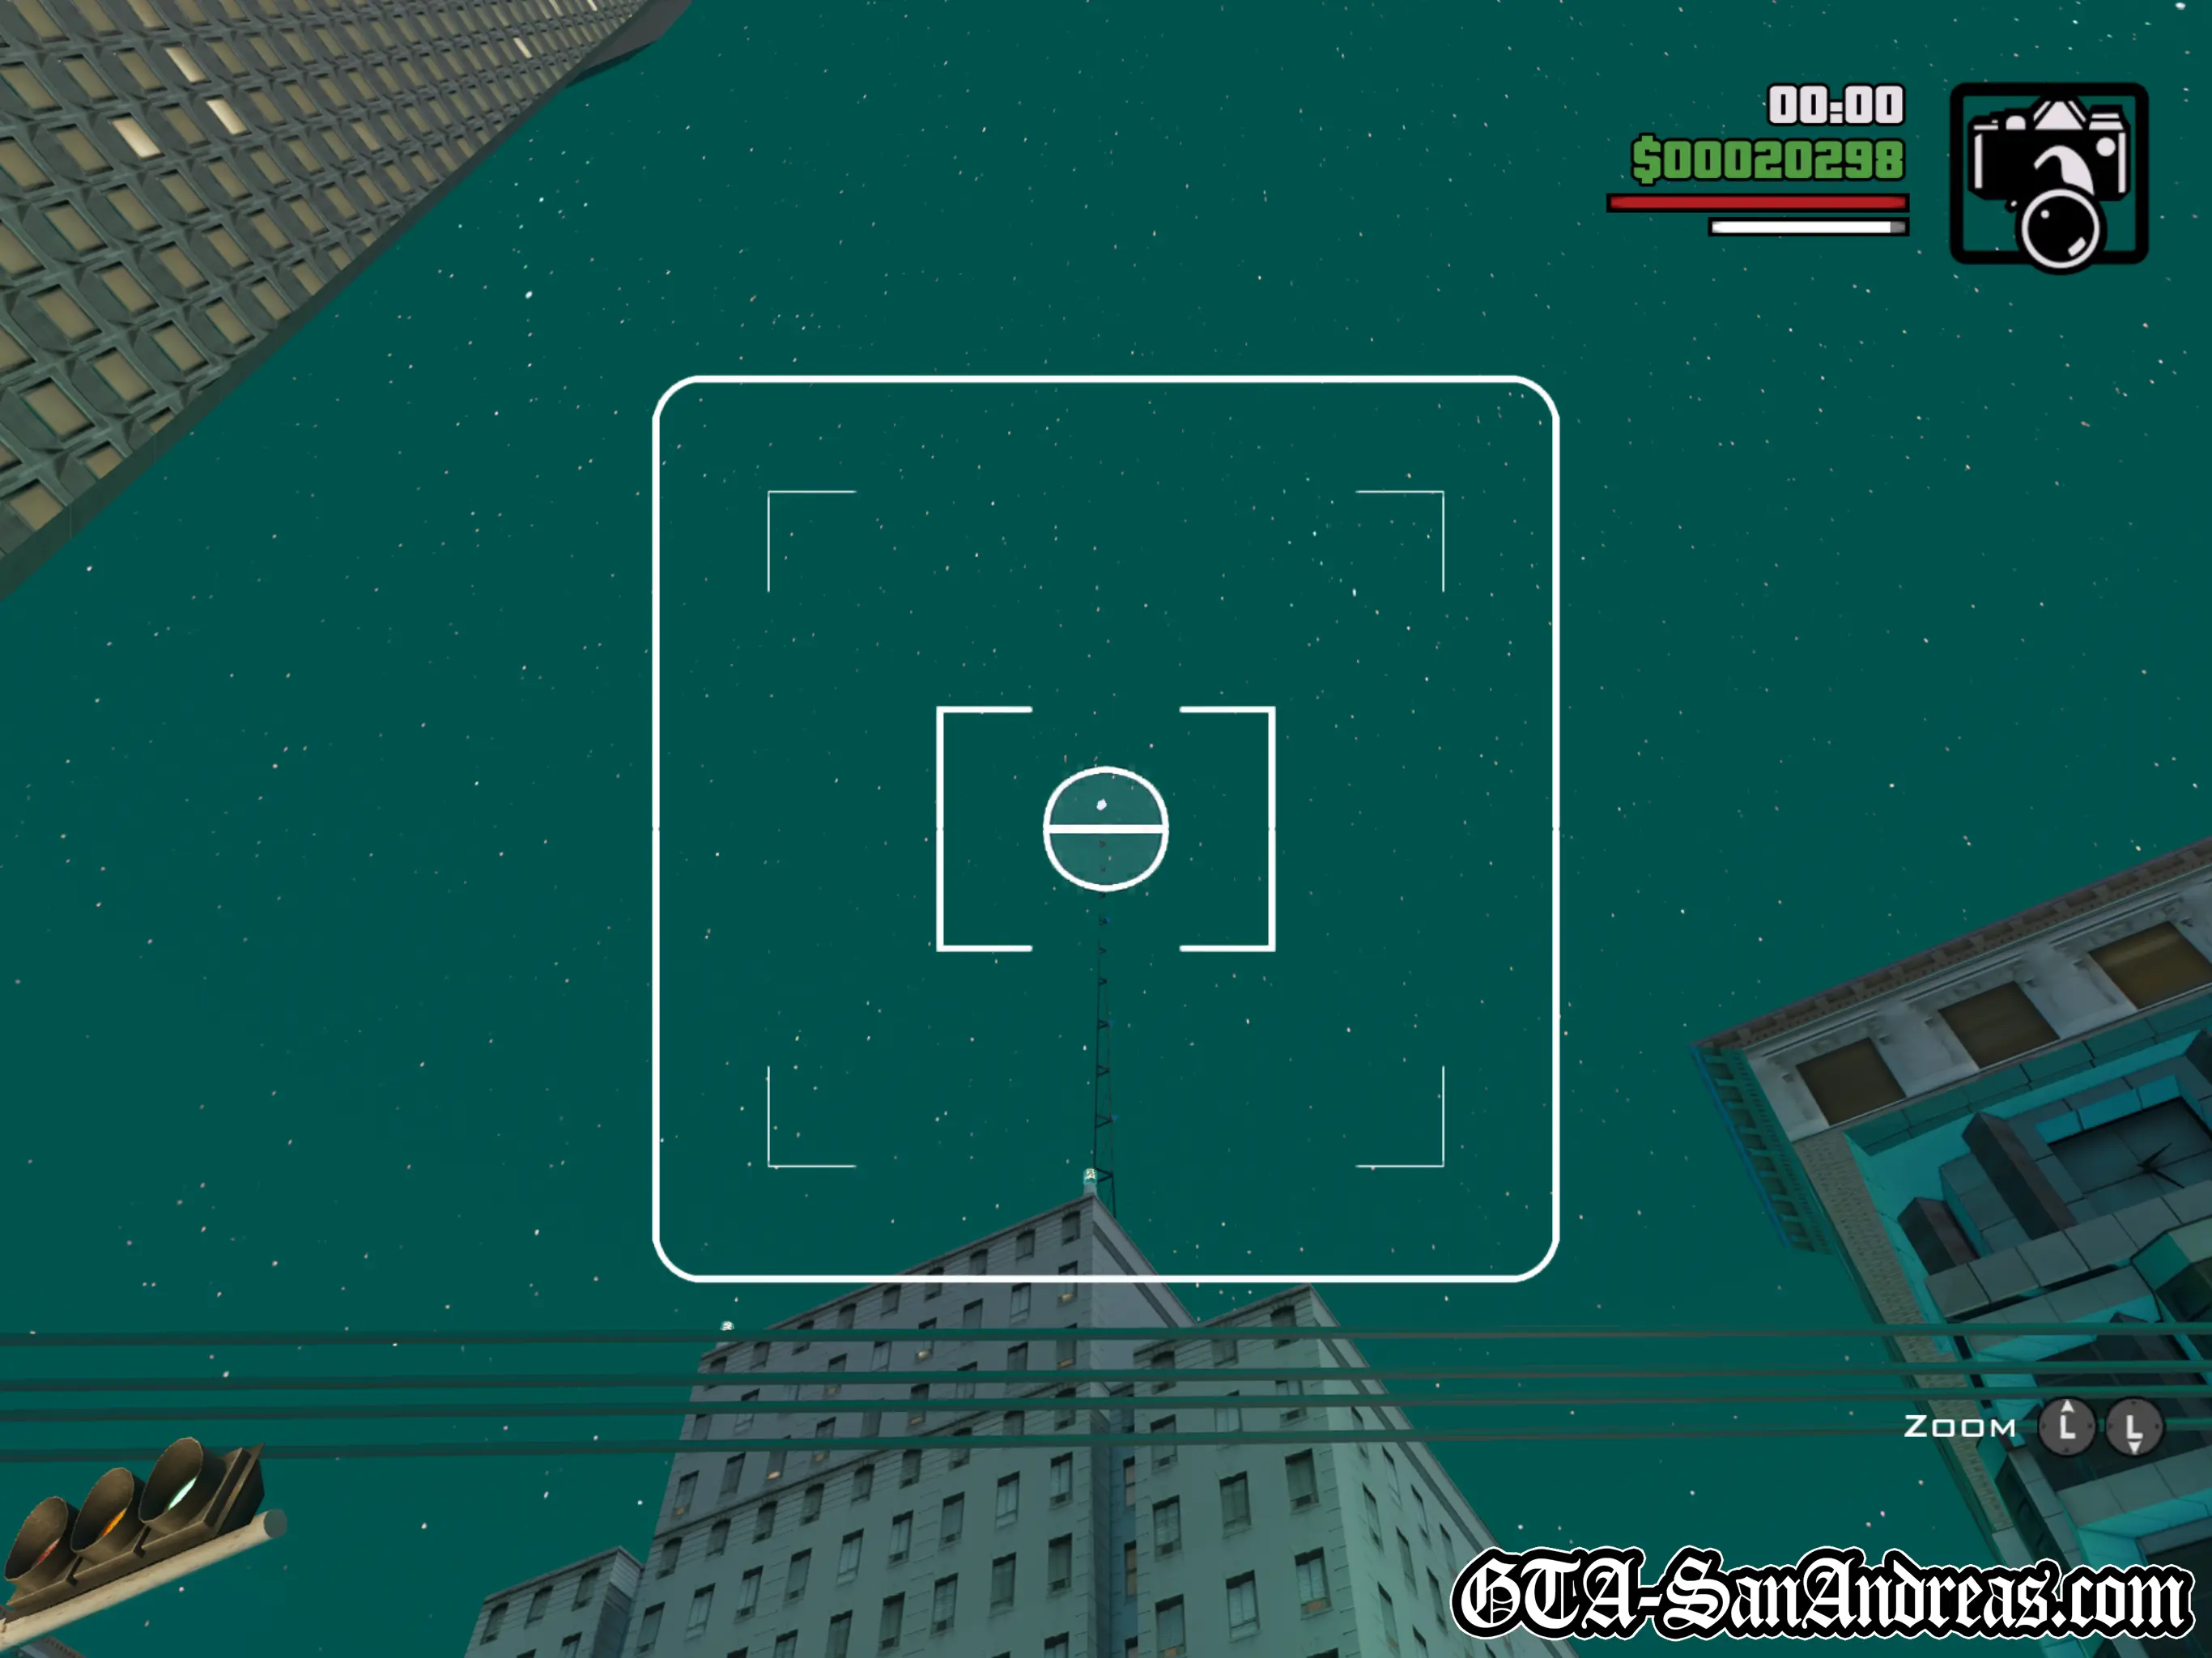
Snapshot #36
Location
Financial - Very high up at the top of a radio tower opposite the 'Big Pointy Building'.
Where To Stand
You can enter the doorway of the Big Pointy Building which will spawn you at the top, then you can look down to the North and snap it. You can also capture it from ground level if you stand on the road North-East in front of the big tower and look up to the North.
Snapshot #37
Location
Financial - About three quarters of the way up a building with a criss-cross structure in front of the windows. It's floating at the North side of the building.
Where To Stand
The nearby grass field, not far from the church, is a good place to see this one. If you're on the grass you'll be looking down the street to the West and it'll be high up on your right.

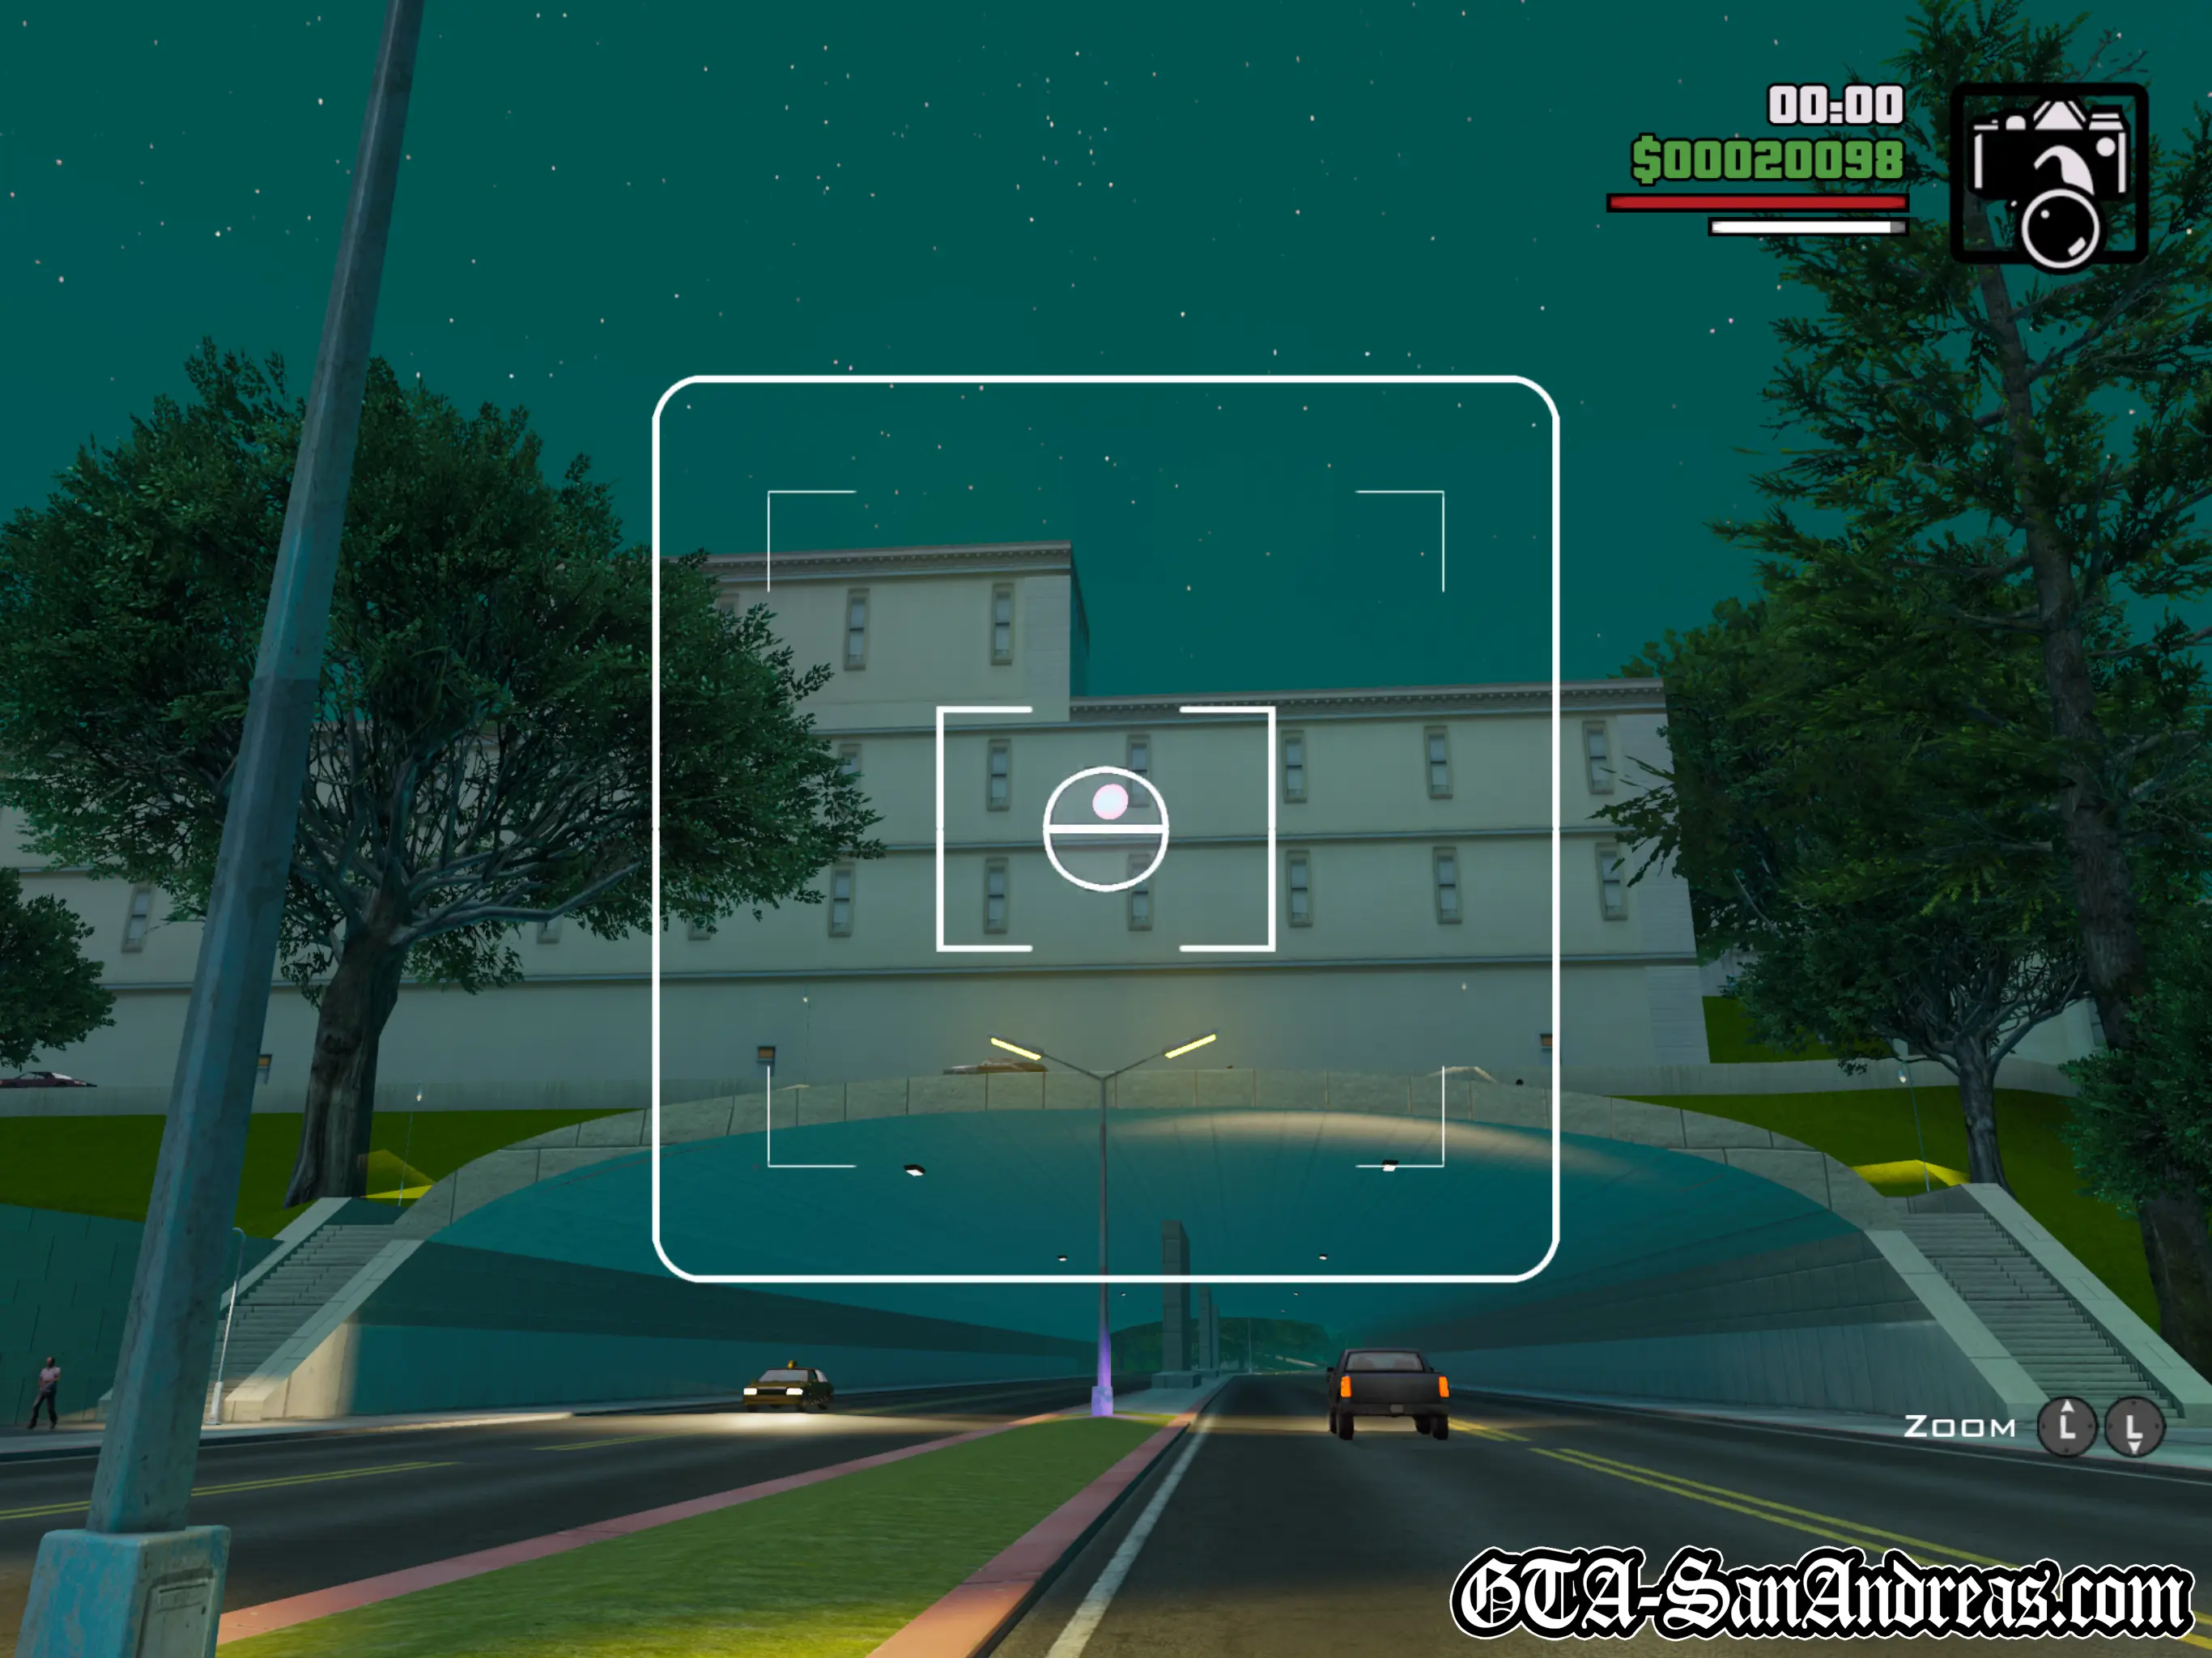
Snapshot #38
Location
Calton Heights - Floating above the entrance to a tunnel under some buildings.
Where To Stand
Anywhere on the road at the West end of the tunnel.
Snapshot #39
Location
Calton Heights - Three quarters of the way up the windy-windy-windy street. There's a safe house you can purchase just near this one.
Where To Stand
Stand at the top of the hill and look down, or at the bottom and look up. It's not very high up.
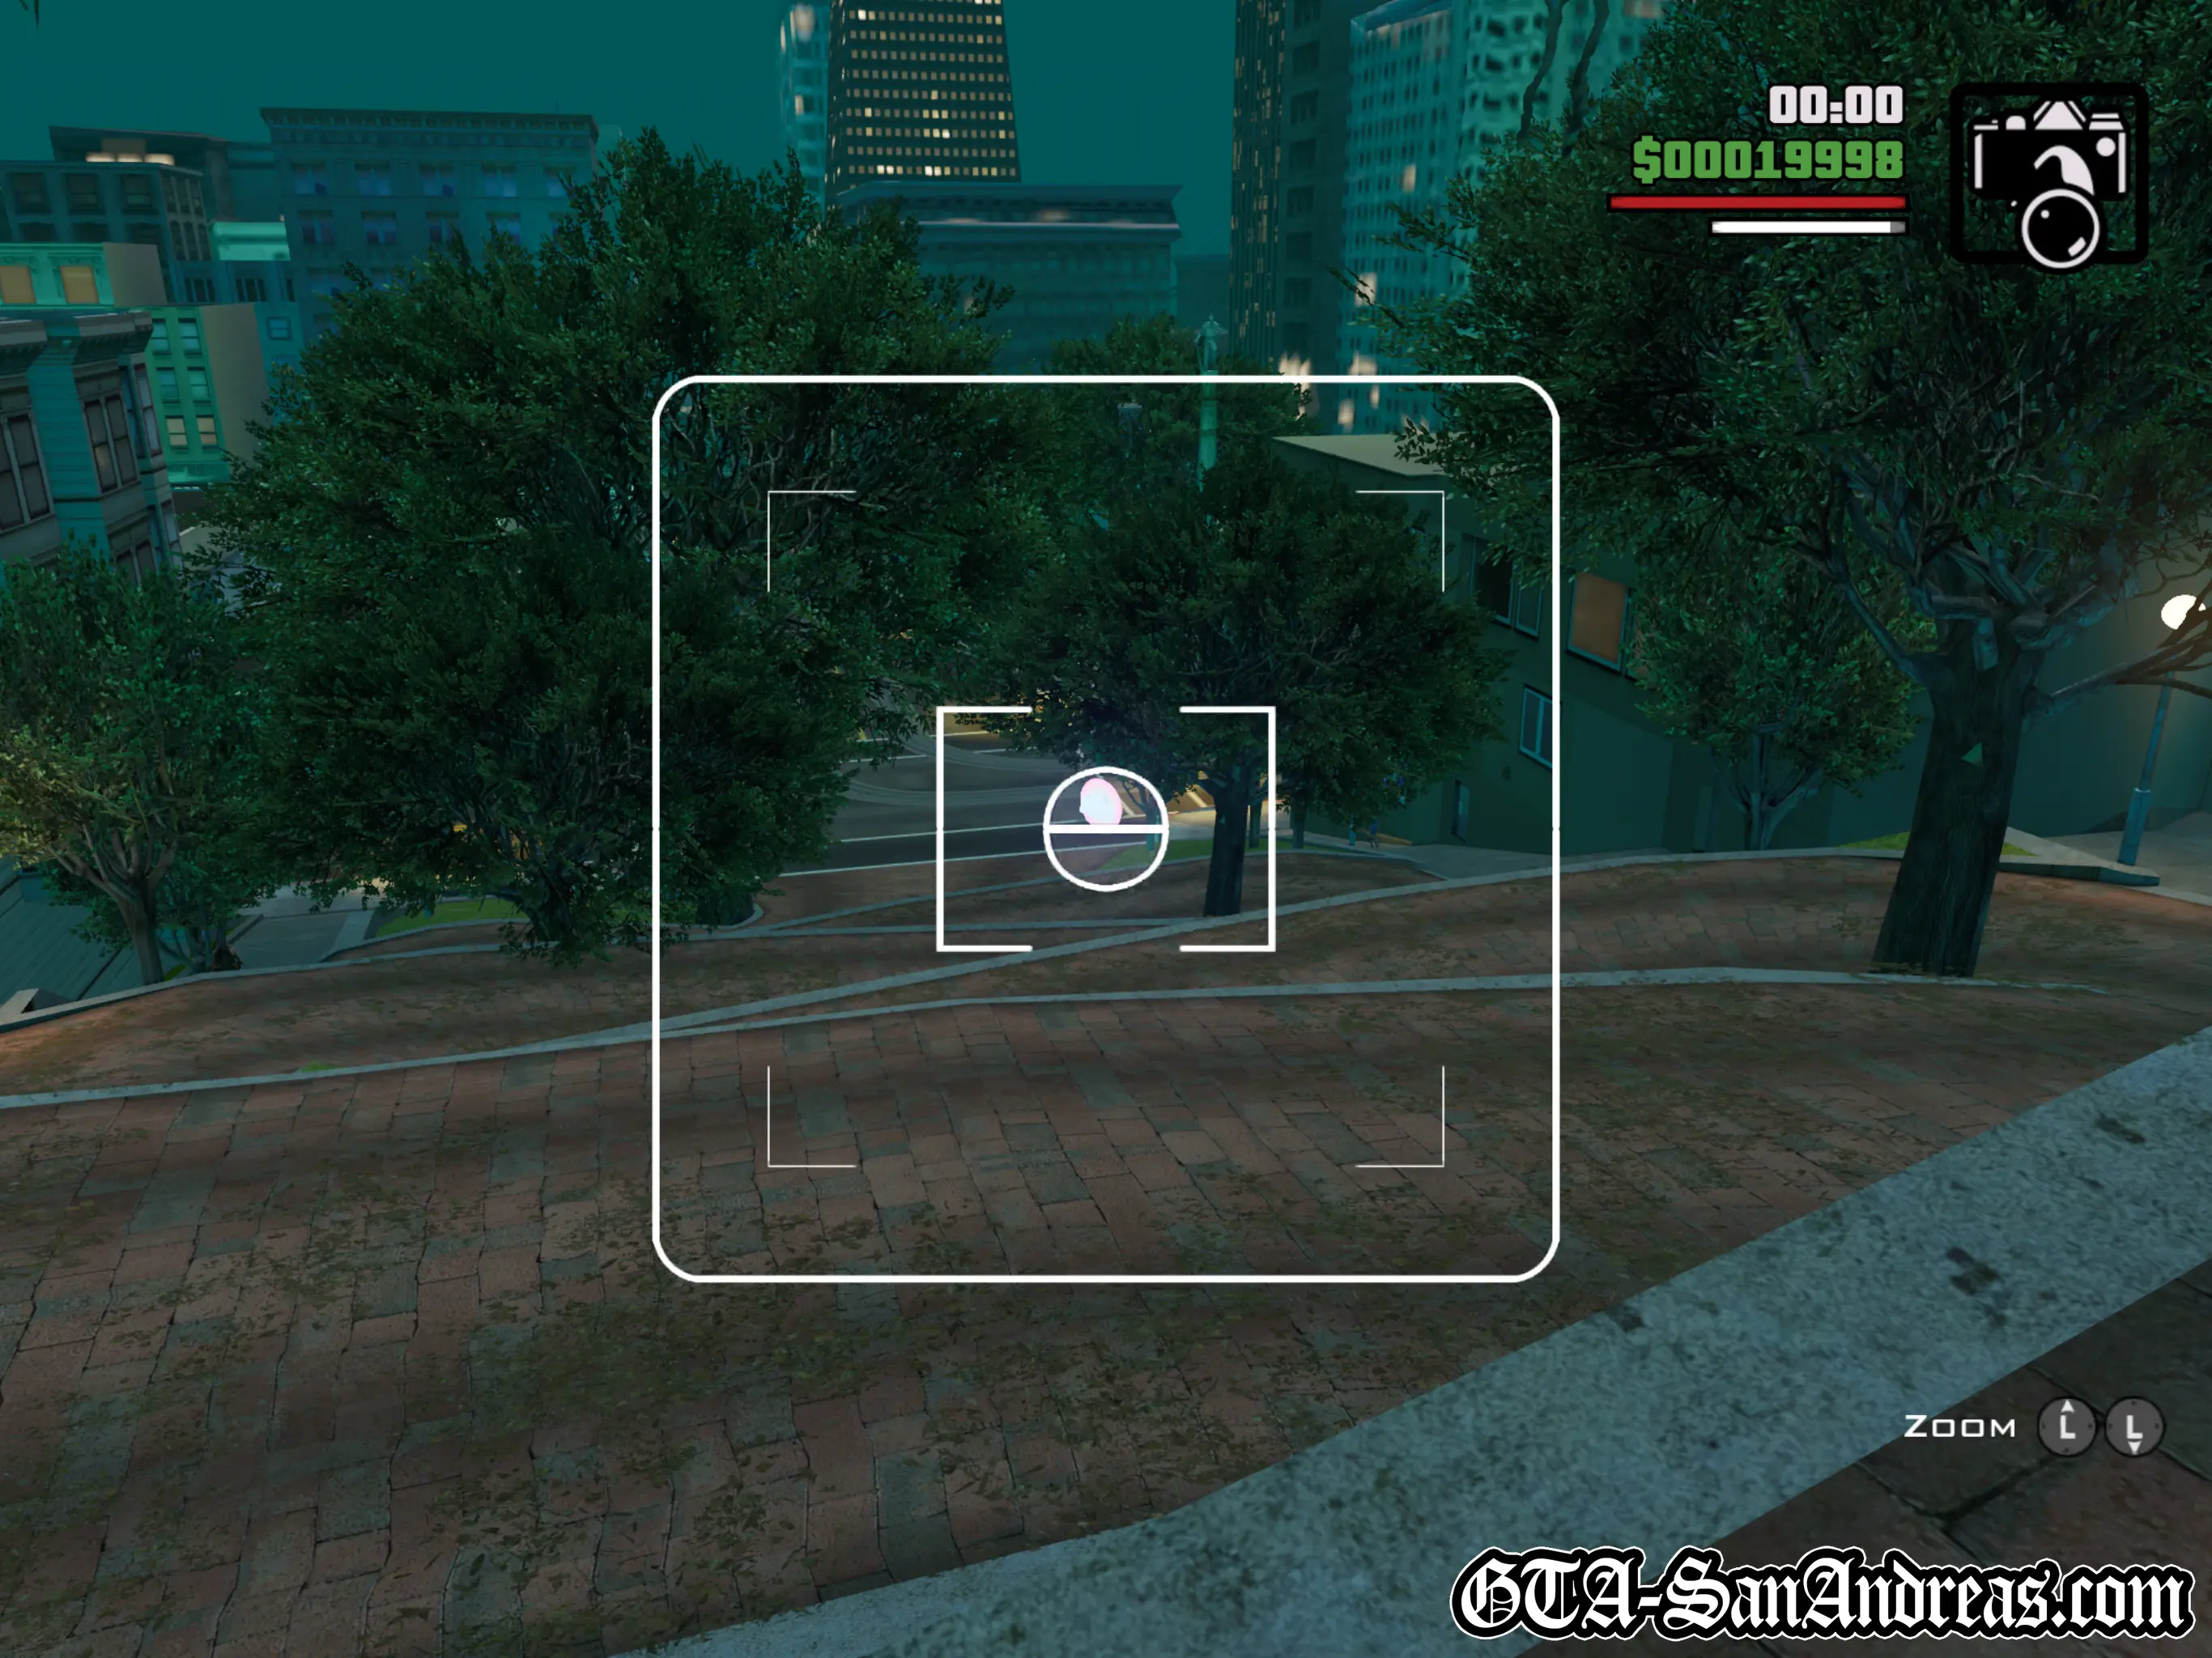
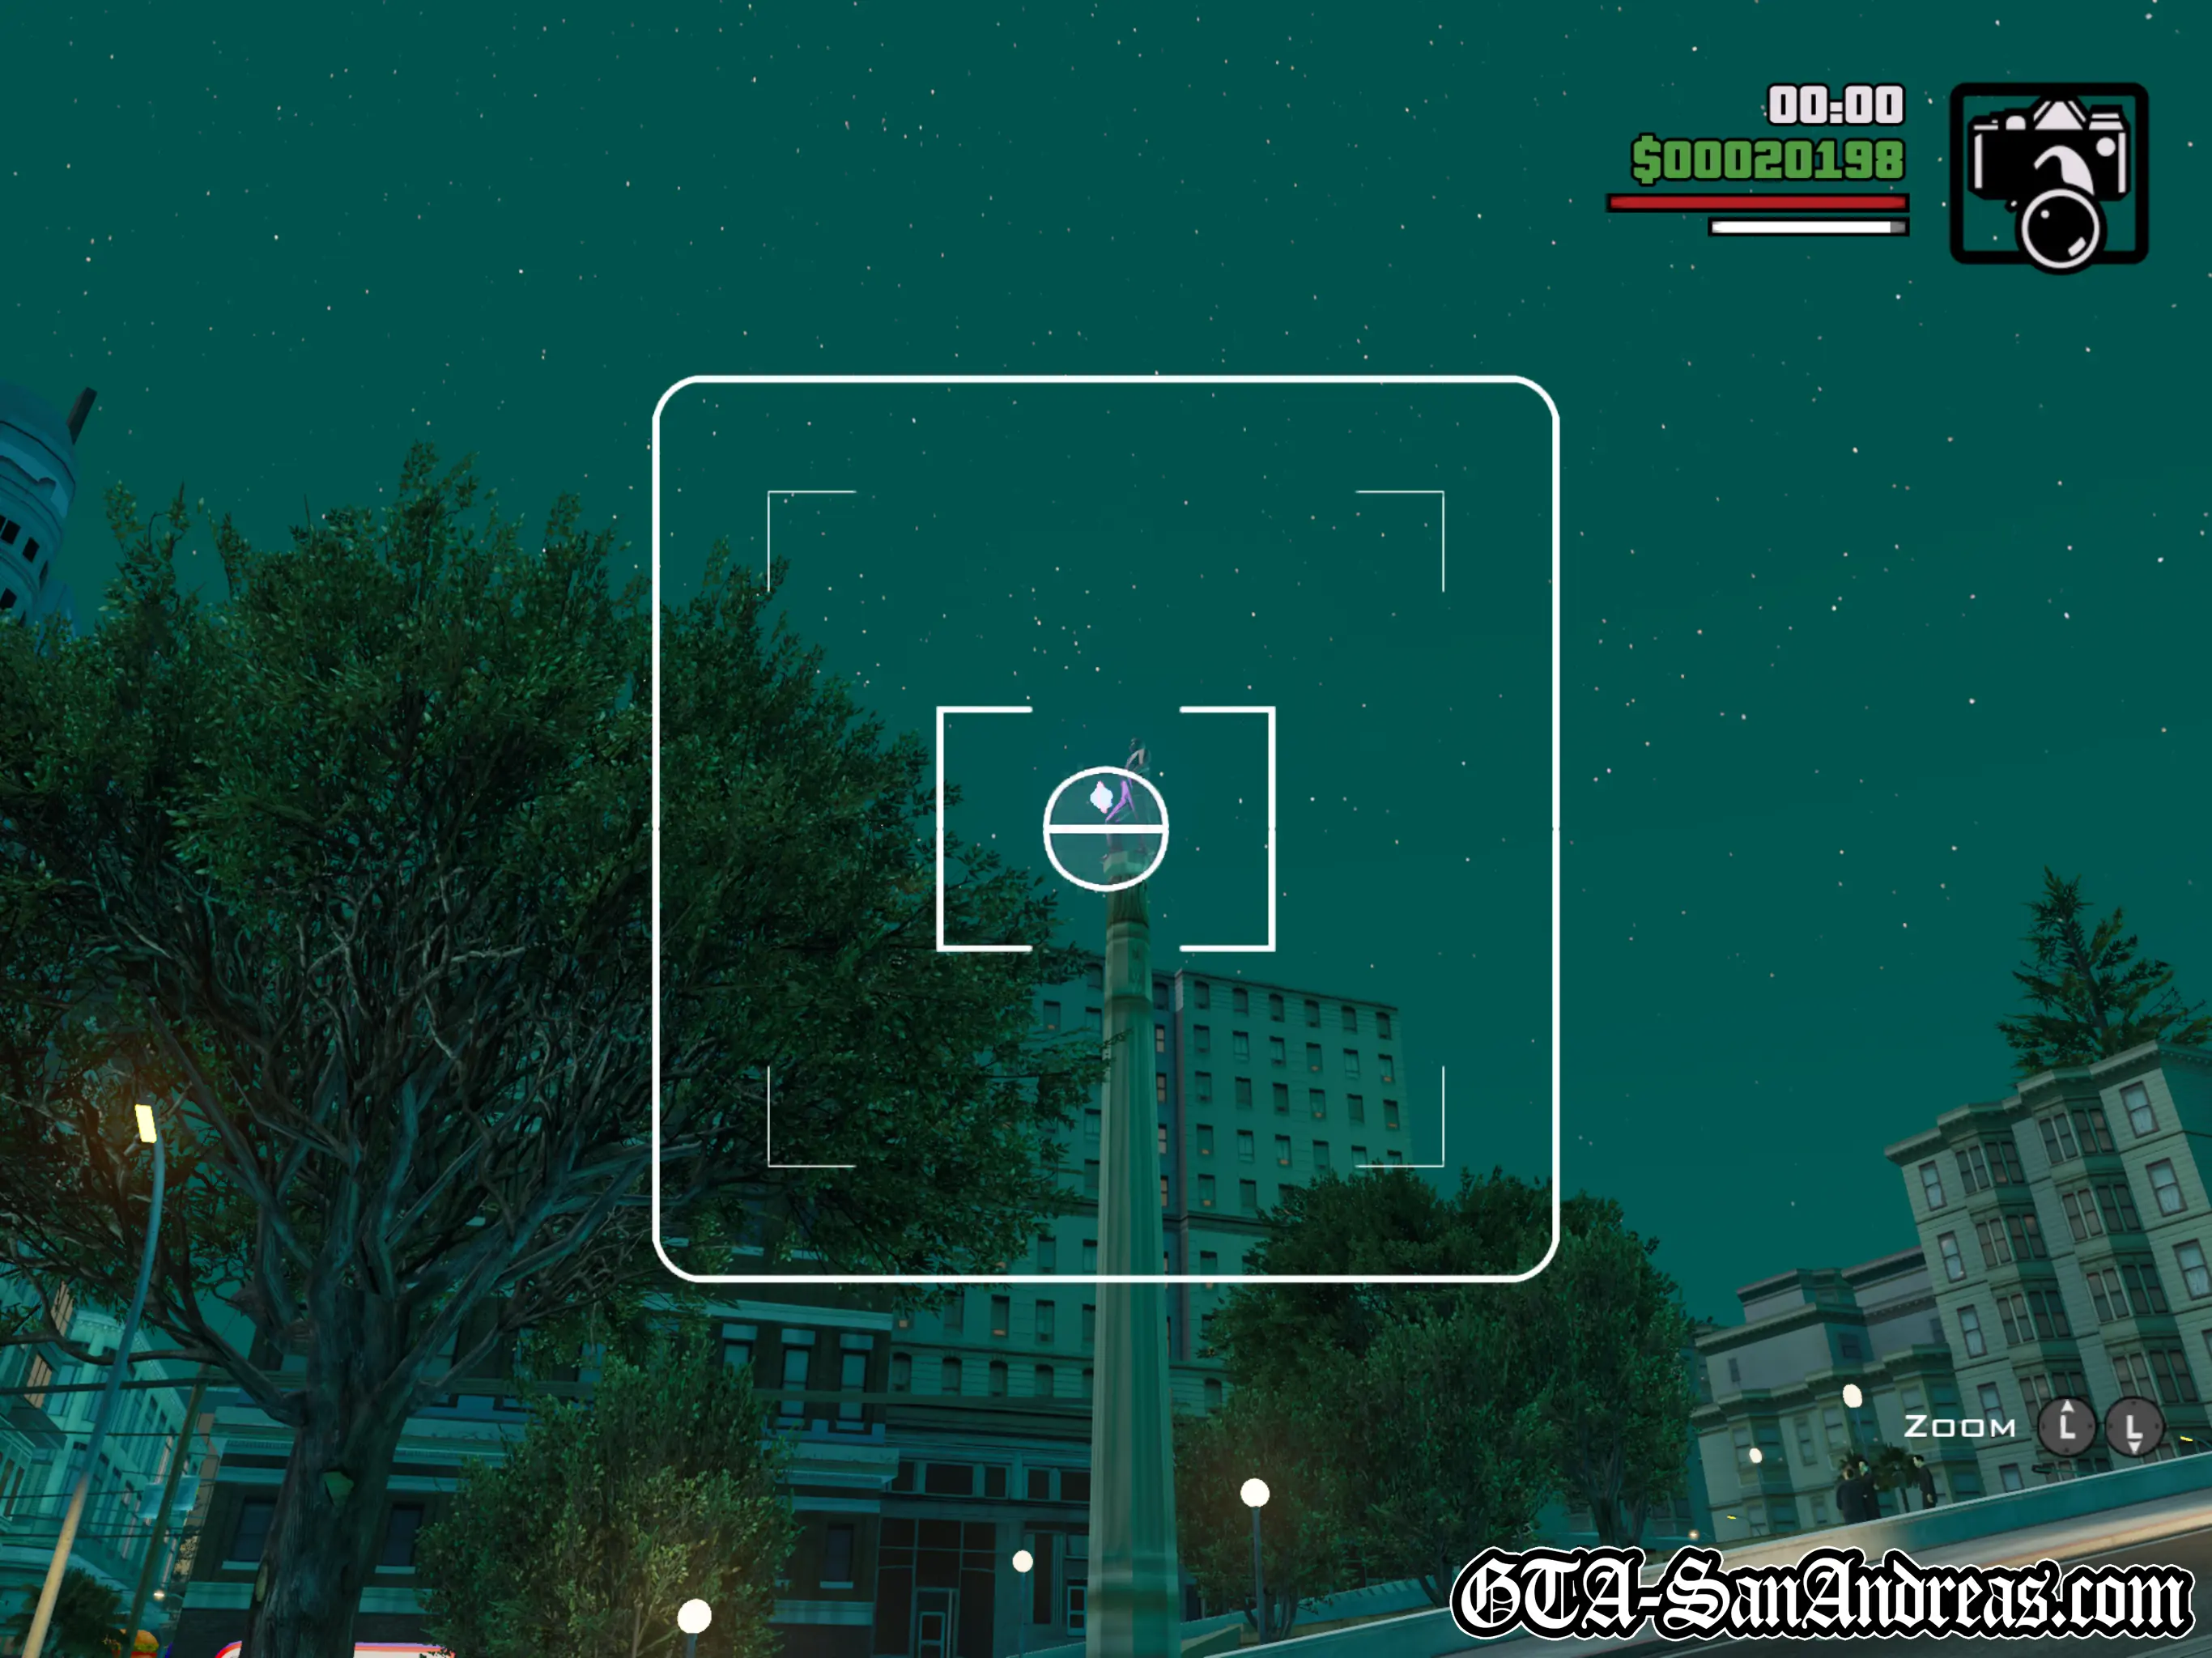
Snapshot #40
Location
Downtown - Floating in front of a tall statue holding a baseball bat.
Where To Stand
Anywhere you can see the statue should allow you to snap this one. I captured it from the road to the North.
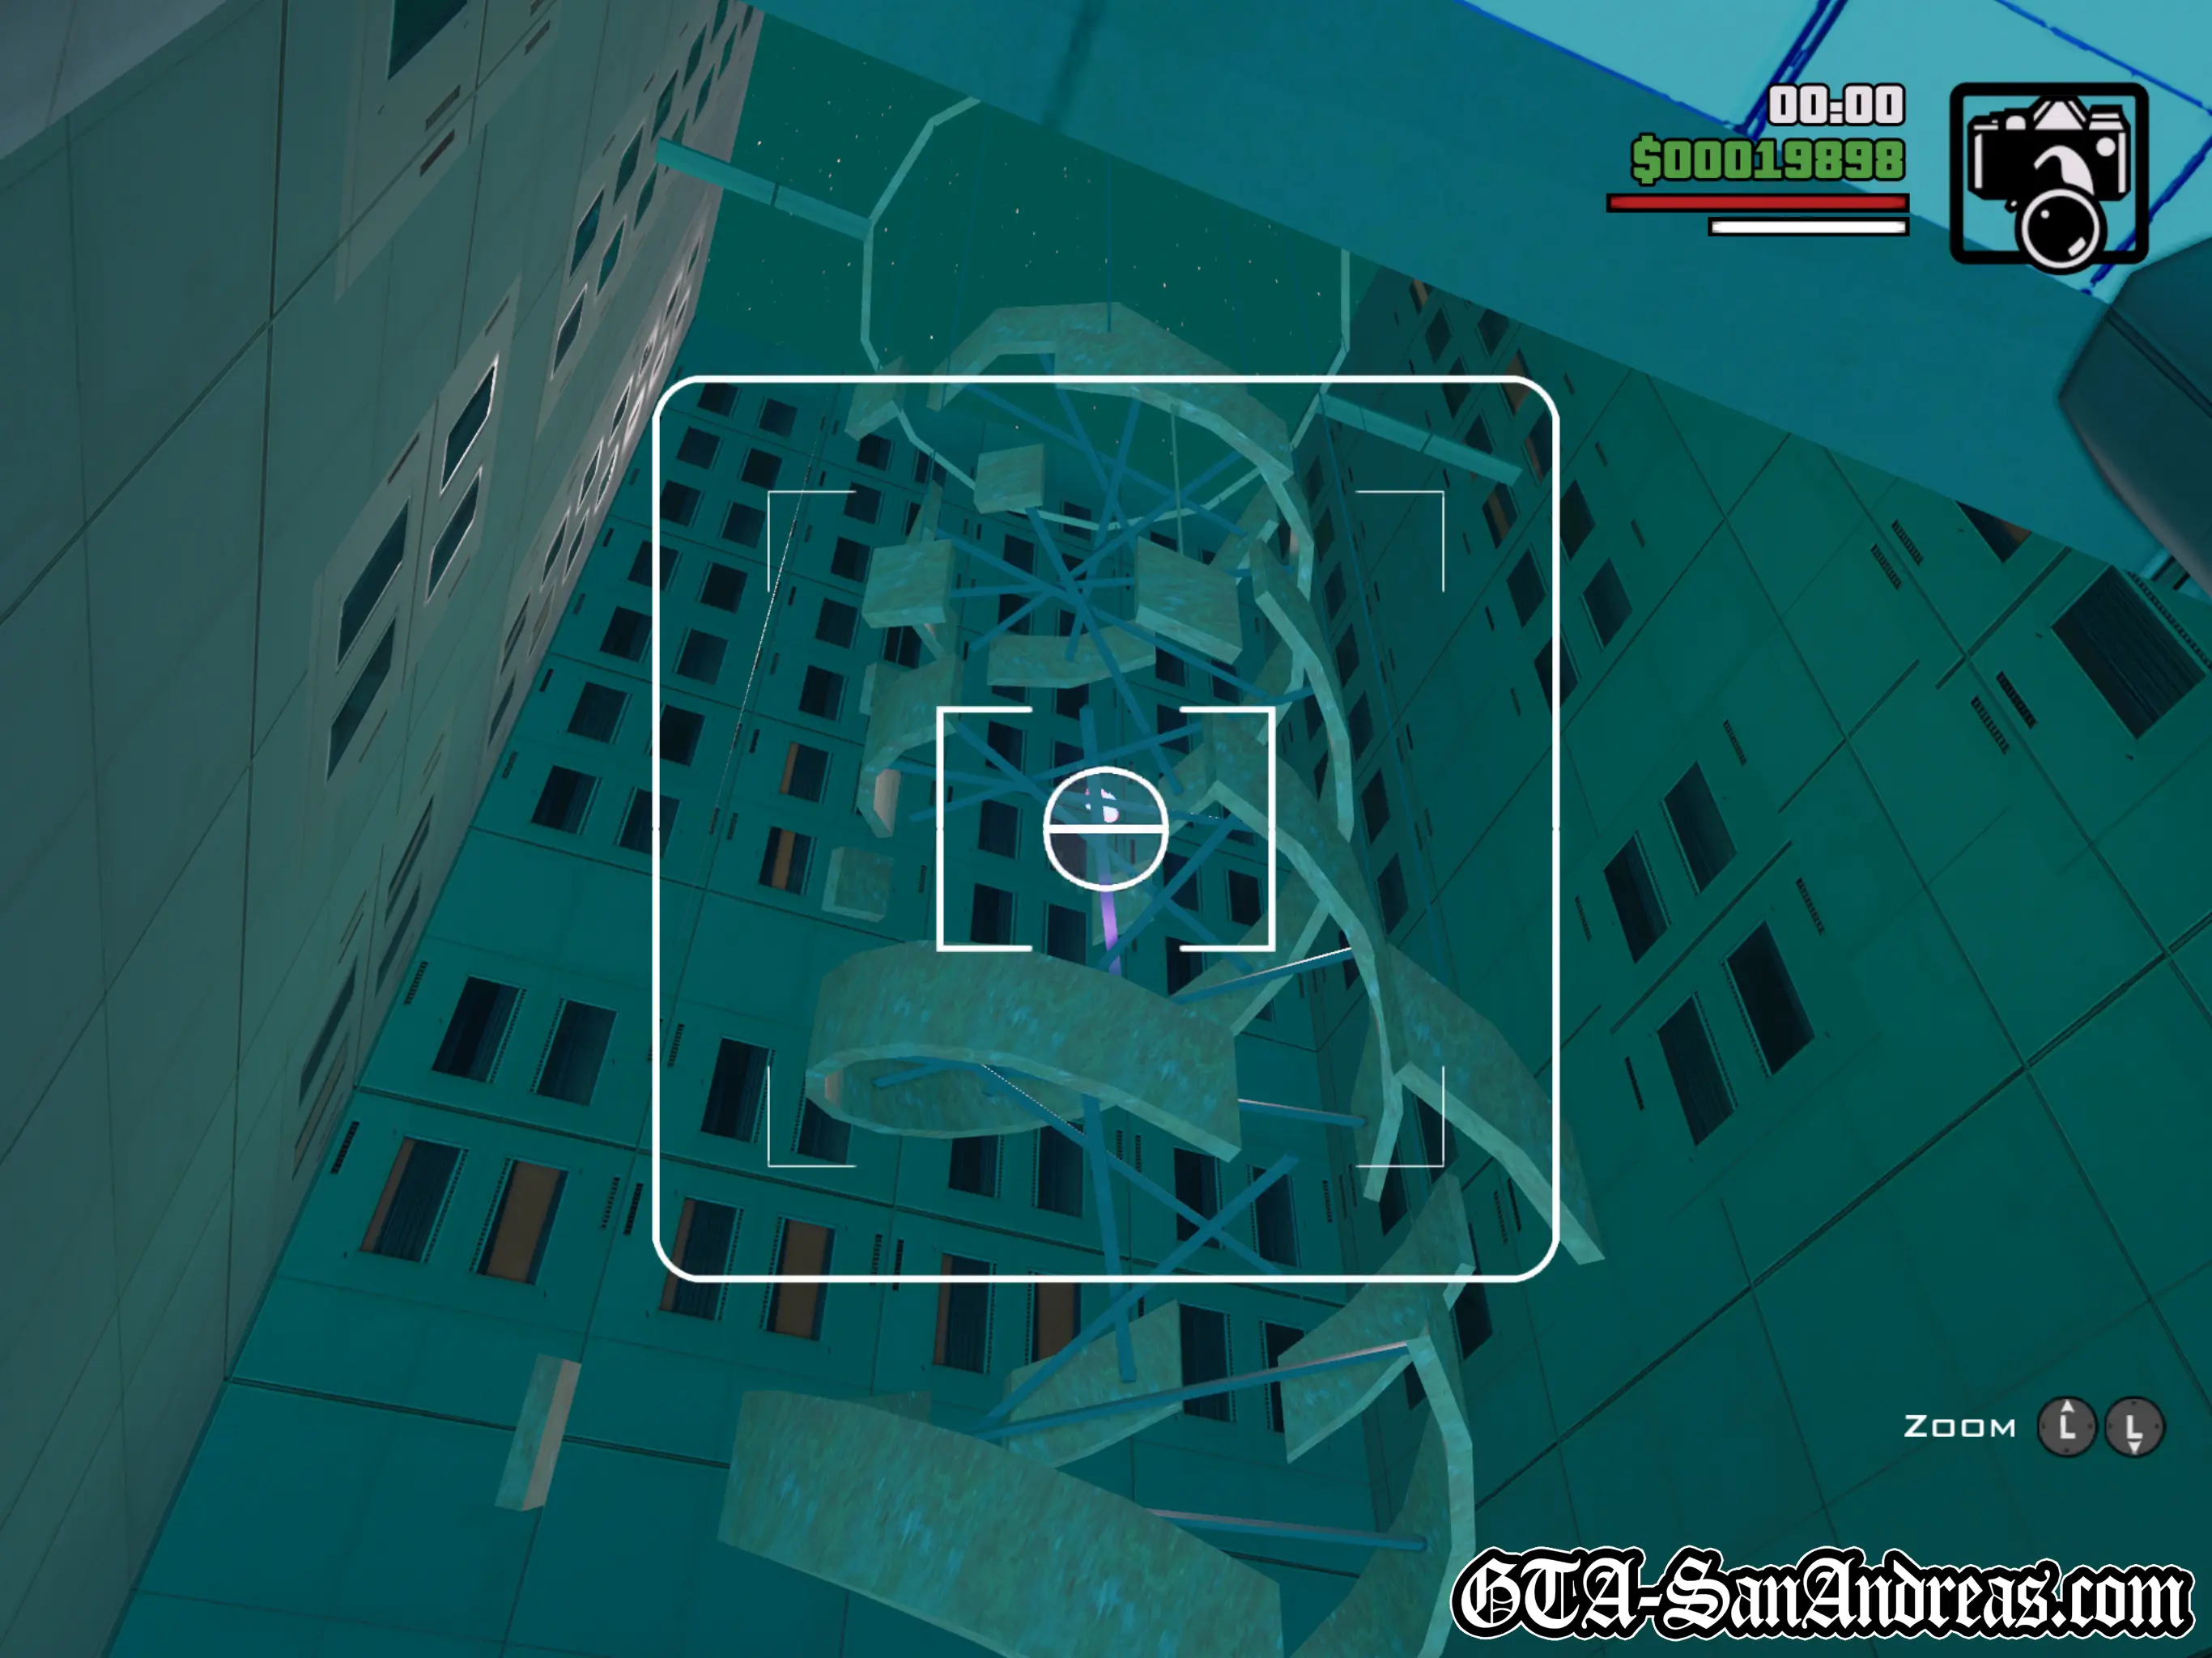
Snapshot #41
Location
Downtown - Floating inside a large DNA sculpture inside a building.
Where To Stand
You'll need to head inside through the glass doors. There's a camera pick up to the right and you can stand there and look up to take the snapshot.
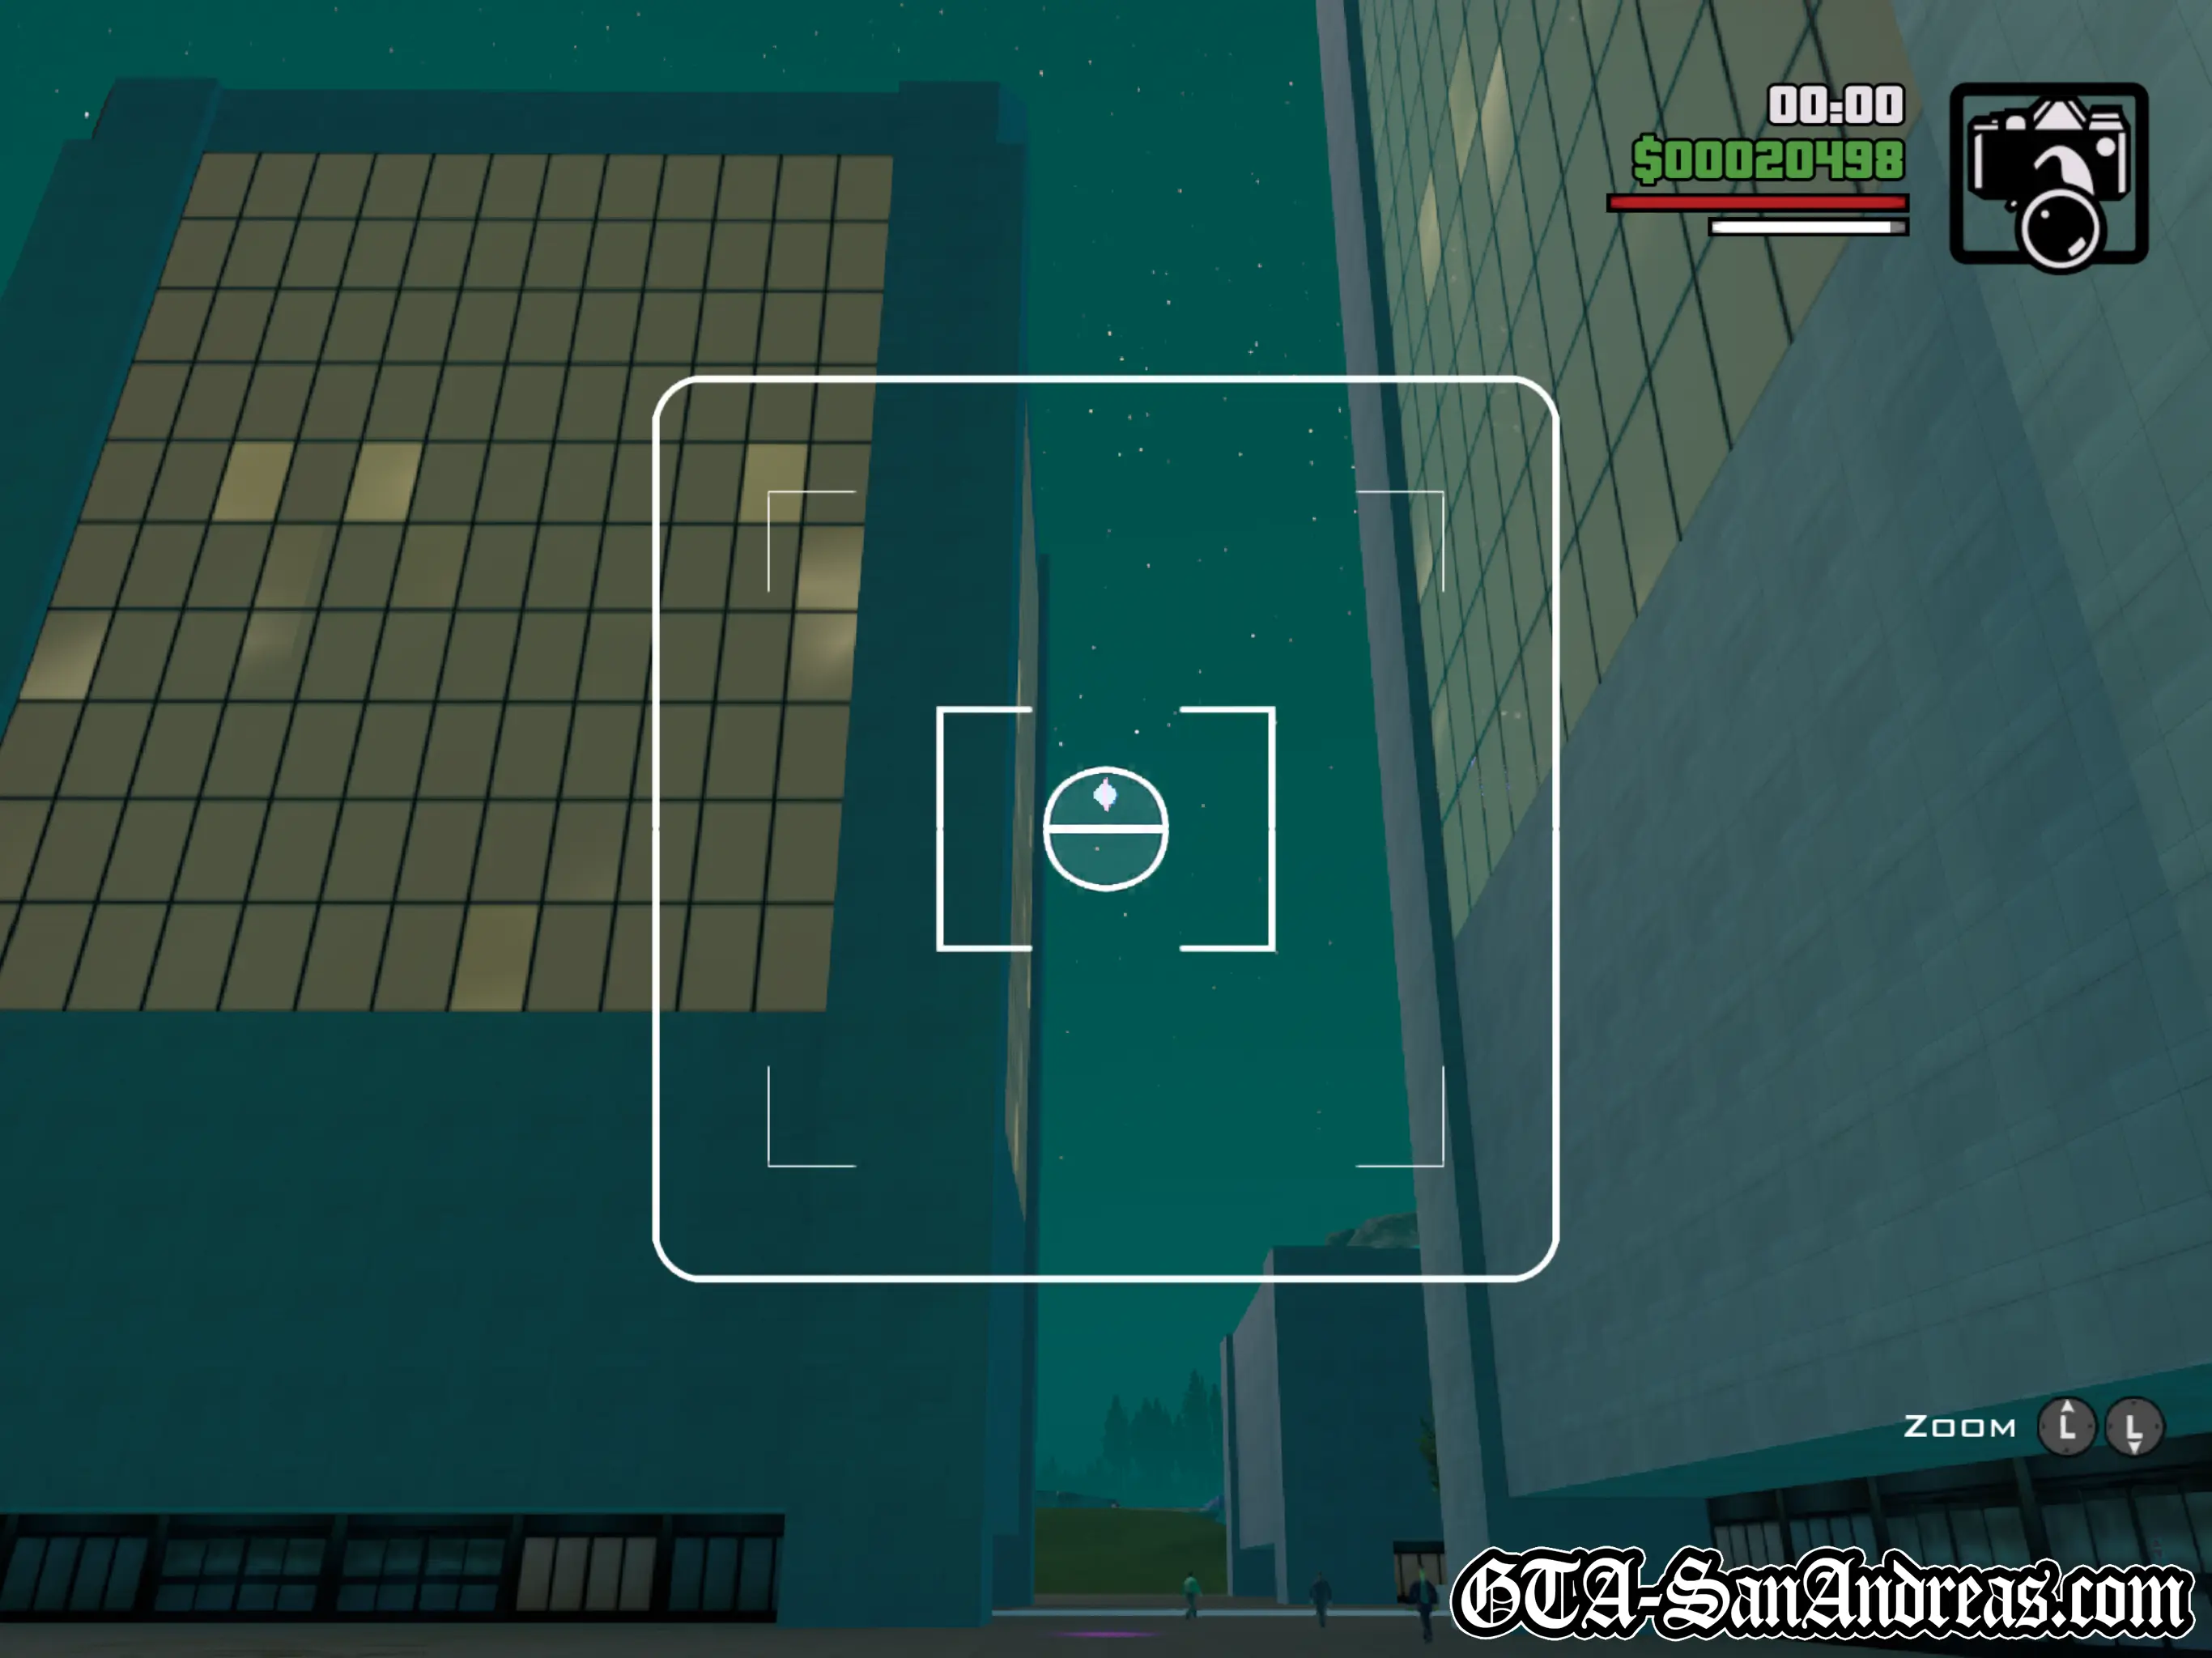
Snapshot #42
Location
Downtown - Floating between three square buildings to the South of Downtown.
Where To Stand
Stand on the ground anywhere nearby and look up. If you stand to the North of the three buildings and look South, you'll have the same view I did for the screenshot.
Snapshot #43
Location
King's - At the top of a curved building with four pillars sticking out of the top.
Where To Stand
Although it's high up, you can capture this one from ground-level. Just stand on the road facing the building so that you're looking into the curve and you'll spot it floating high up on top of one of the pillars.
Snapshot #44
Location
King's - High up at the top of a building with a tower and a fancy top.
Where To Stand
I stood to the South of the building and looked up the street to the North.
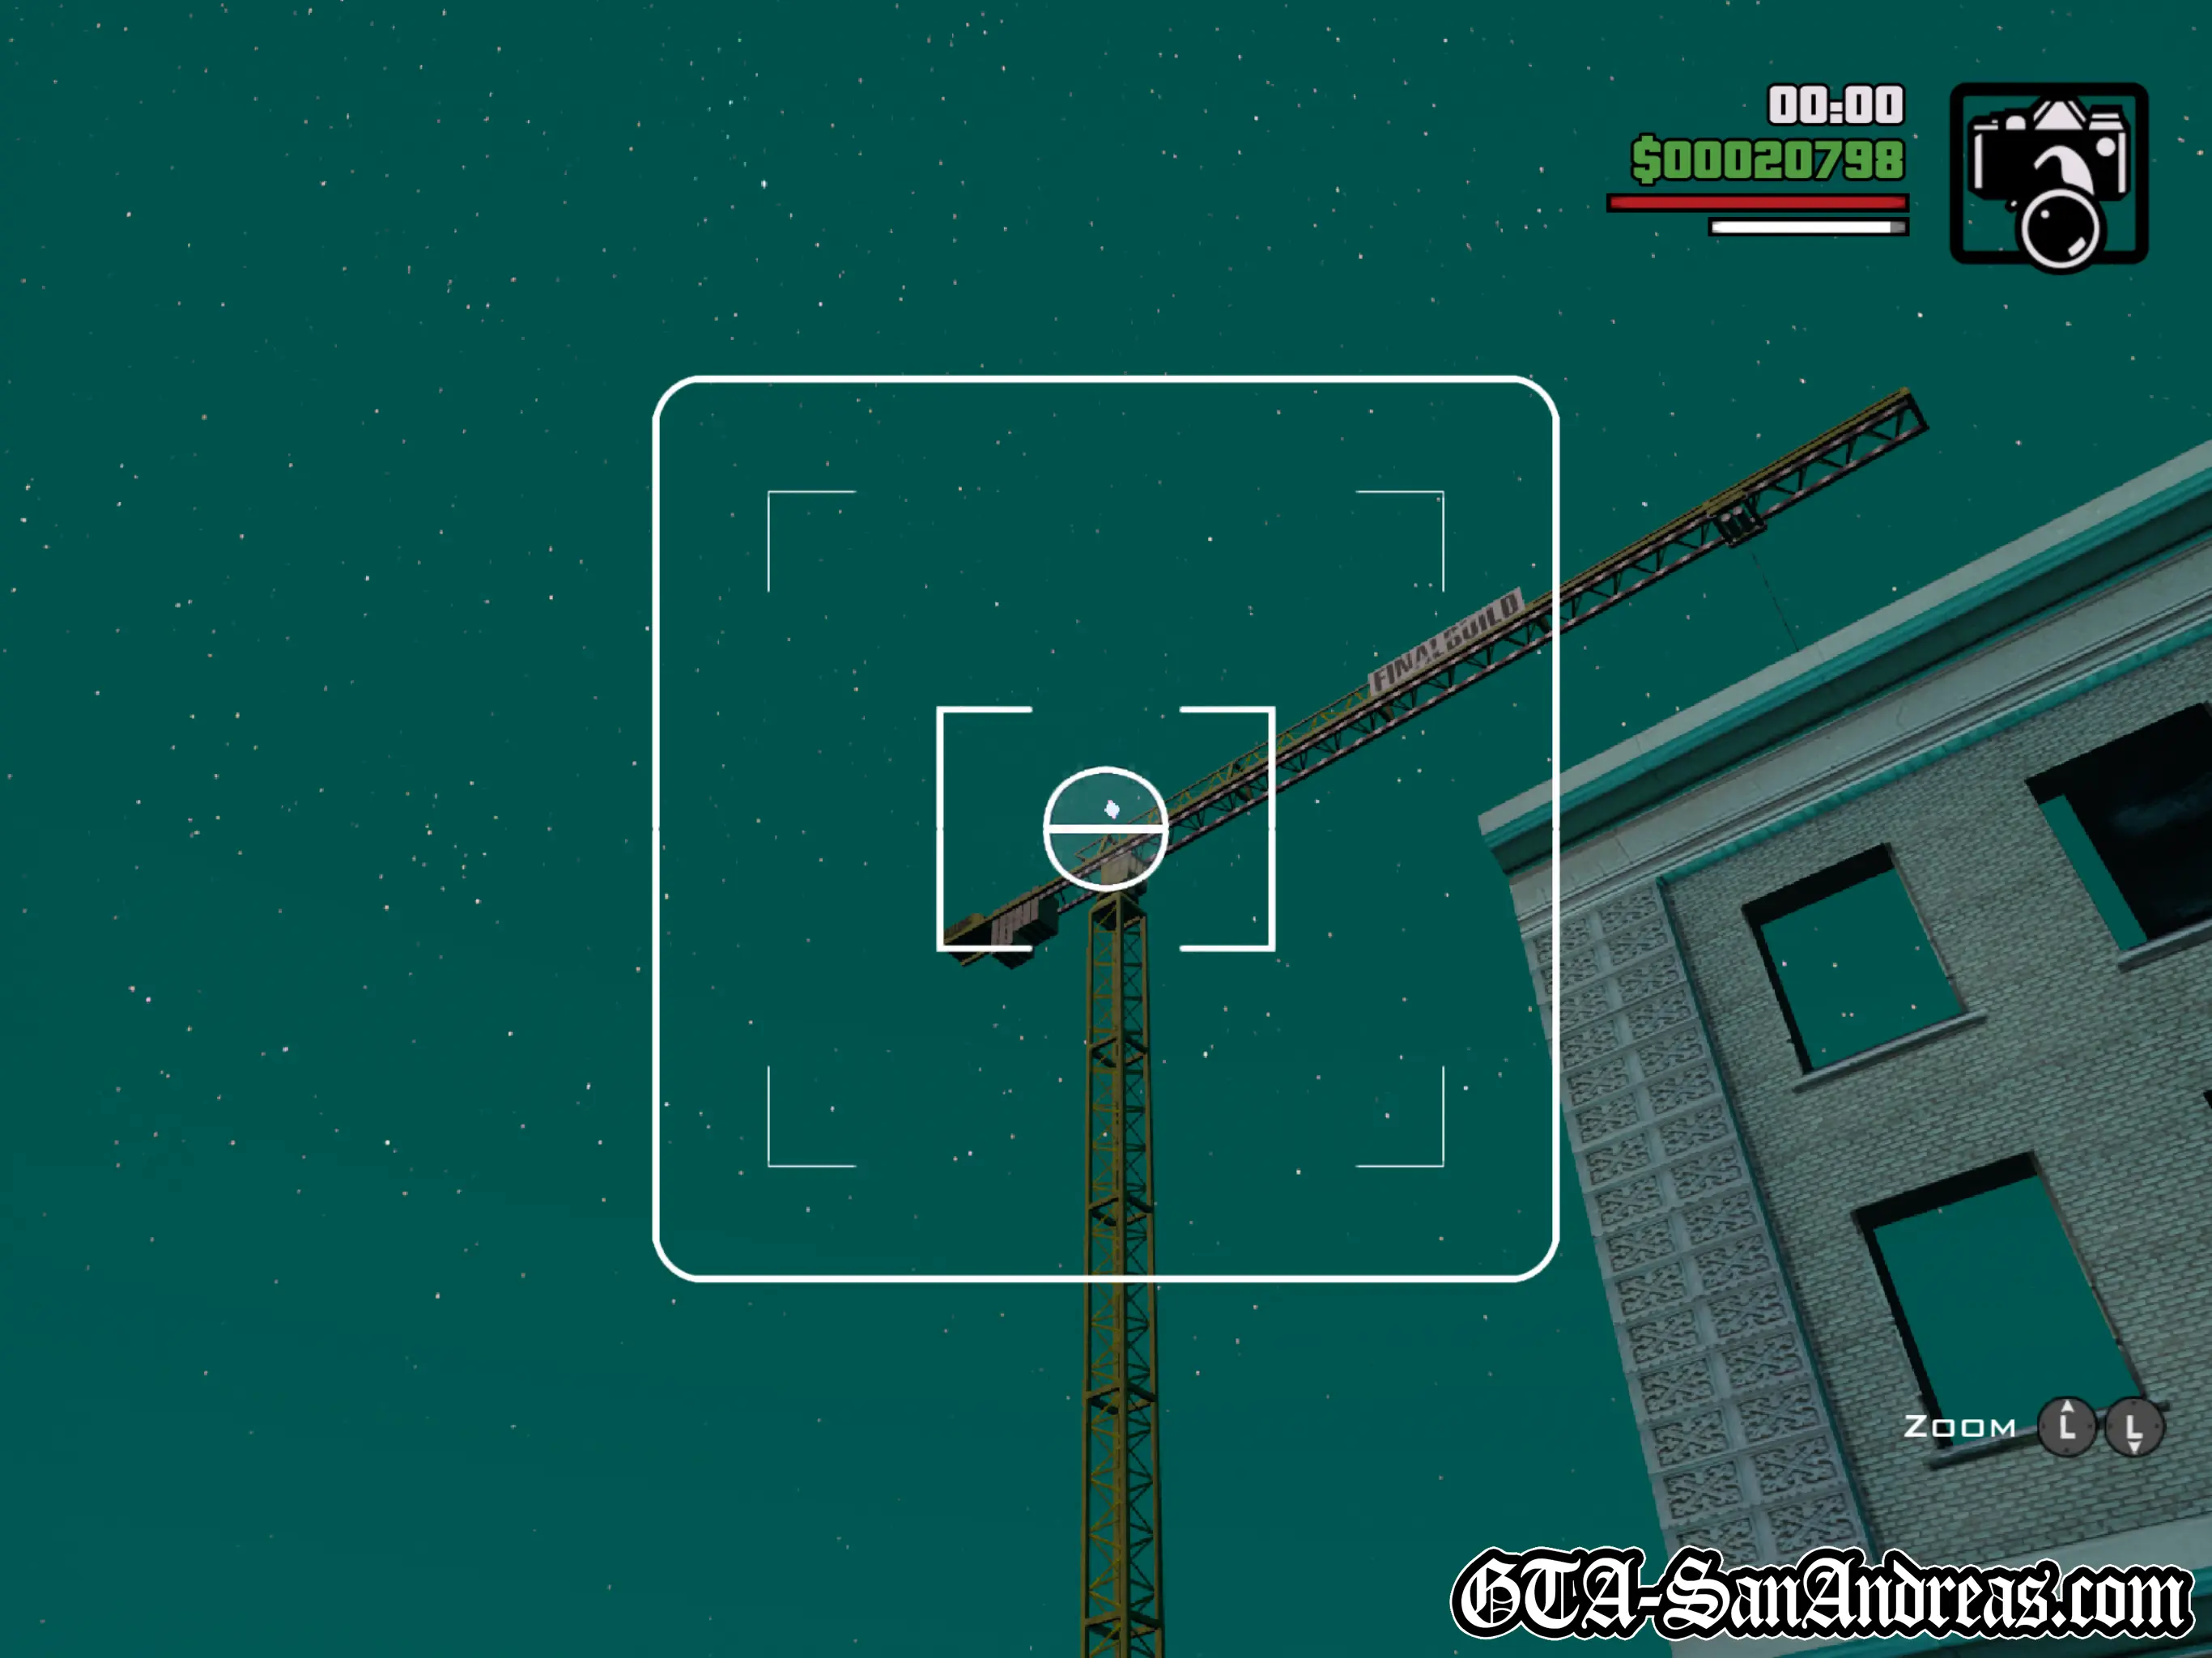
Snapshot #45
Location
Doherty - On top of the 'Final Build' crane in the construction site. It's at the top of the tower structure, not at the end of the actual crane.
Where To Stand
Anywhere inside or nearby the construction site should be close enough.
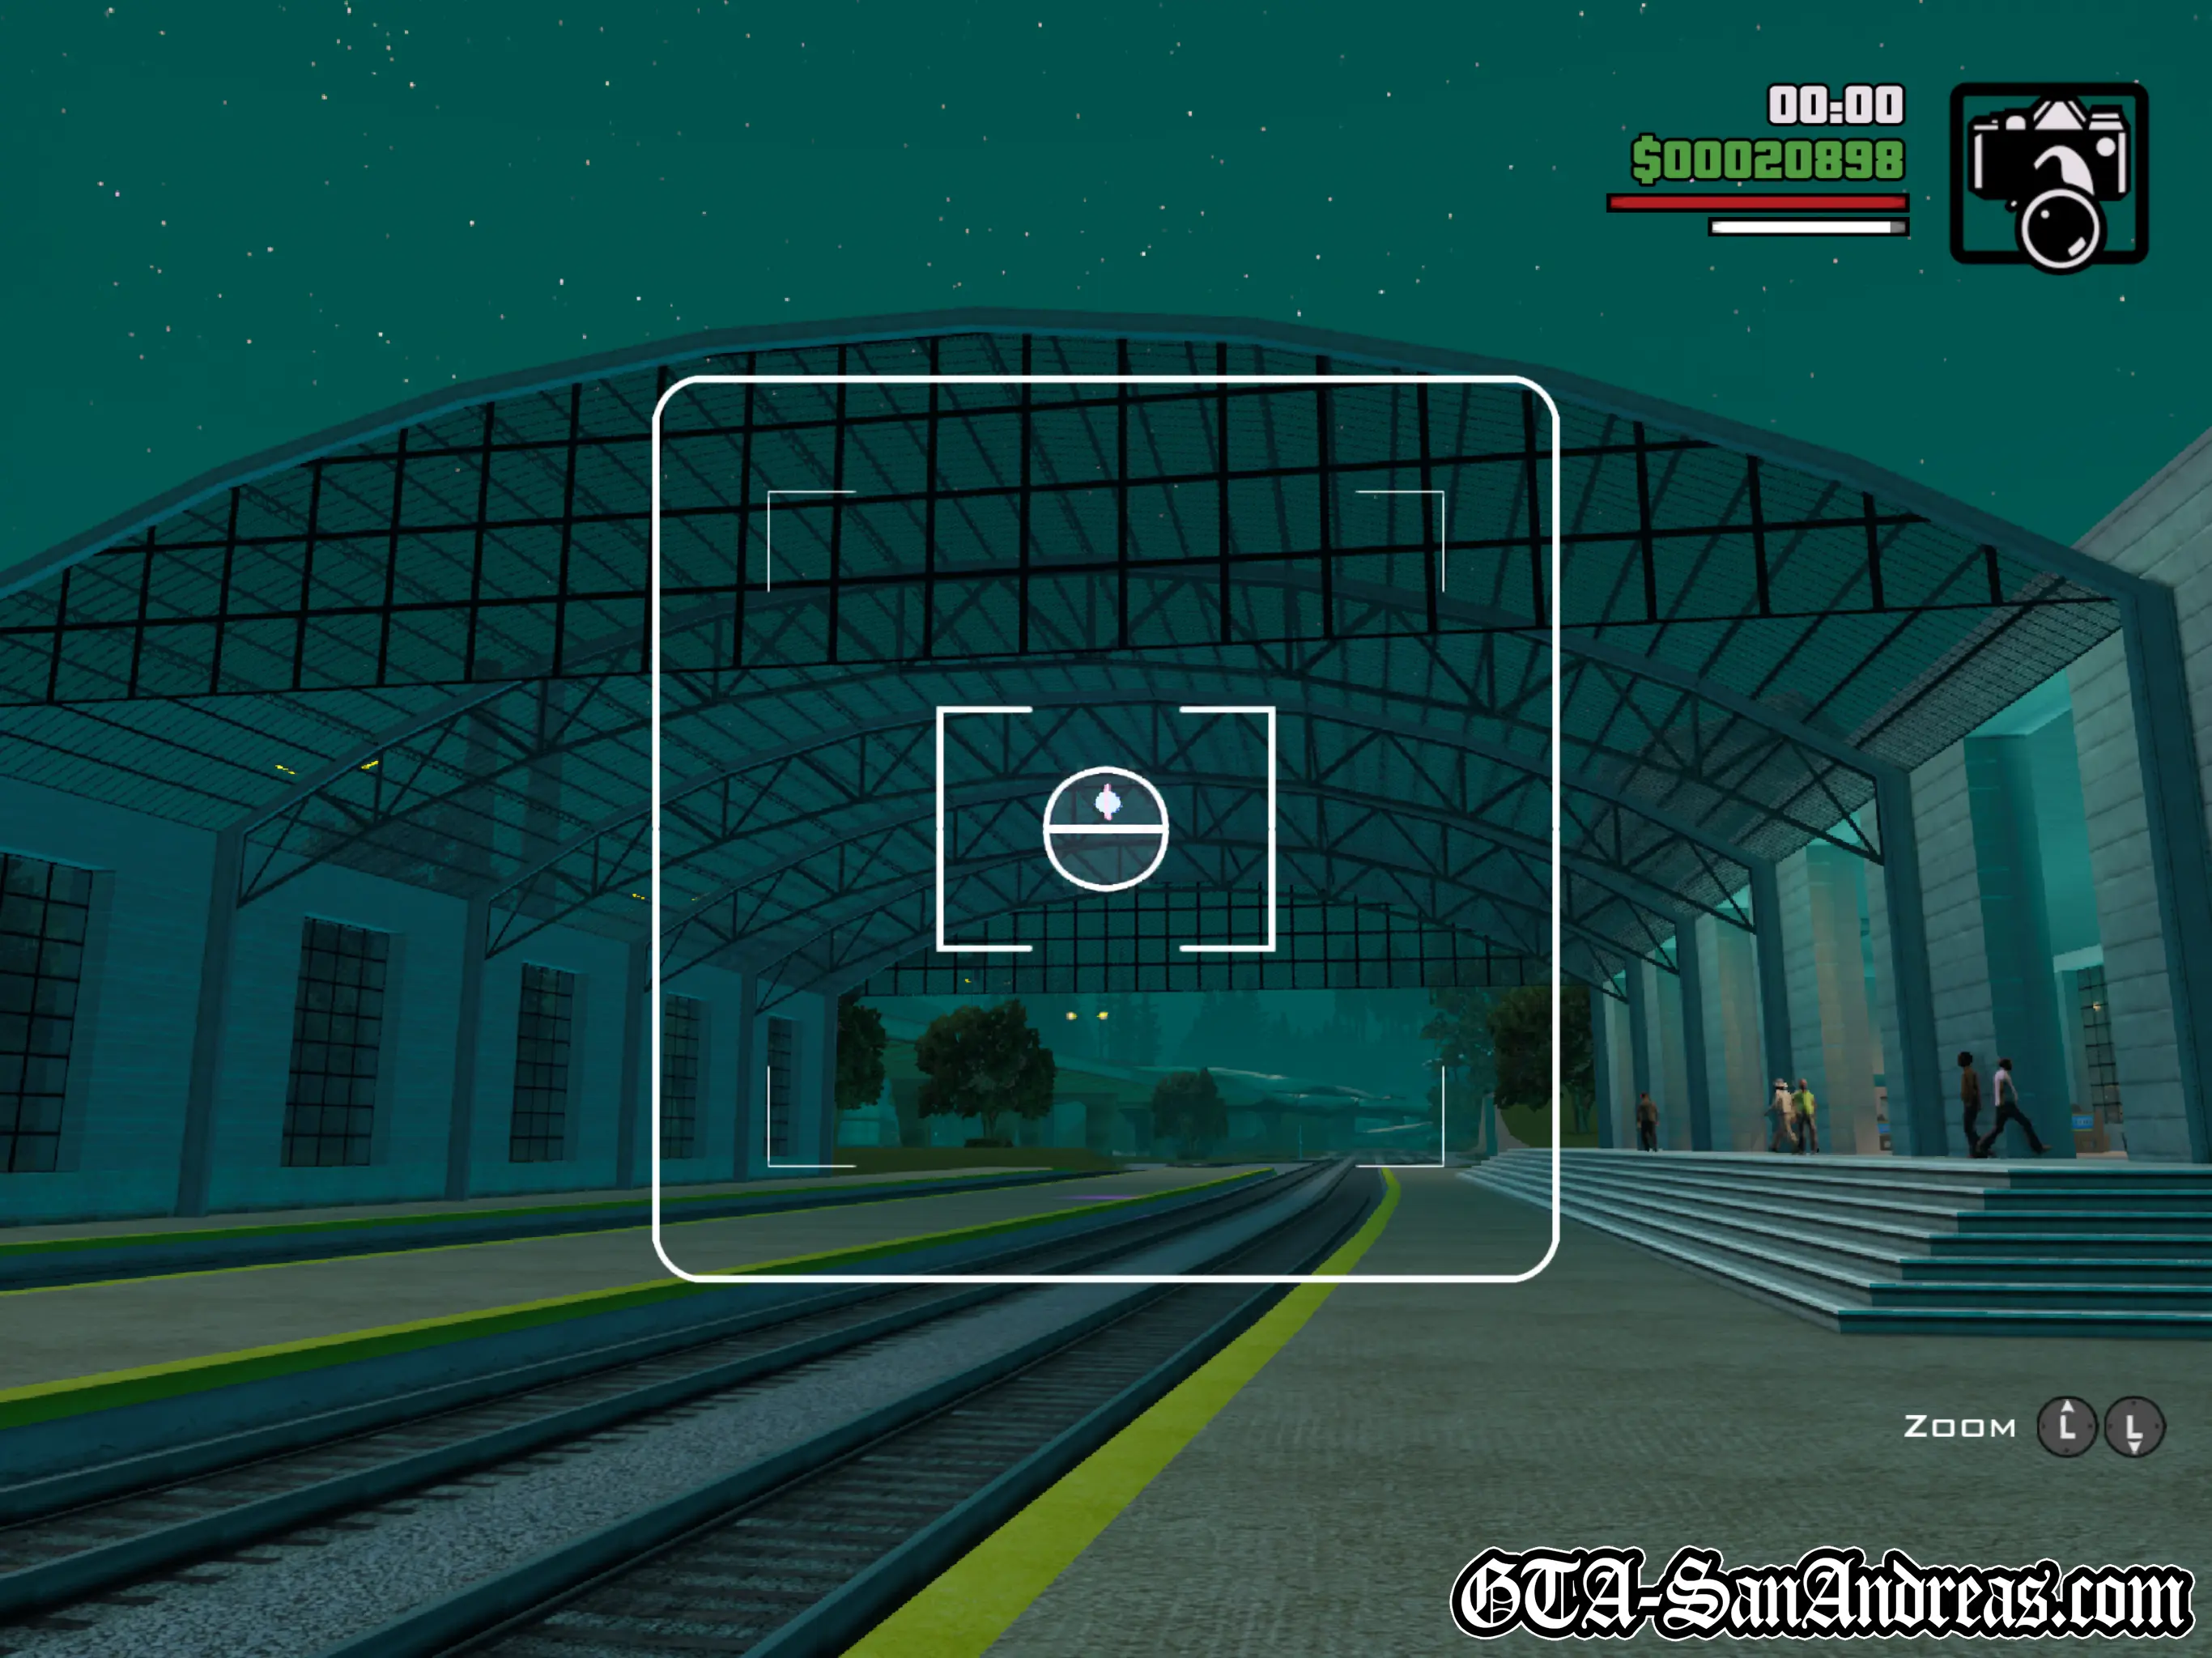
Snapshot #46
Location
Cranberry Station - Under the roof of the train station, floating above the tracks. There's a camera to pick up inside the station itself should you need it.
Where To Stand
Anywhere near or on the tracks should allow you to see it, just watch out for trains!
Snapshot #47
Location
Doherty - Mid-way up on the East side between two large metal tanks. There's a shotgun pick up nearby.
Where To Stand
Anywhere in front of the tanks to the East.
Snapshot #48
Location
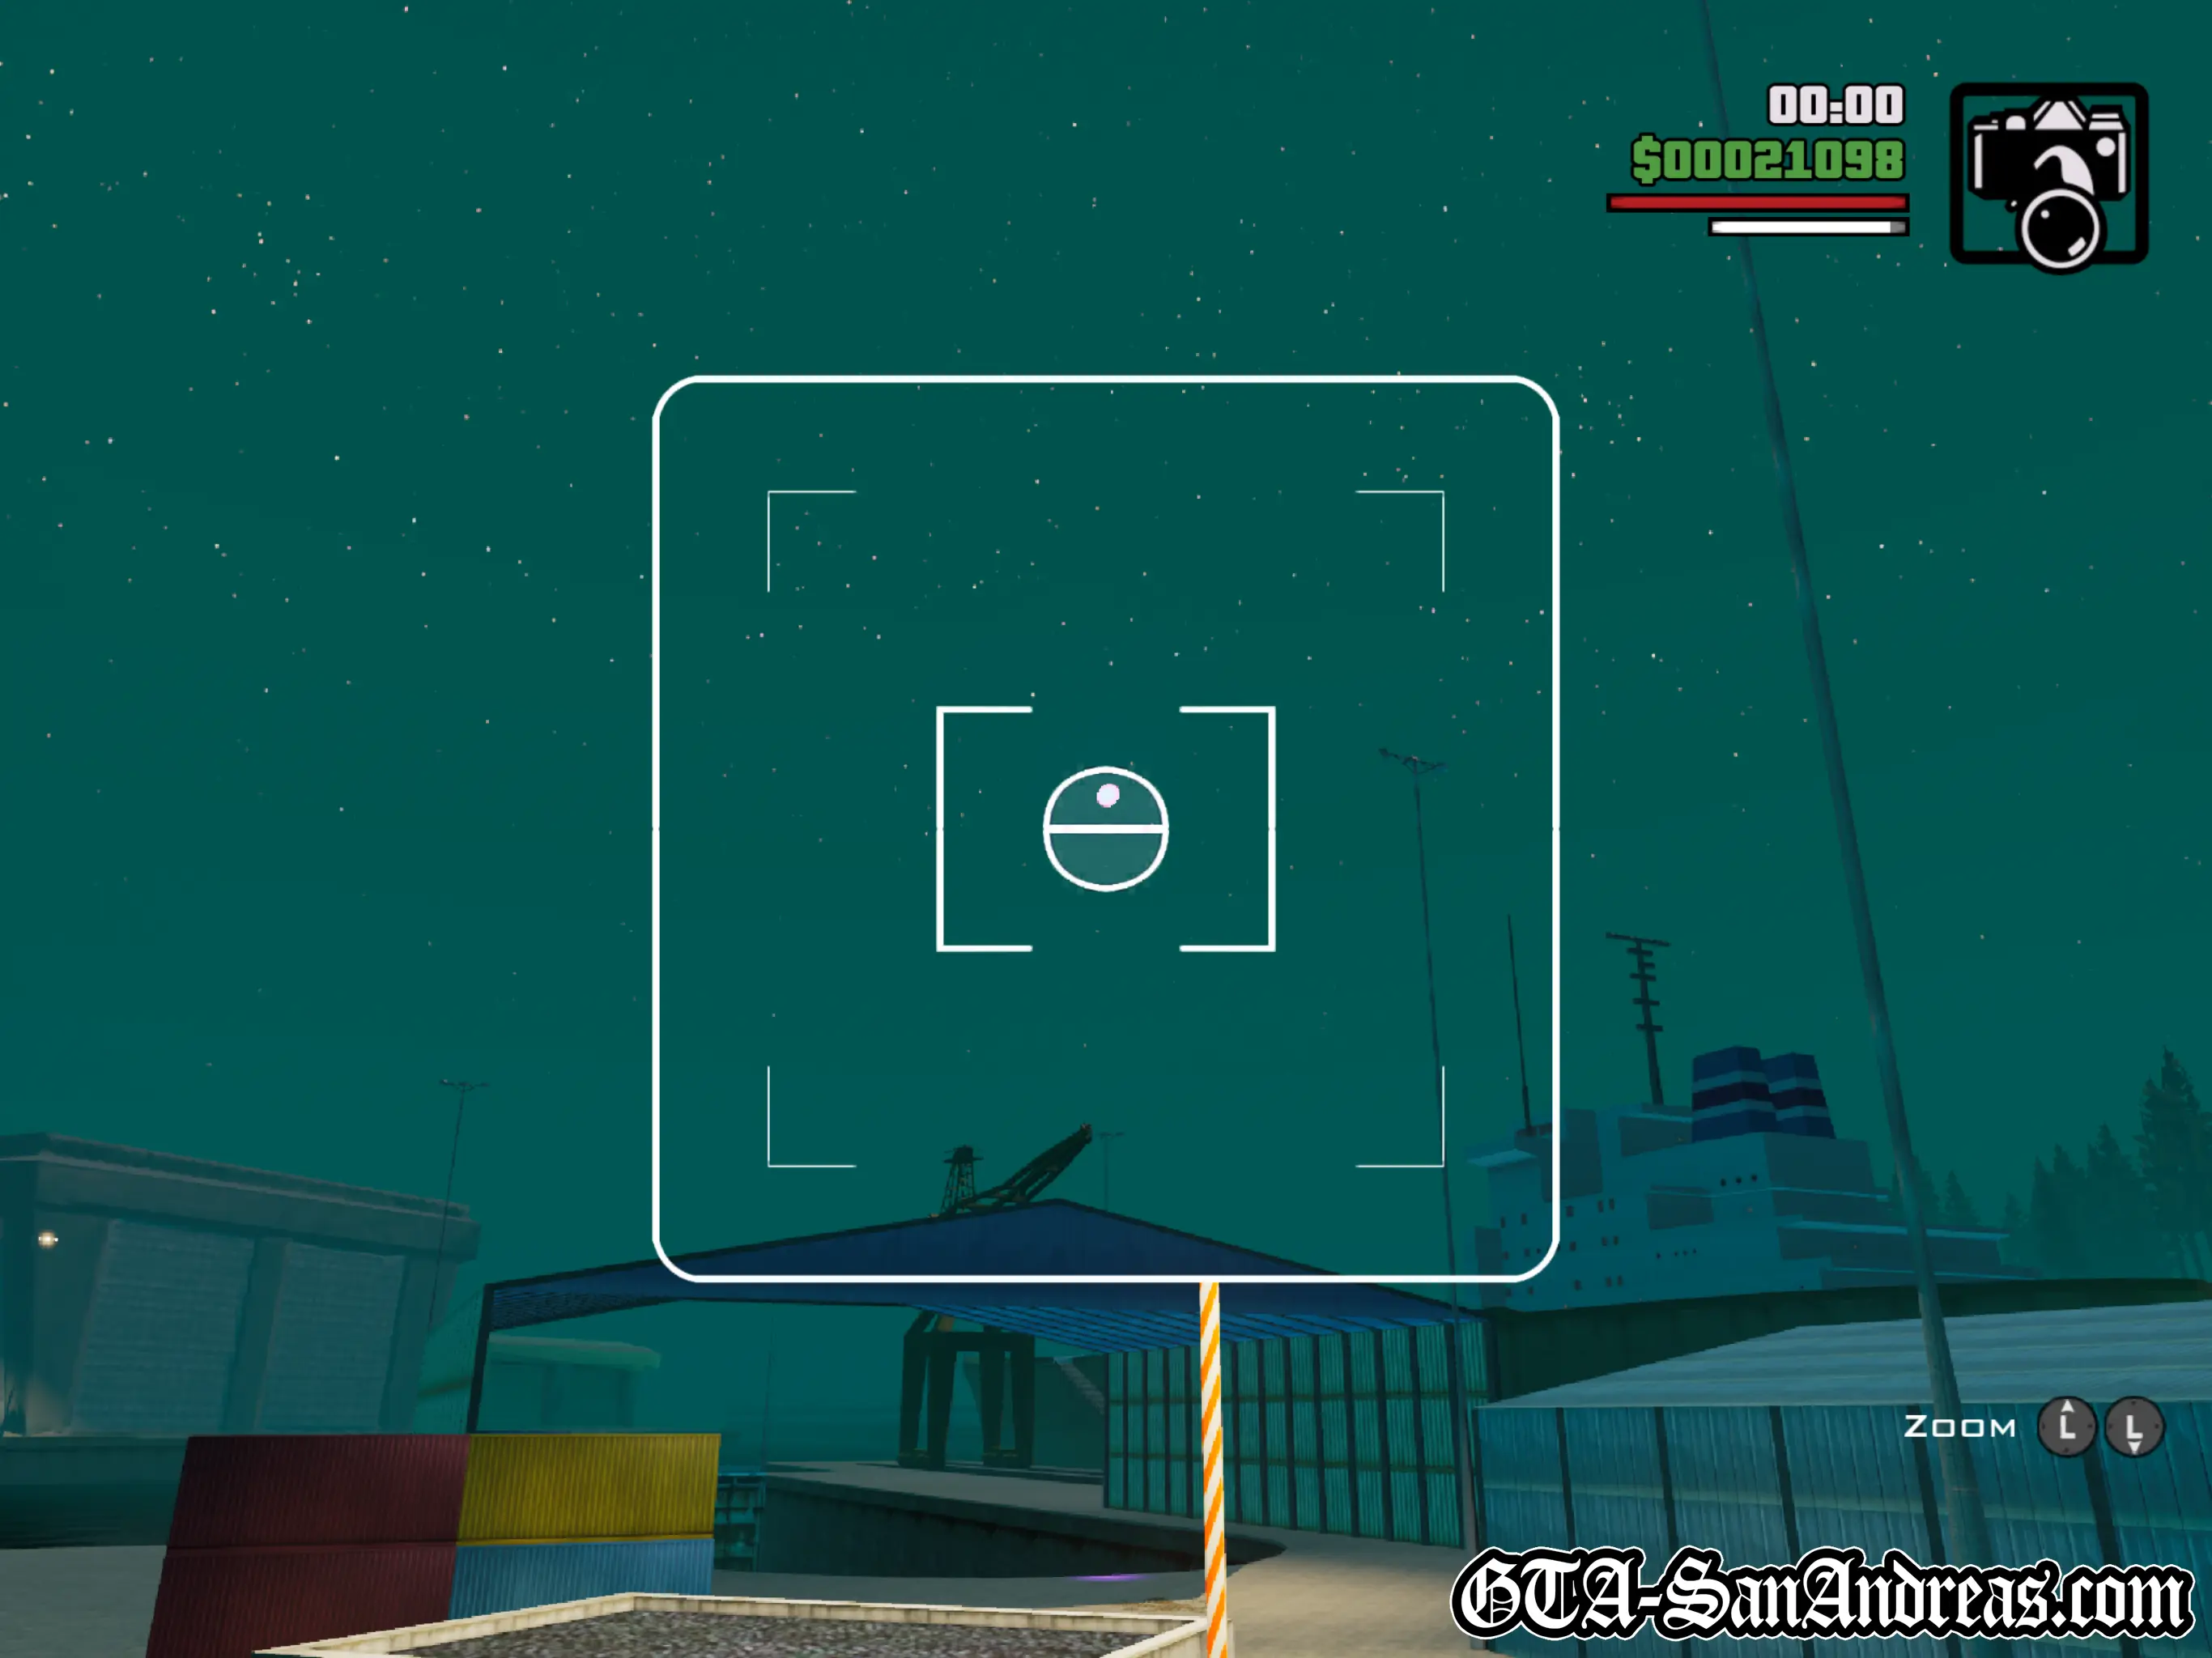
Easter Basin - High above the dry dock at Easter Basin. You may recognise this dock from the NRG-500 checkpoint challenge which you can start by getting on the parked super-bike. The Import/Export crane and ship aren't far away either.
Where To Stand
Anywhere near the dry dock. I captured the screenshot from the road to the West.
Snapshot #49
Location
Easter Basin - Right on top of the Xoomer gas station sign.
Where To Stand
Anywhere on the road in front of the gas station.

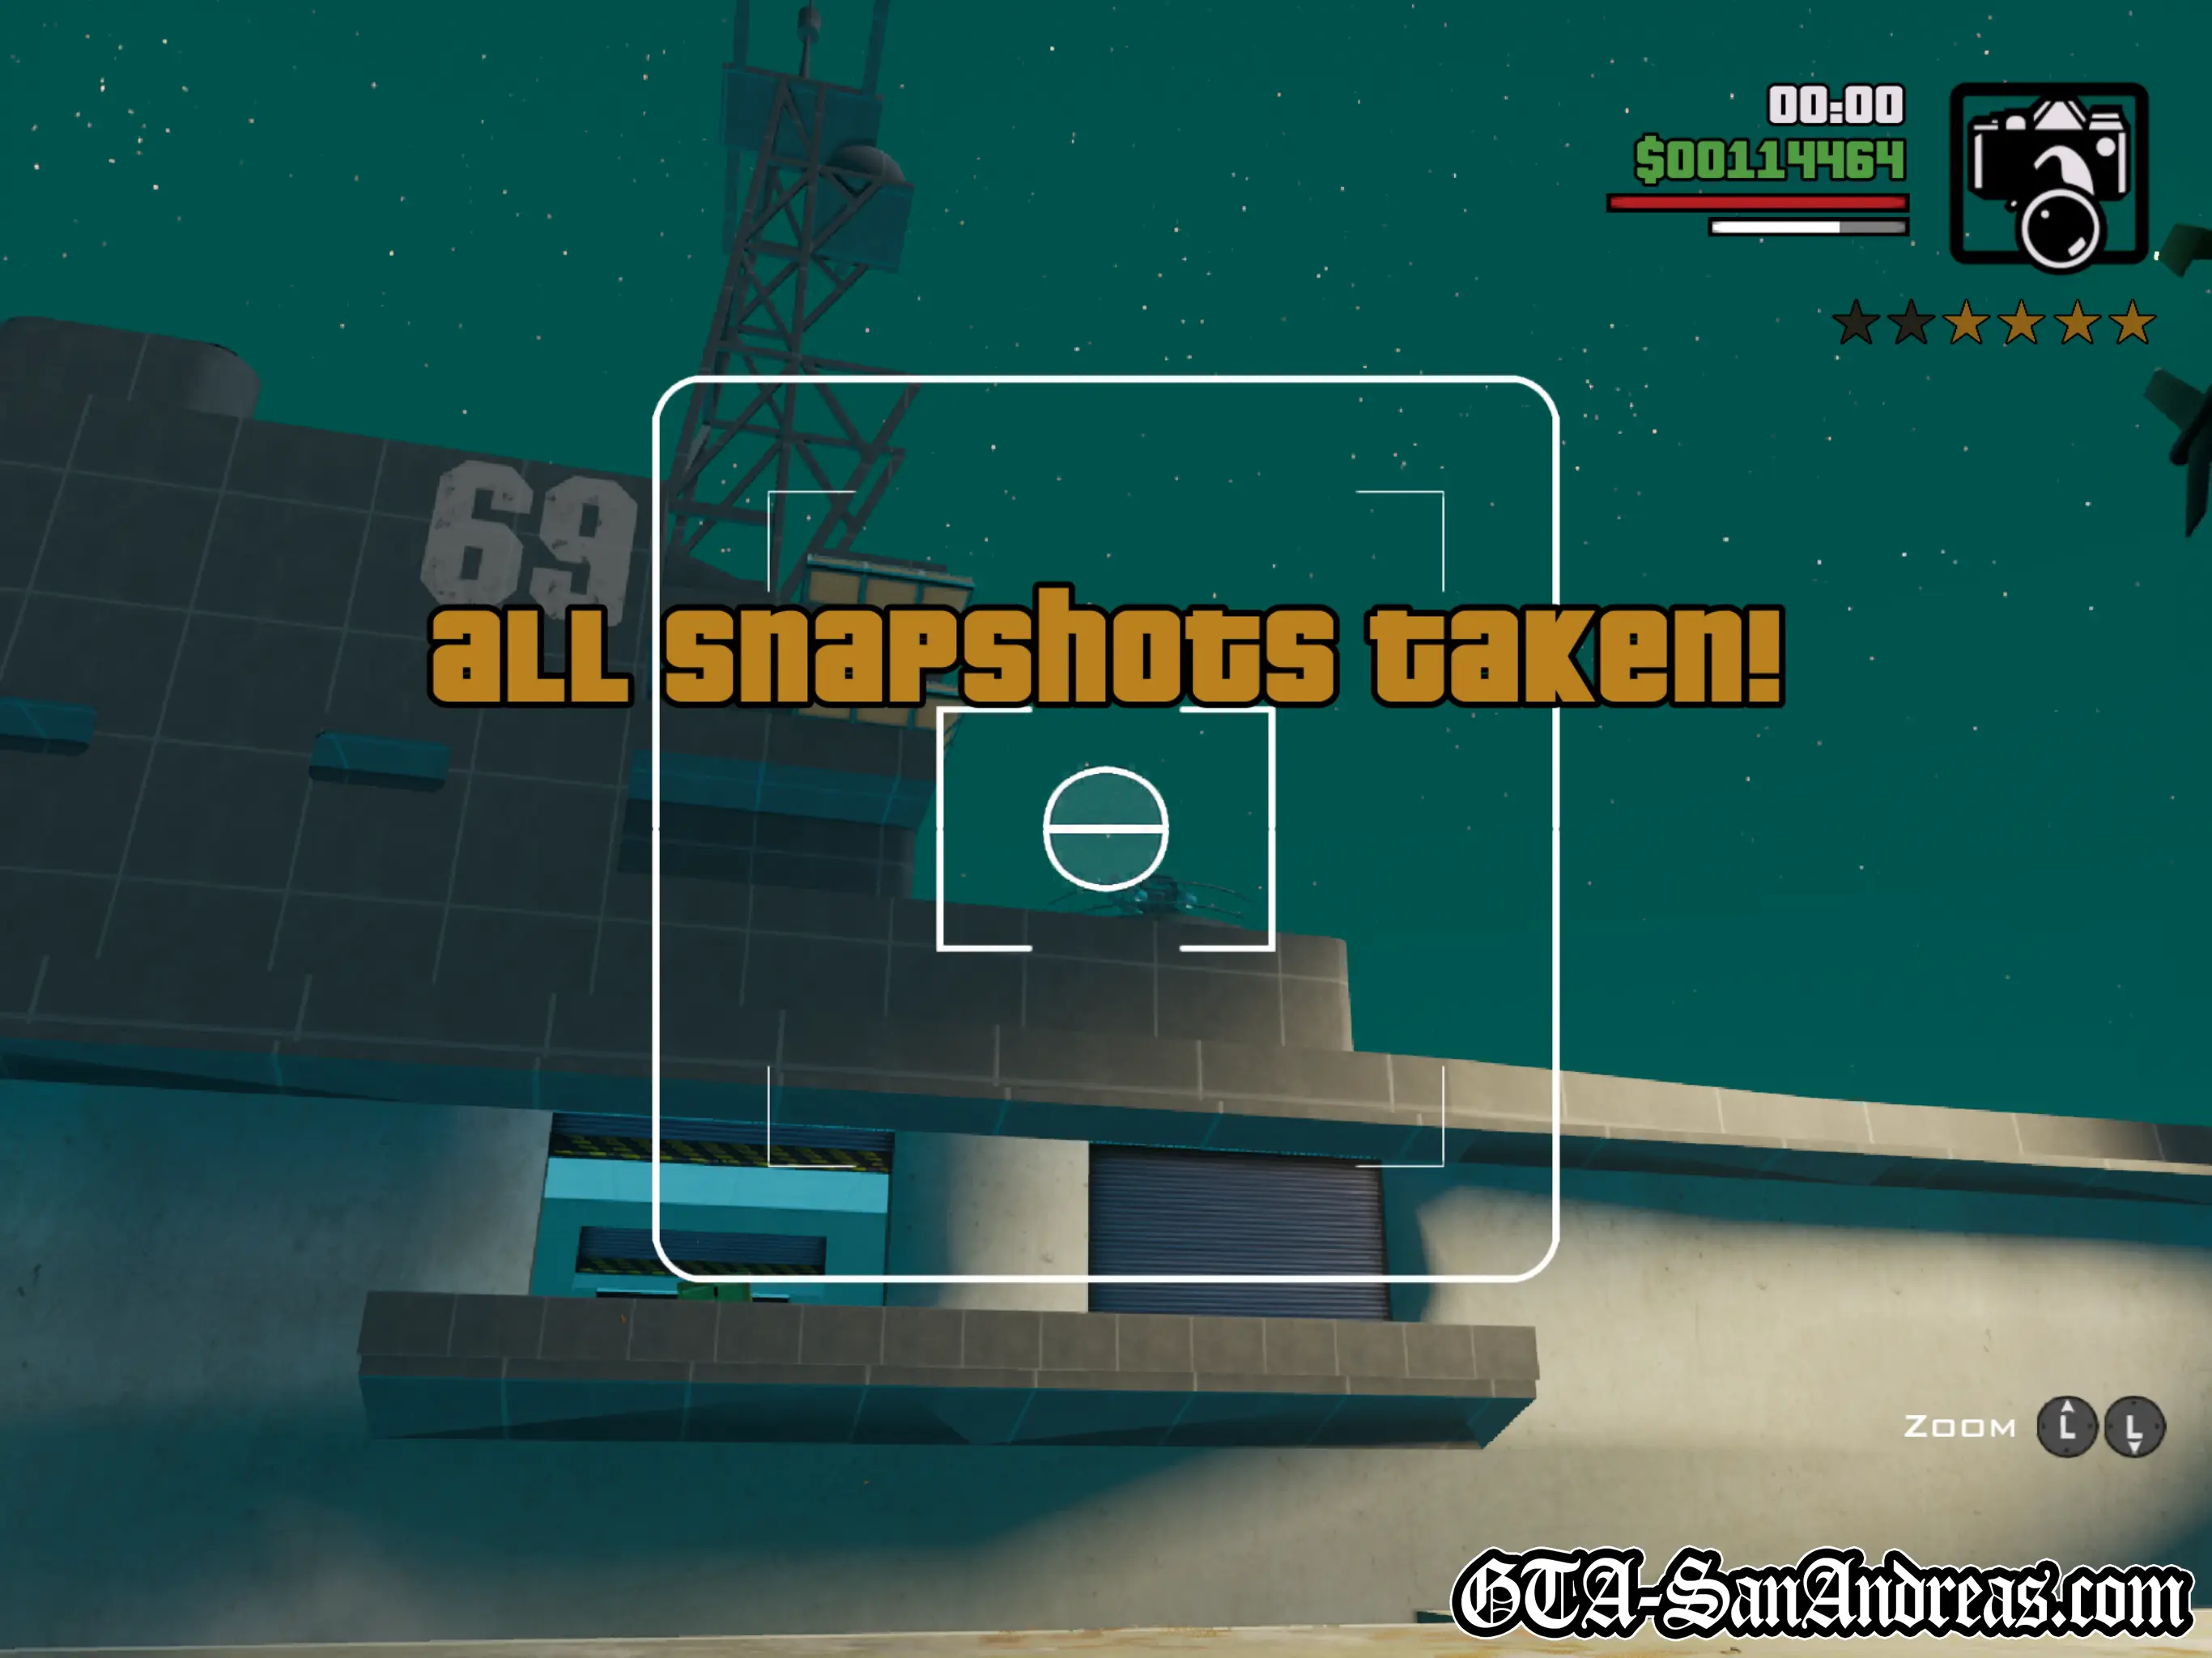
Snapshot #50
Location
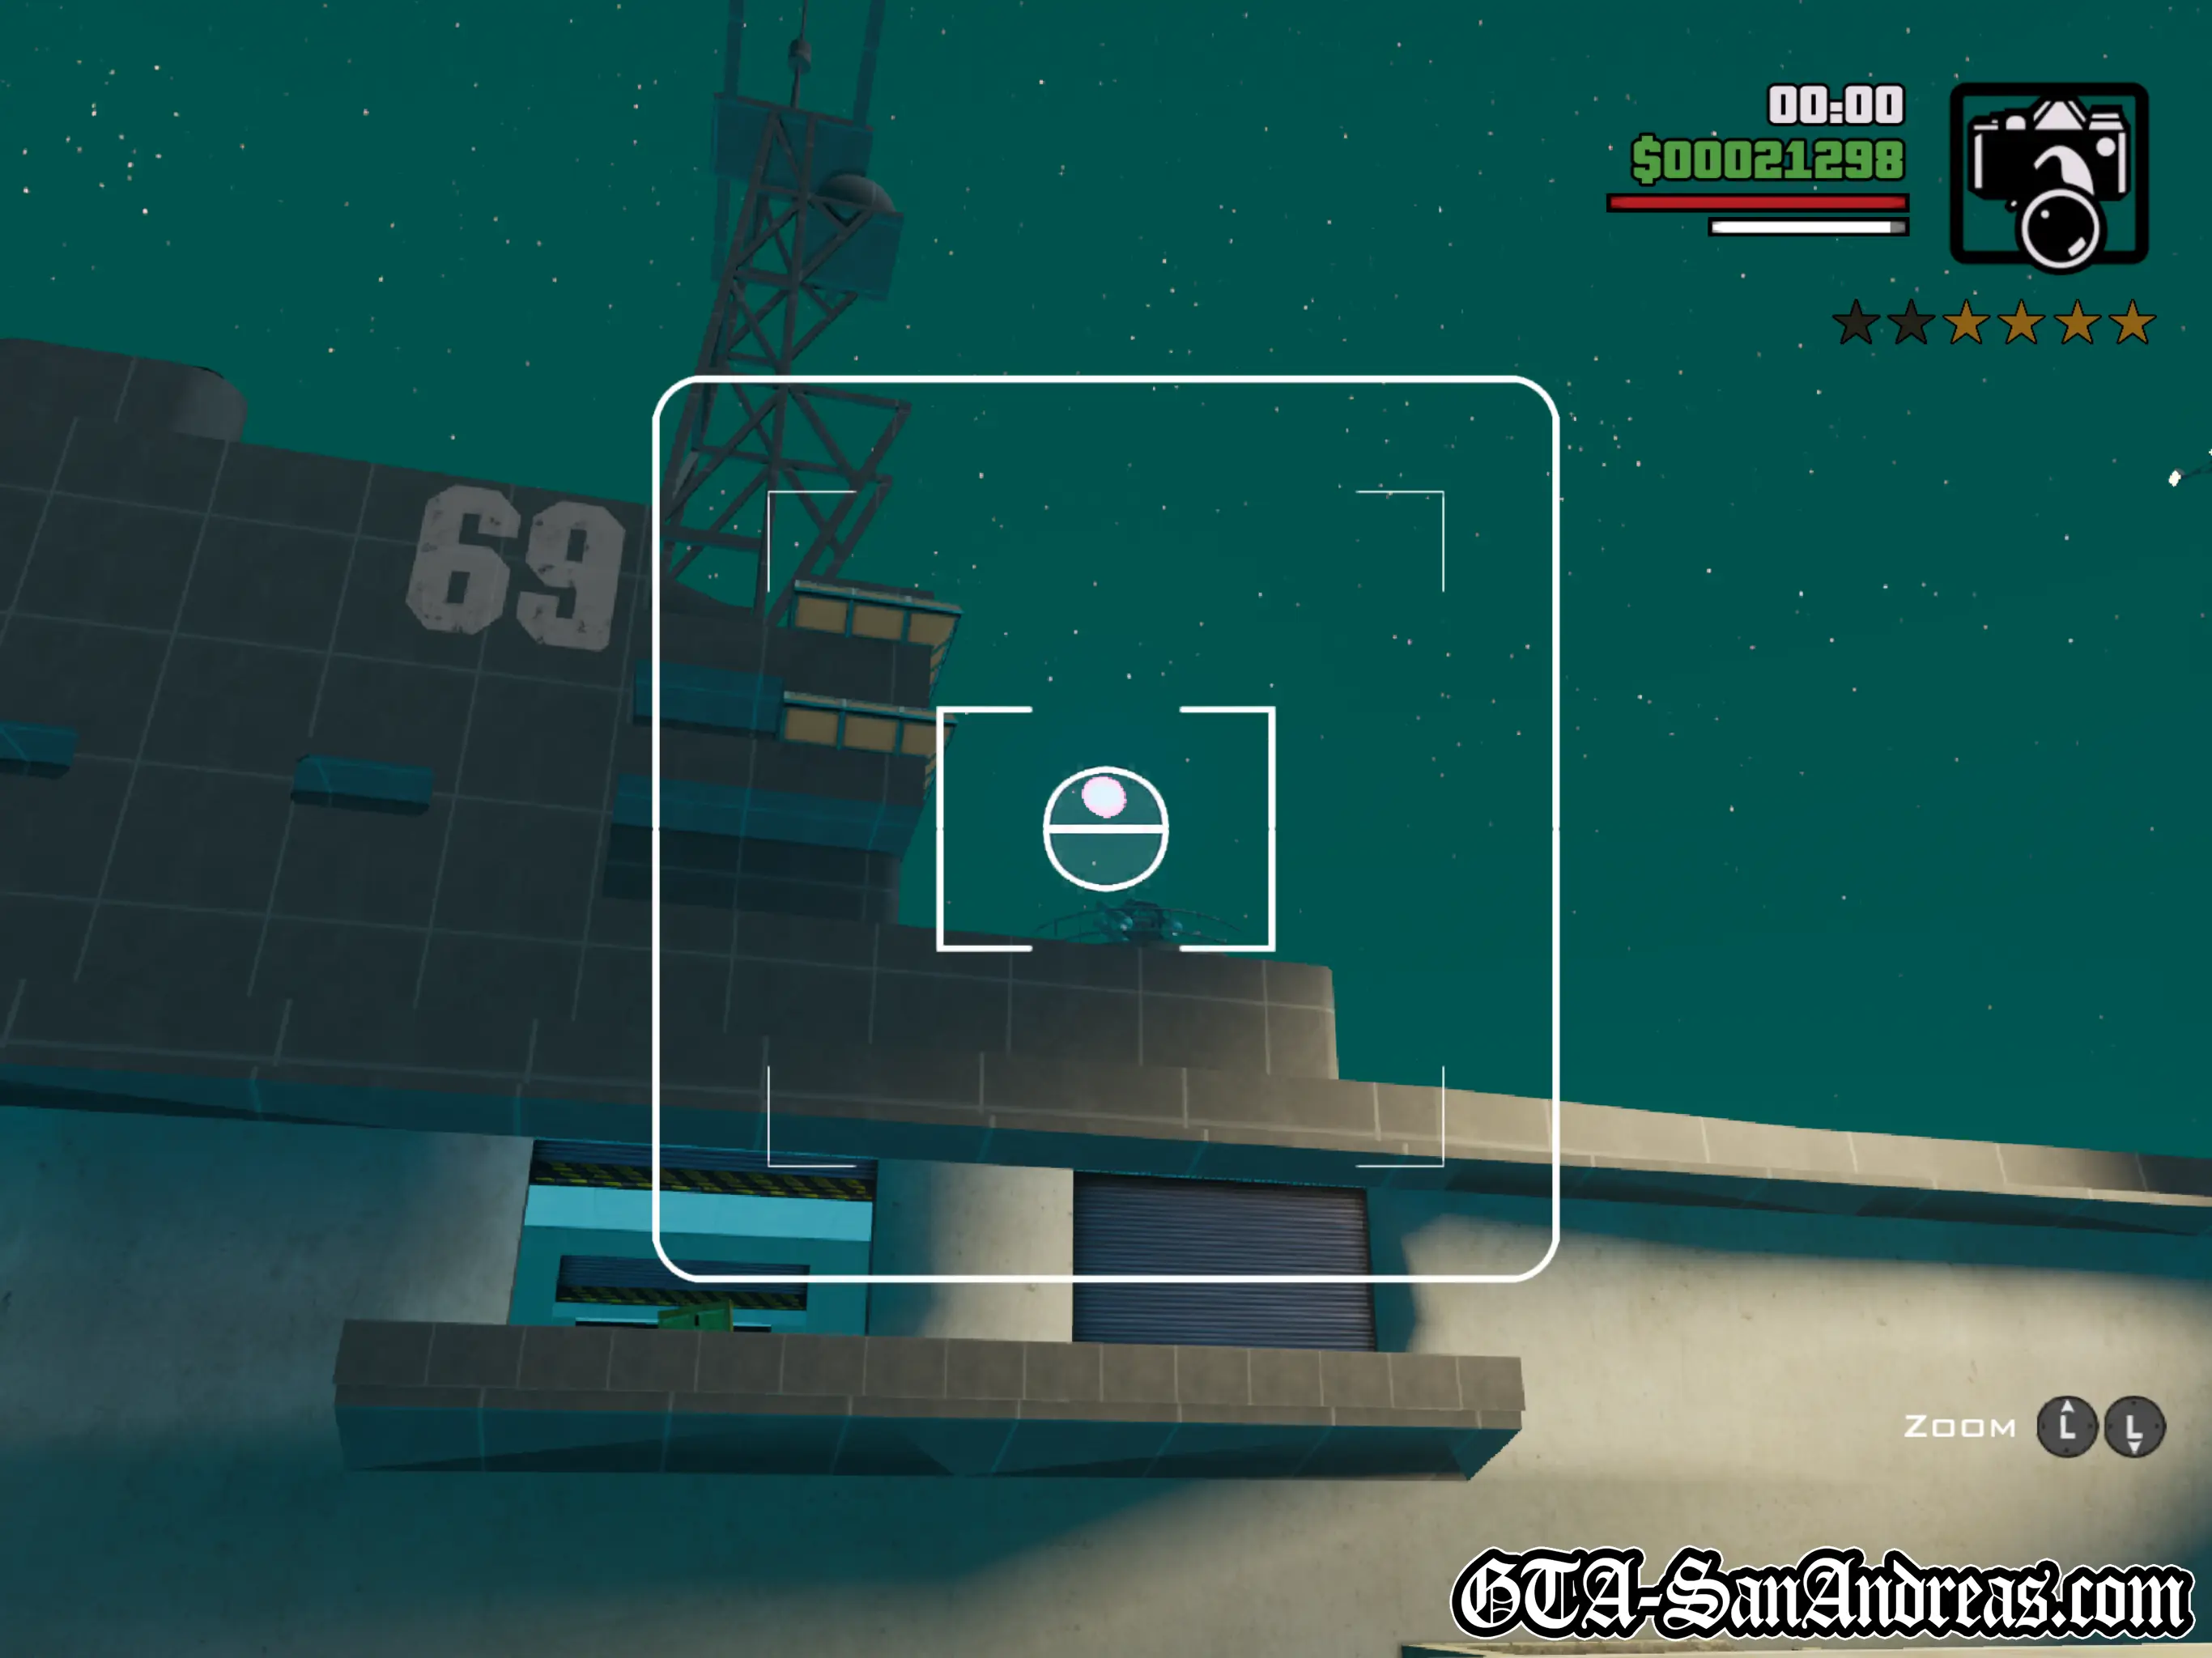
Easter Basin - The only way to get this snapshot is by entering the Naval Base which will give you an automatic 4 star wanted level. The snapshot icon is hovering above the deck at the front quarter of the ship. You can get it on foot from ground level by running through the gate and along the side of the pier next to the ship, so there's no need to fly a helicopter in. If anything it's easier to escape on foot or in a car because you'll likely be shot down in an air vehicle.
Where To Stand
Run alongside the ship until you see the number 69 towards the front quarter of the ship. You can stand anywhere on the ground of the harbor and it should be visible. Alternatively you can land a helicopter on the boat or the roof of the naval base and capture it from there.
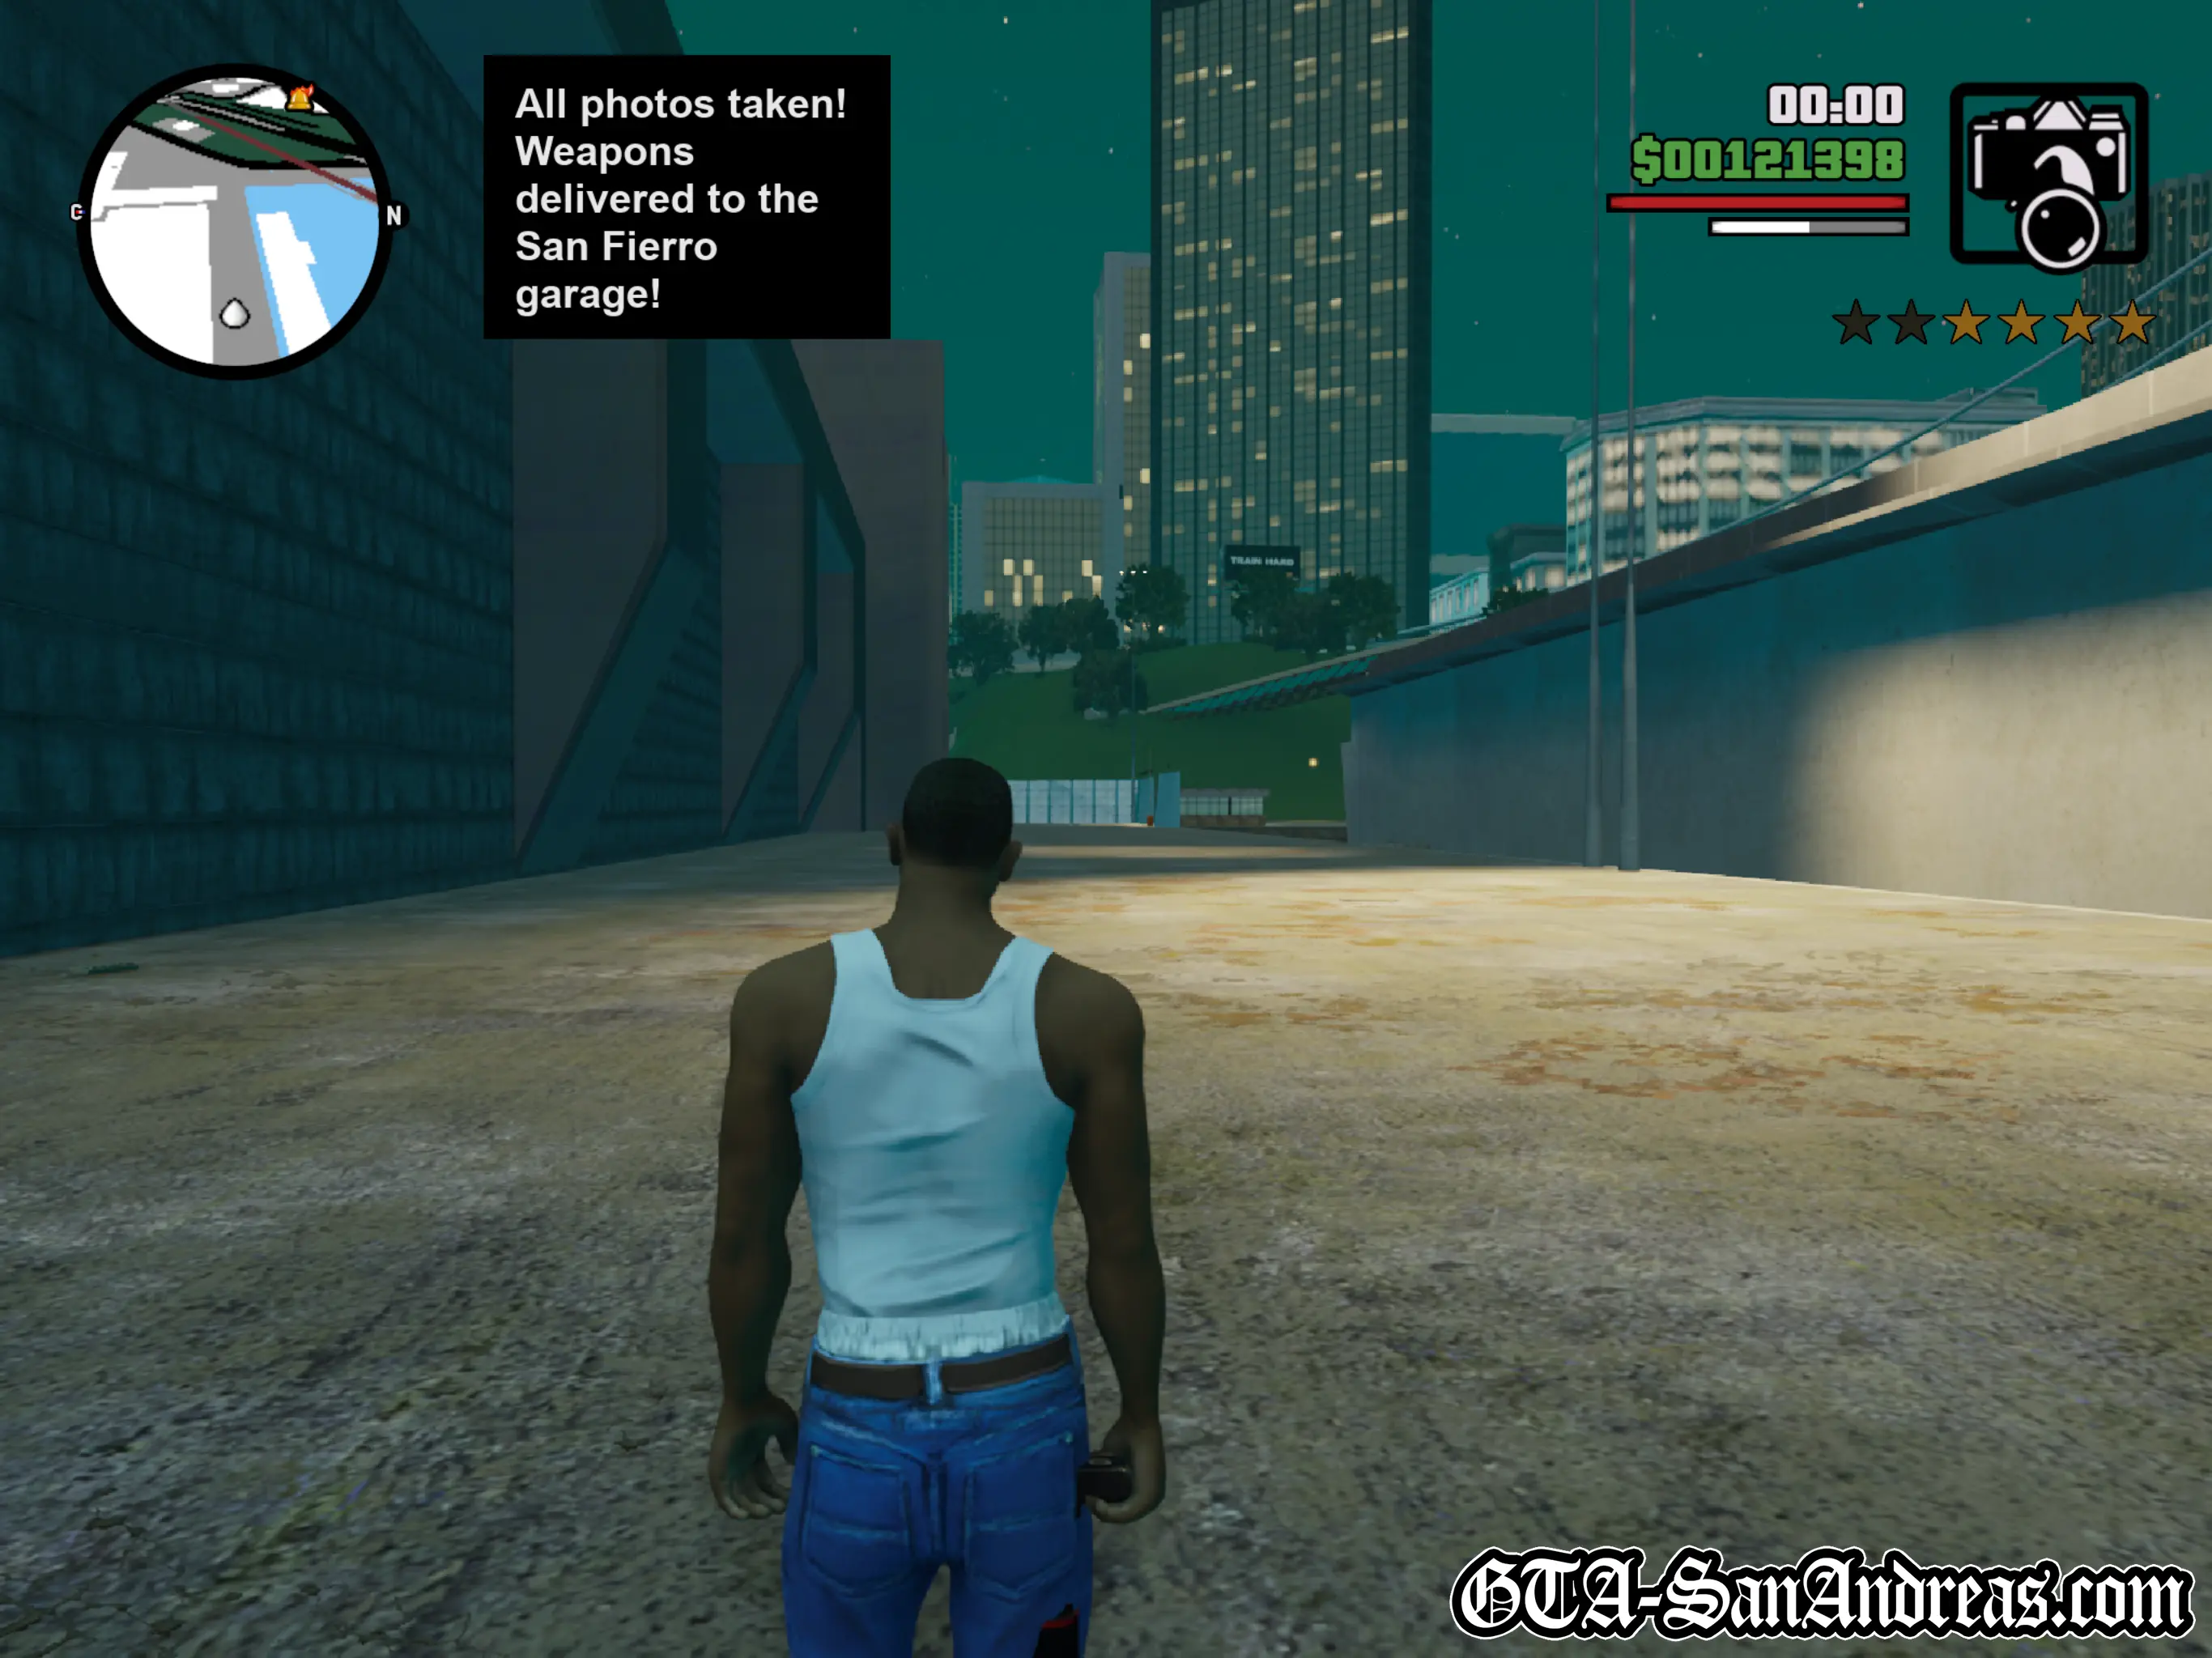
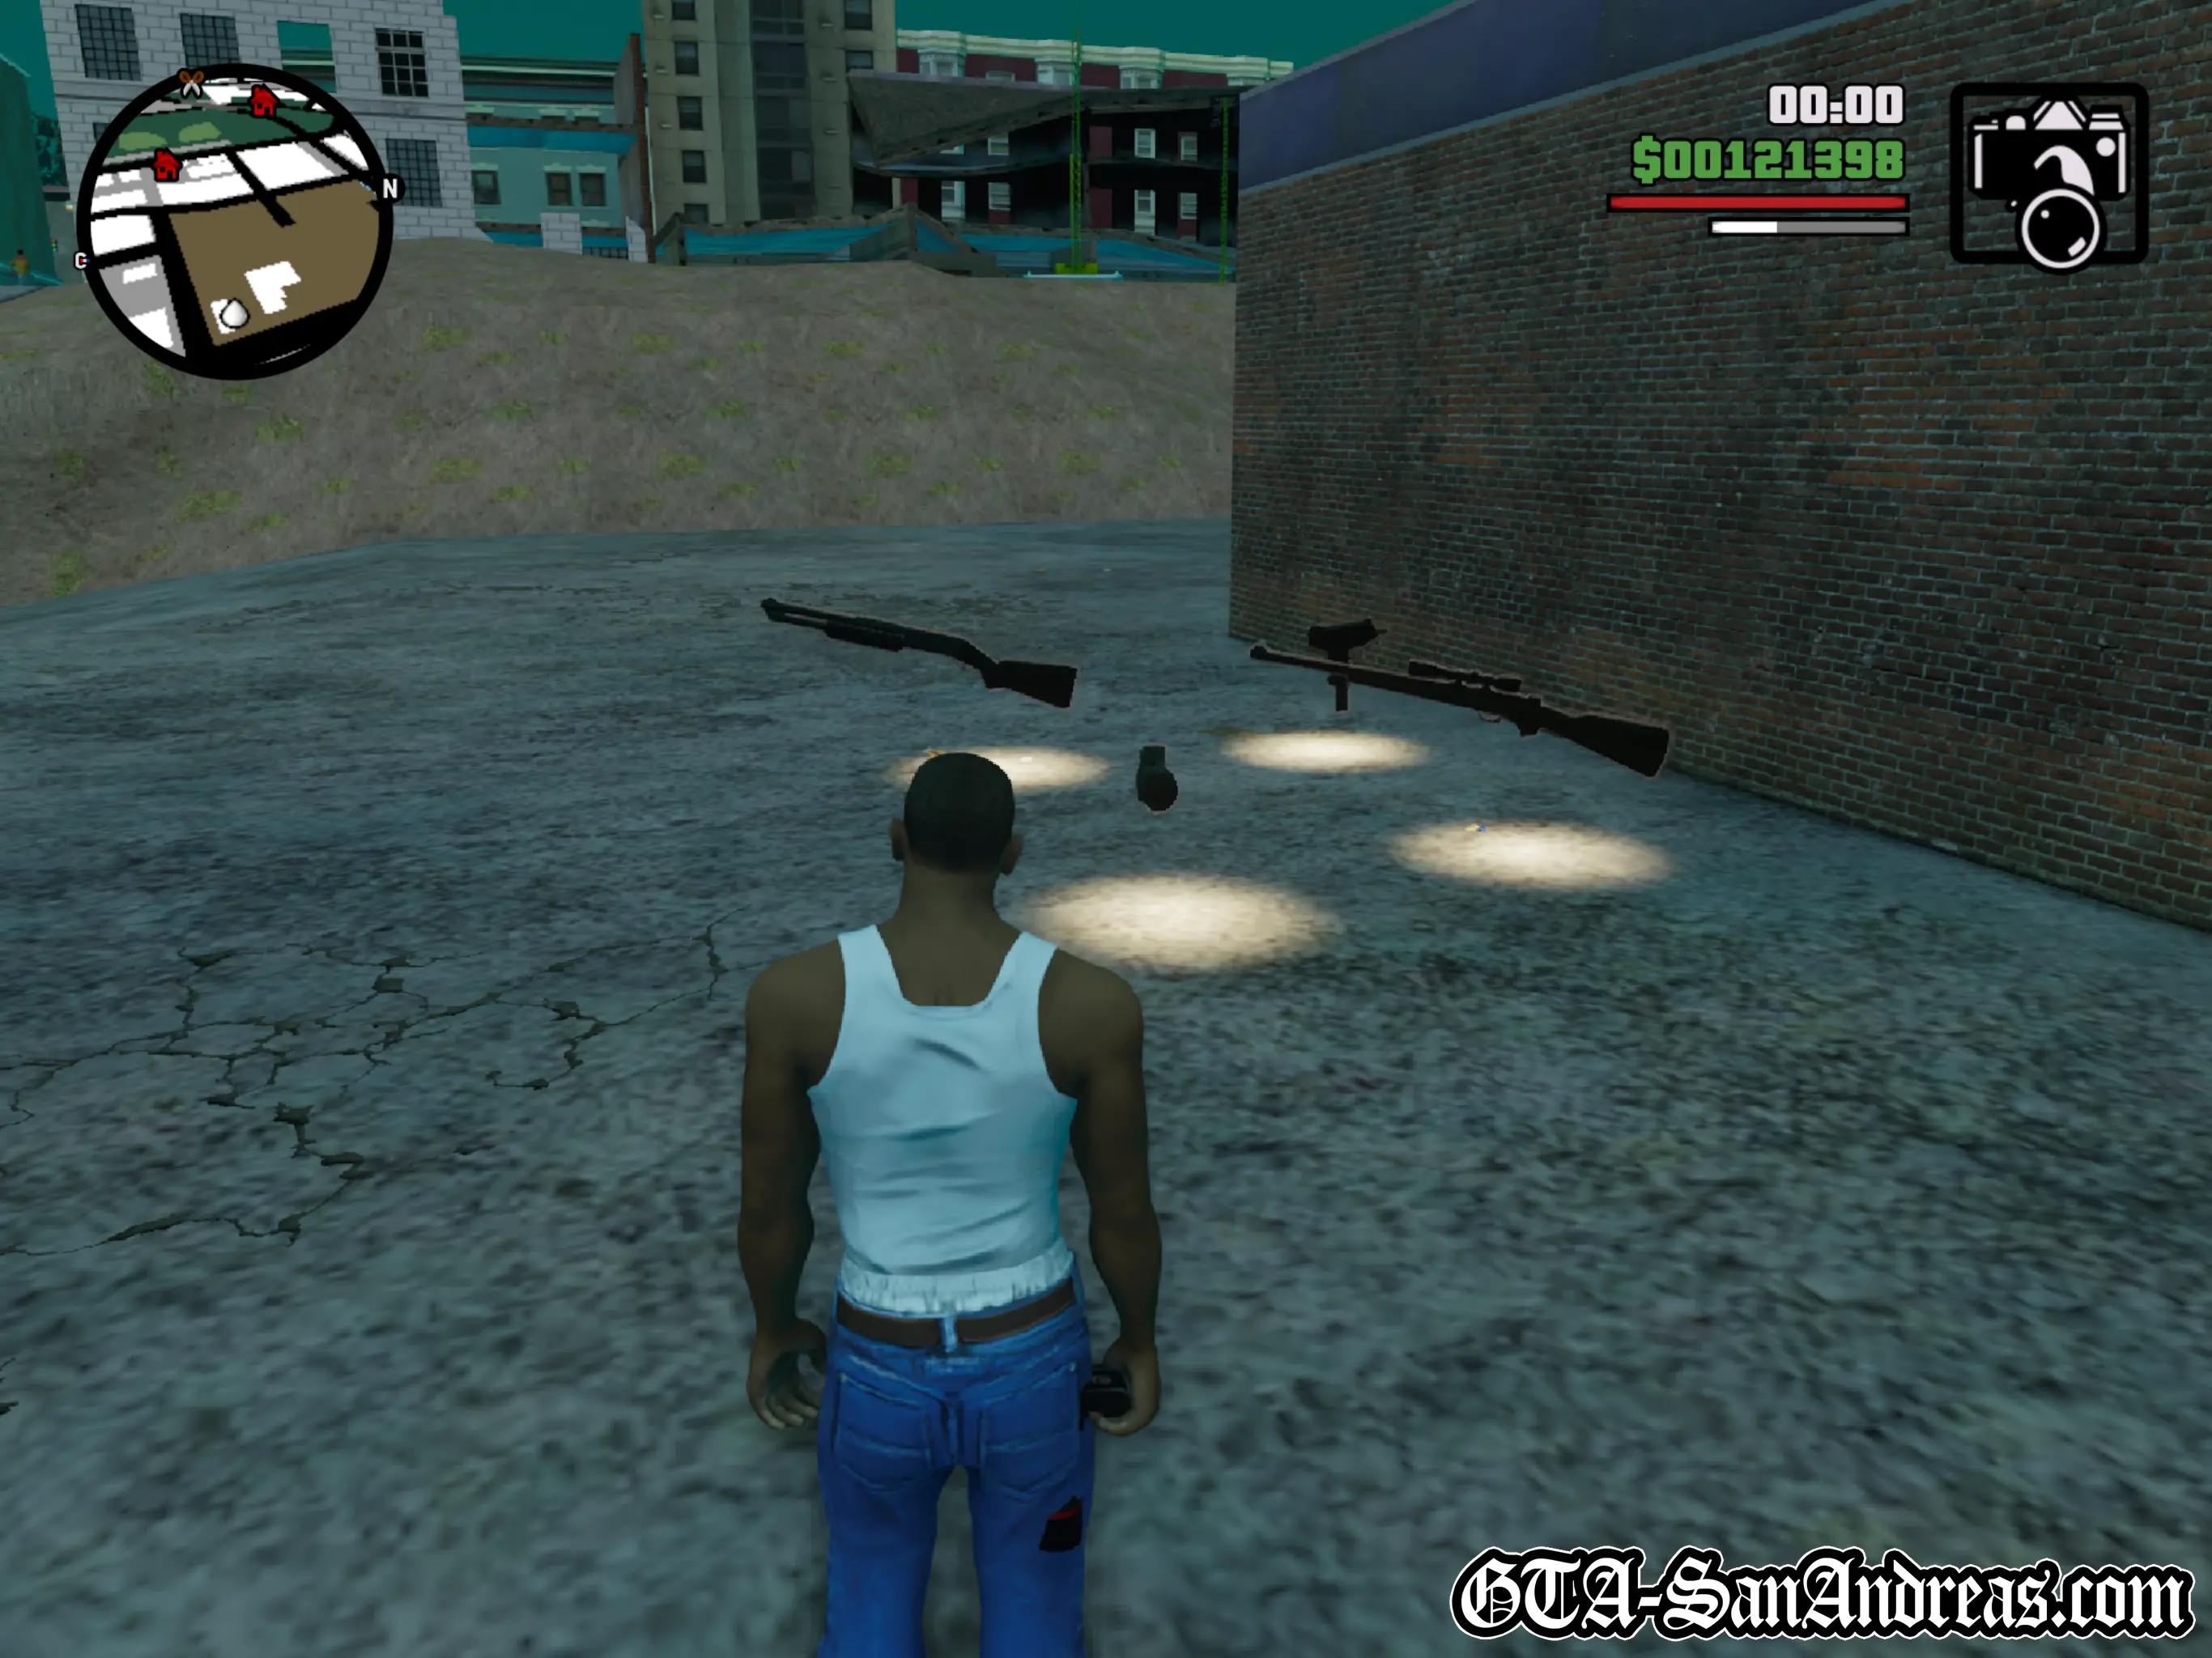
Rewards
Once you've photographed all 50 Snapshots in San Fierro, you'll receive $100,000 cash and you'll unlock 4 weapons at the garage in Doherty; Uzi, Shotgun, Sniper Rifle and Grenades. These weapons will respawn every time you save and load the game essentially giving you a way to grab lots of ammo for free.